Tyre Foundations

Interested in learning more about this topic and more social and sustainable ways of doing architecture? Apply now for our Postgraduate!

jQuery(function() { _initLayerSlider( ‘#layerslider_20_gxf958i0tshu’, {createdWith: ‘6.11.2’, sliderVersion: ‘6.11.2’, skin: ‘v6’, navPrevNext: false, hoverPrevNext: false, navStartStop: false, navButtons: false, showCircleTimer: false, skinsPath: ‘https://criticalconcrete.com/wp-content/plugins/LayerSlider/assets/static/layerslider/skins/’}); });

DISCLAIMER

[This article shows the development of the first step of a new prototype experimented in Critical Concrete. During the conception of the green roof, the structure was checked by a civil engineer who also advised us in the development of our wildest prototypes.]

Check out the video to see how we experimented with scrap tyres and compressed earth&gravel for a low-impact and concrete free building! 
:ok_hand:

Introduction 

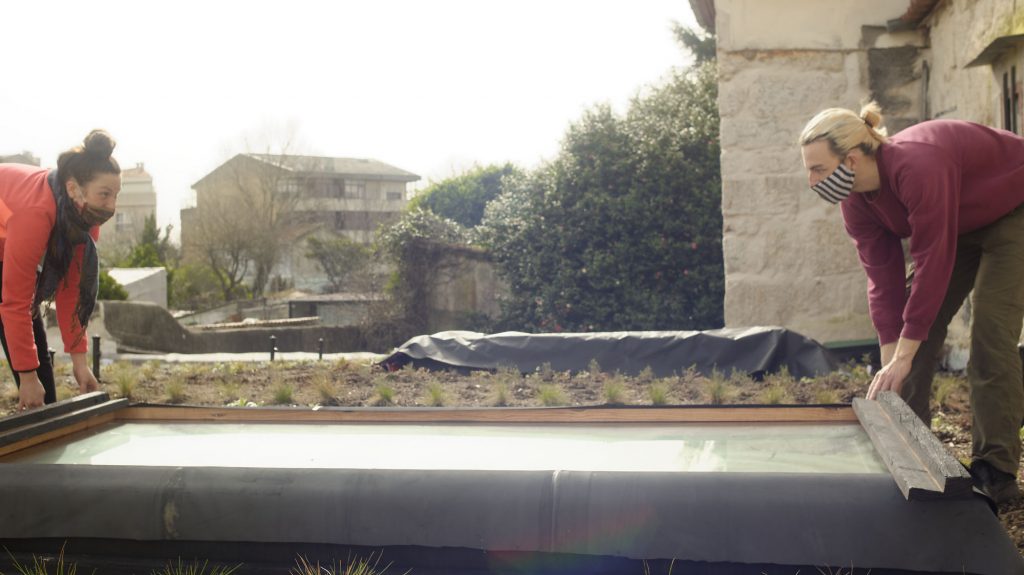
In the progress of developing our green roof prototype we have been confronted with foundations in different ways. Seeking for alternatives it turned out that the old granite walls of the building, once reinforced by wooden beams, would be strong enough to carry the load of the new roof. You can read all about the refurbishment and reinforcing of the walls for the roof in our previous articles (walls-refurbishment 1.0, walls-refurbishment 1.1, how to build a stone wall).

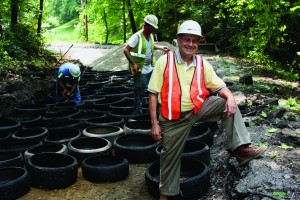
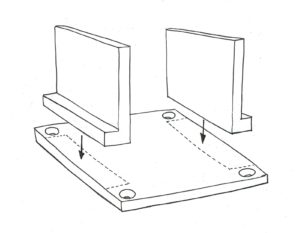
The size of the new roof however, stretches out further than the fully loadable walls. For that reason, part of the roof needs a different kind of foundation.

Section of Tyre foundation
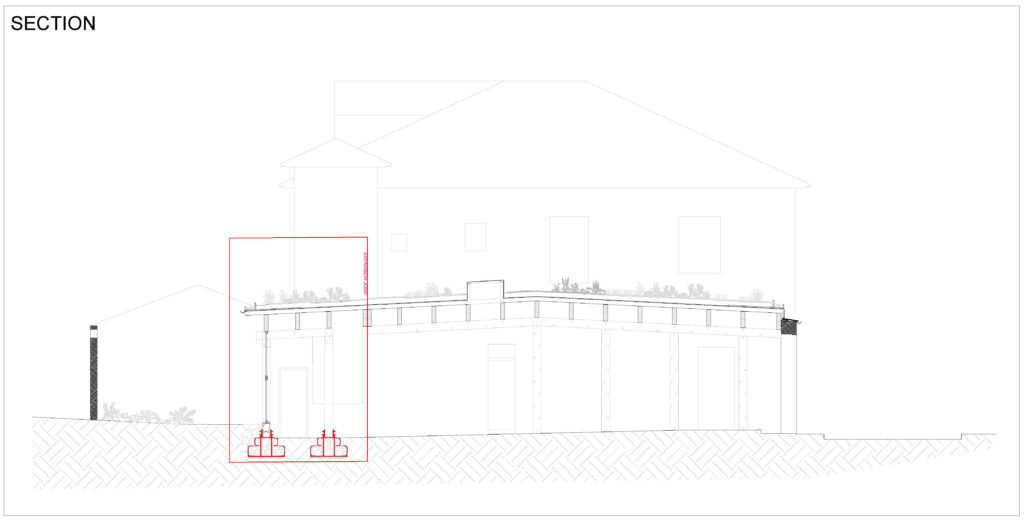
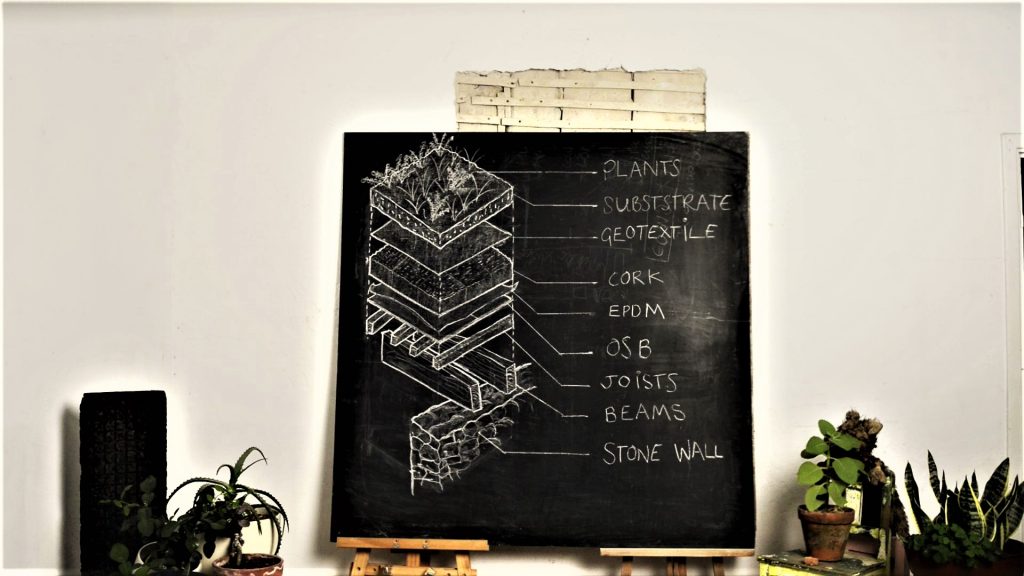
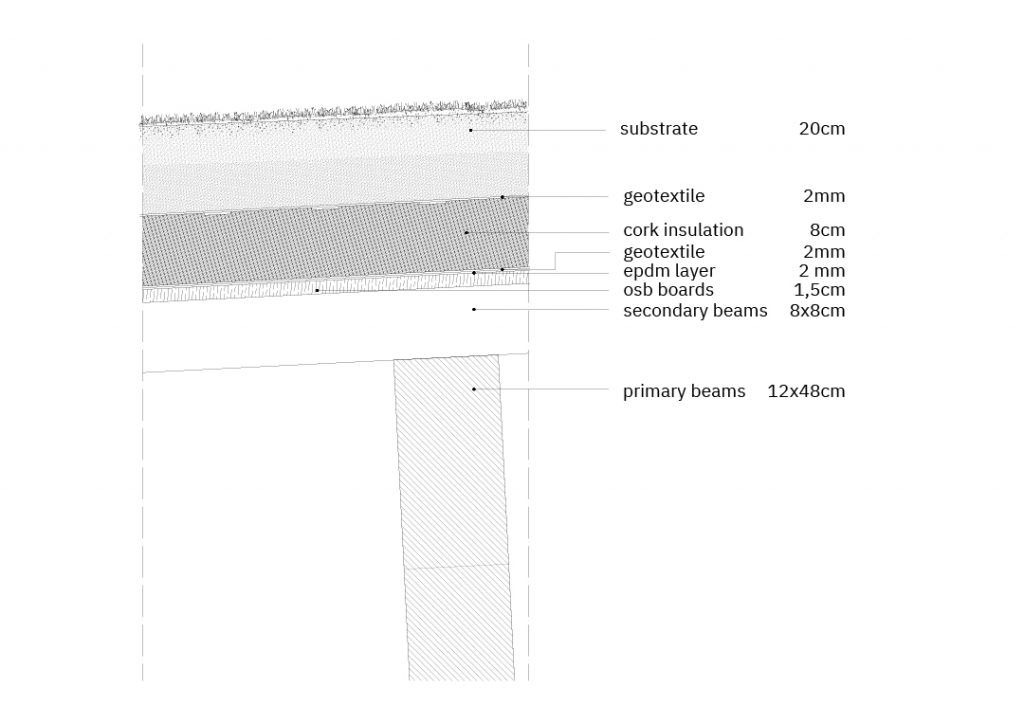
Section of the green roof highlighting the parts supported by tyre foundations

Our Research

Throughout our research for alternatives to concrete, we stumbled over the tyre foundation. For us, it was very interesting since it is a low-tech solution which is composed only of scrap tyres filled with compressed gravel. Both components are easily accessible almost everywhere in the world.

Indeed, when tyres worn out, they become a waste which is not easy to handle. Recently, more processes that aim at recycling have been developed from which rubber, steel and textile fibers are obtained. Another solution is to reuse the tyres directly in a different context, thus avoiding more energy consumption for the transformation of the product.

Pile if trashed tyres
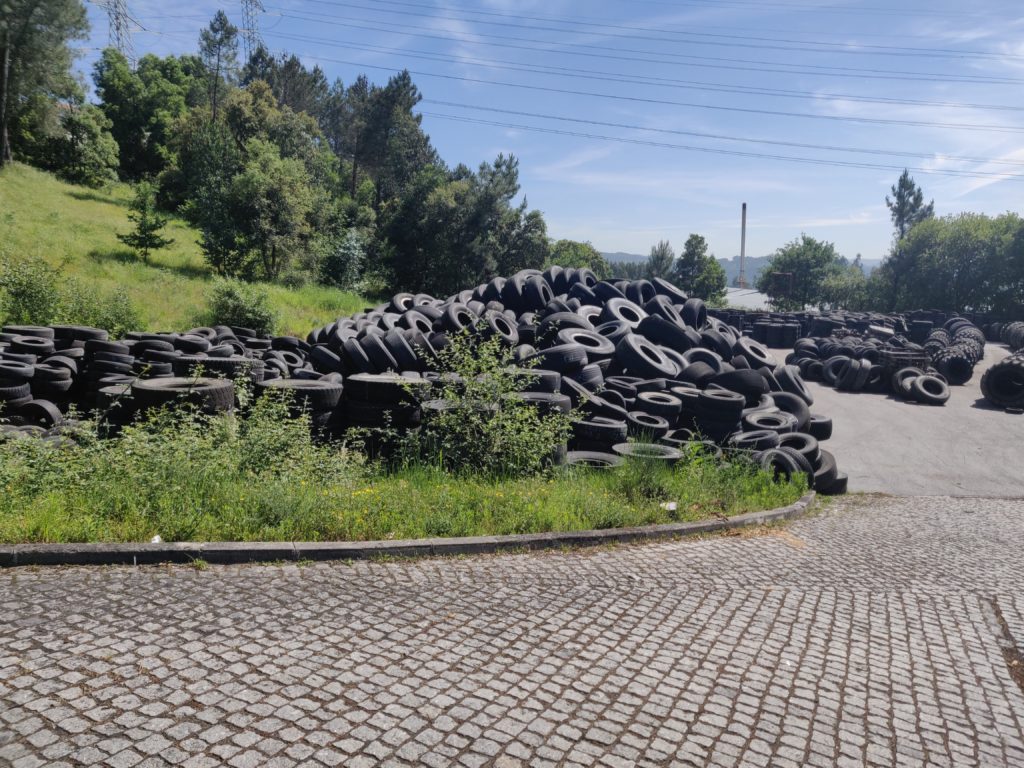
Pile of trashed tyres
Re-using the tyre
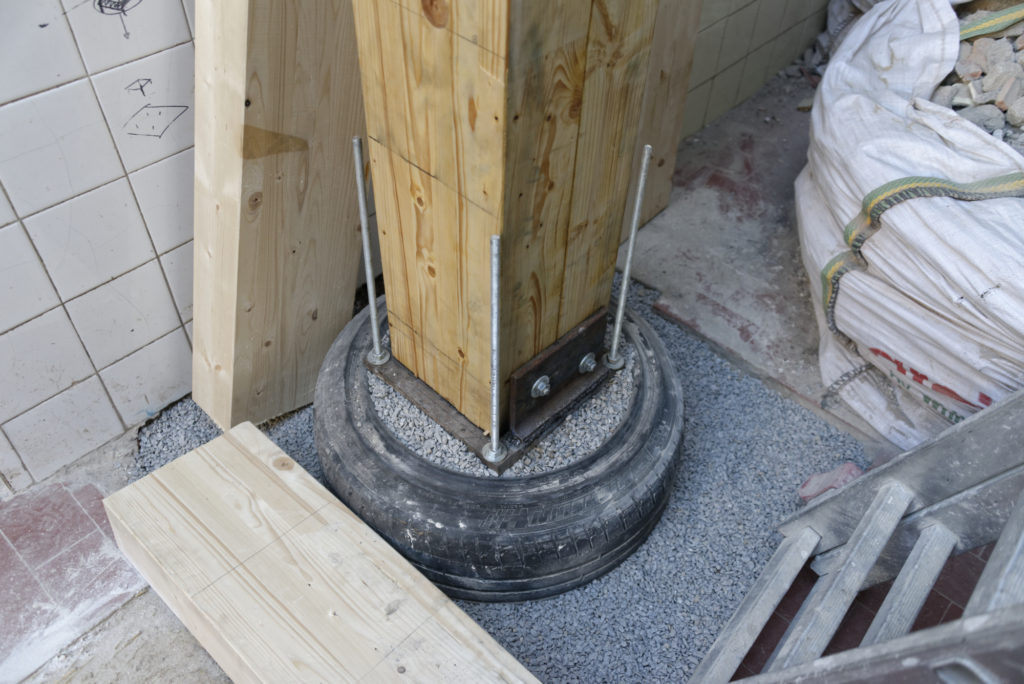
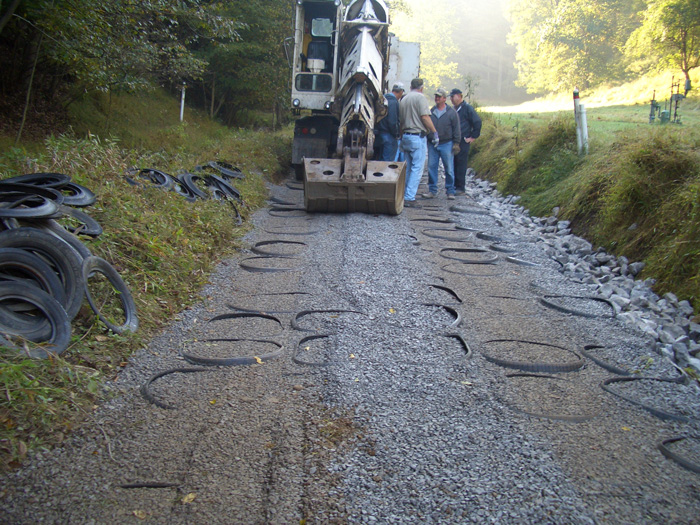
Worn out tyre reused in a new contextScrap tyres have already been tested in various cases in the construction field, for example to make the roadbed of the streets and referred to as mechanical concrete, a method widely used in the USA. One of the most known cases is the Earthship Biotecture concept autonomous houses developed by architect Michael Reynolds, in which earth-rammed automobile tyres are used for building the main retaining wall of the house. This technique is presented as the most appropriate method for its strength, economy and low need of technical skills.

Truck covering tyres with rubble

Person standing on tyre wall
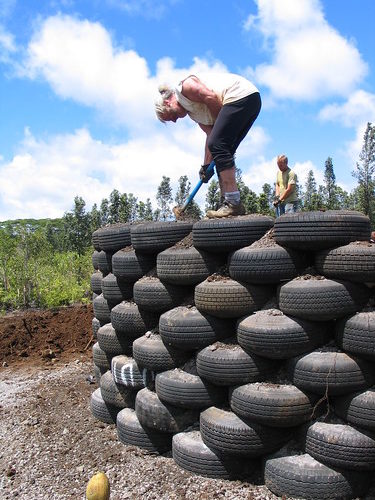
Pictures by mechanicalconcrete.com (pictures on the left) and by earthship_biotecture (licensed under CC BY-NC-ND 2.0) (picture on the right)

The flexibility of the tyre can also offer durable protection in a seismic area. These foundations can indeed reduce the effect of seismic vibrations on the building on top of them and it can be used in every stable soil, even clay soil (for more information click here). Yet we couldn’t find any applications that fits exactly our needs. Many cases used the tyres to build walls, or wall-like foundations where the structure was resting without anchoring. Other examples used conventional concrete to fix some kind of anchoring sockets. As far as we know, our case, a structure with several punctual load bearing columns, has not been well documented yet.

Interested in using this technology in your project?

Critical Studio can help!

Learn More!

Our Approach

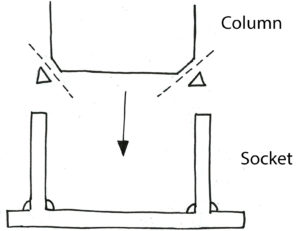
In our particular case, we designed two single stepped footings for two columns of the green roof.

Section and plan of tyre foundation
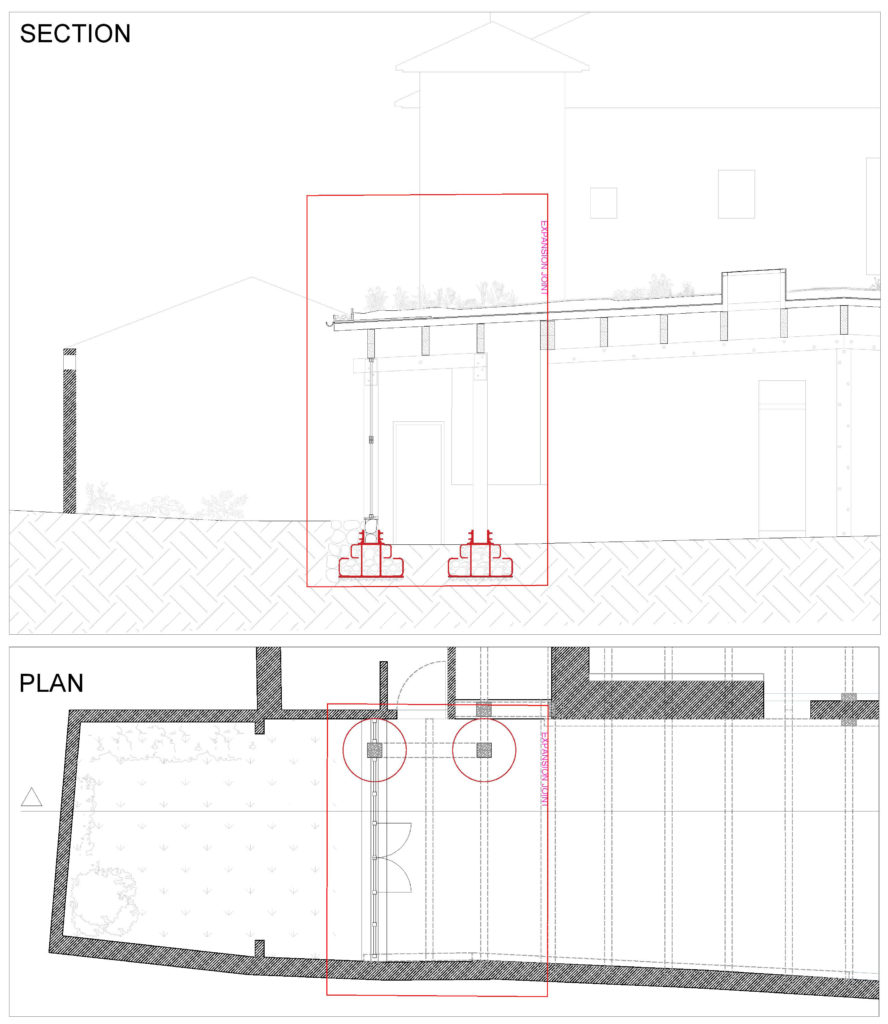
Section and plan of the two single stepped footings for two columns of the green roof

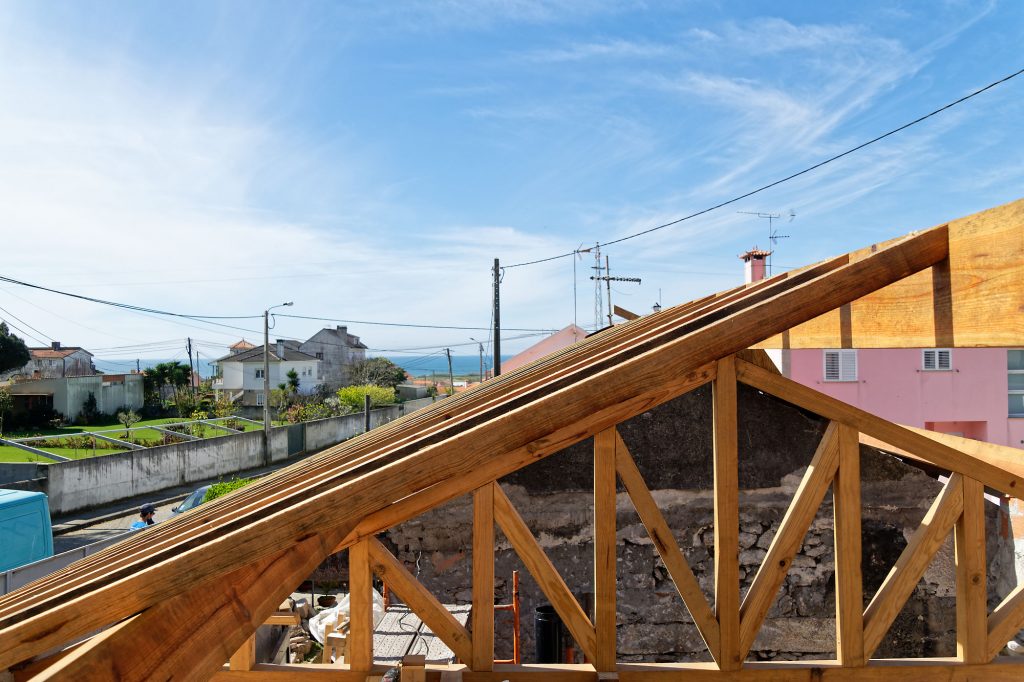
One part of the green roof structure lies on a massive, structurally stable granite wall built in the 19th century, and the other part will lay on the new foundation. Since it is a prototype and it is not well known how the foundations will react to the heavy load, we decided to make the new part (15m2) independent of the rest of the roof previously built (120m2). This assembly required us to insert an expansion joint which allows movement due to ground settlement or other variations, expansion or contraction of building materials. It will also assist the observation of potential changes and reduce the risk of damaging the whole roof in the worst case scenario. Indeed, this technique has been used in England for at least 15 years. Research and experiments of the Holy Trinity Church Tulse Hill showed that they tyre stacks will hold a minimum of 1000 kN/m2 of load with no detected movement on the expansion but a compressive variation of only 3mm (to watch the video click here). The IUT of Grenoble made tests of loading tyre foundations from the Flexagone office: They applied the weight of pressure of 72 tons on the foundation, without any damage or detectable movement (for more information click here).

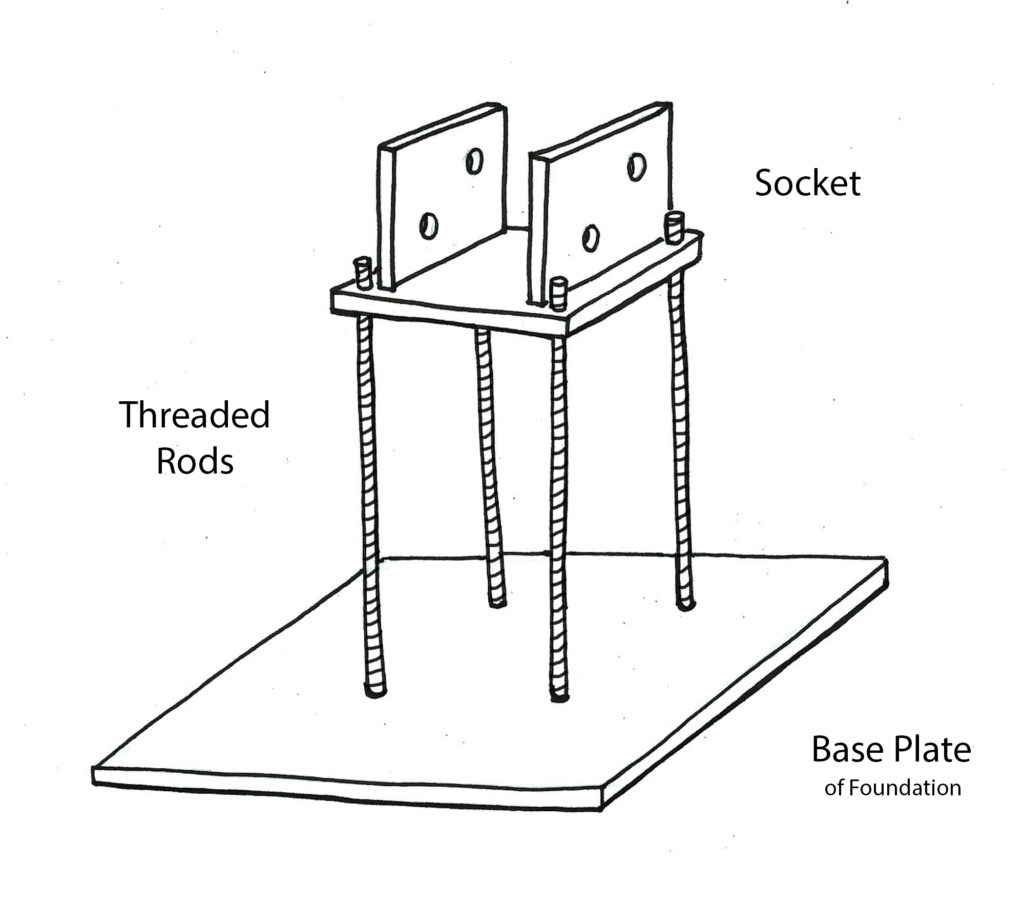
Additionally we consulted several engineers to check our structural conceptions. As we explained in former articles, the heavy loads on the roof – composed of the drainage layer, earth and plants – impacts the renovation process by its load of 600 kg/m2– 5.88kN/m2, including the dynamic load. Based on this information and our needs, we developed the concept of single stepped footings for columns. We calculated that each pillar should carry about 2400kg approximately. The foundation includes a socket which joins it with the wooden column.

Side view of foundation
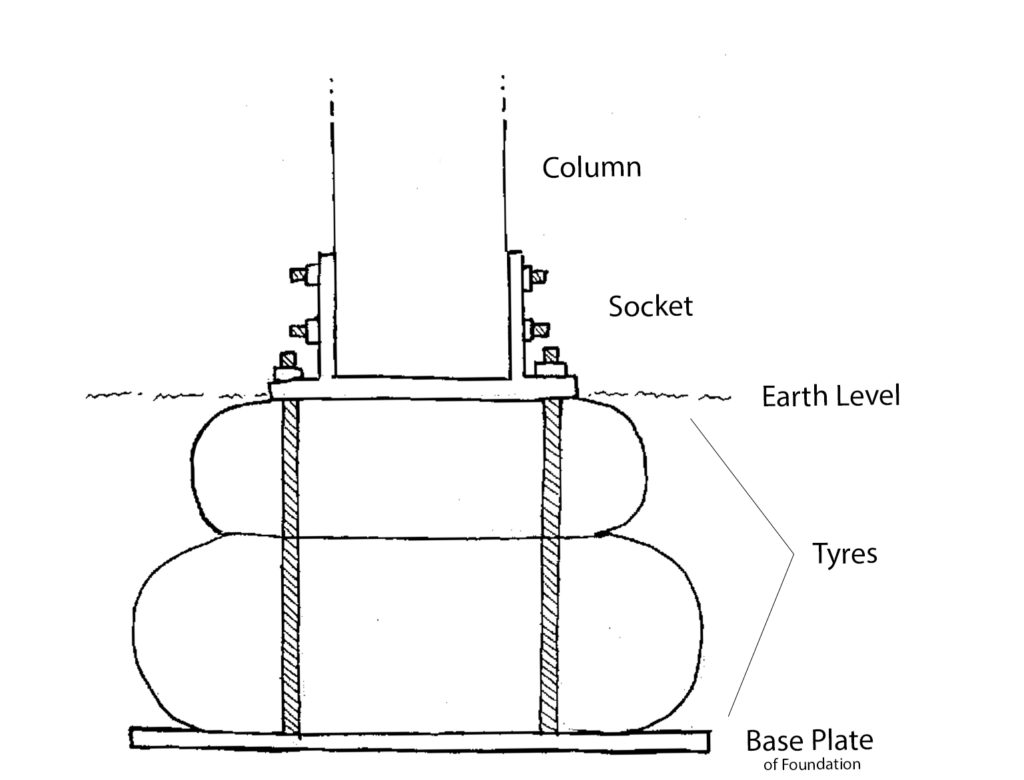
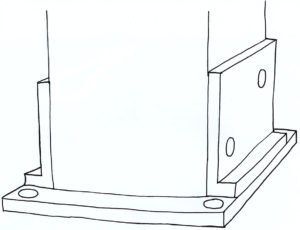
Section of the Tyre Foundation

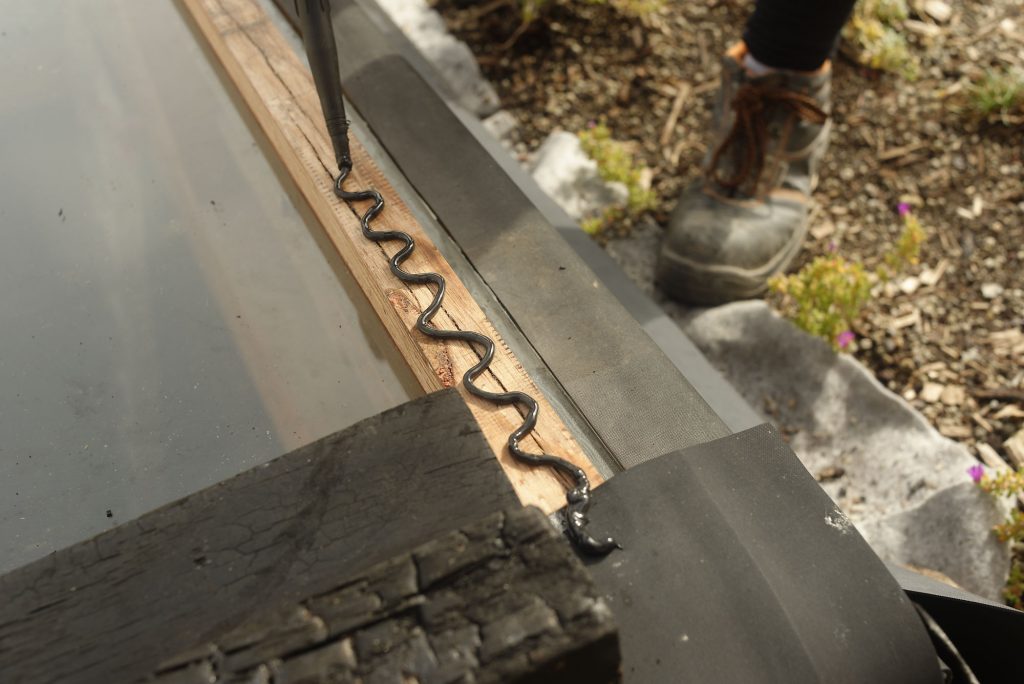
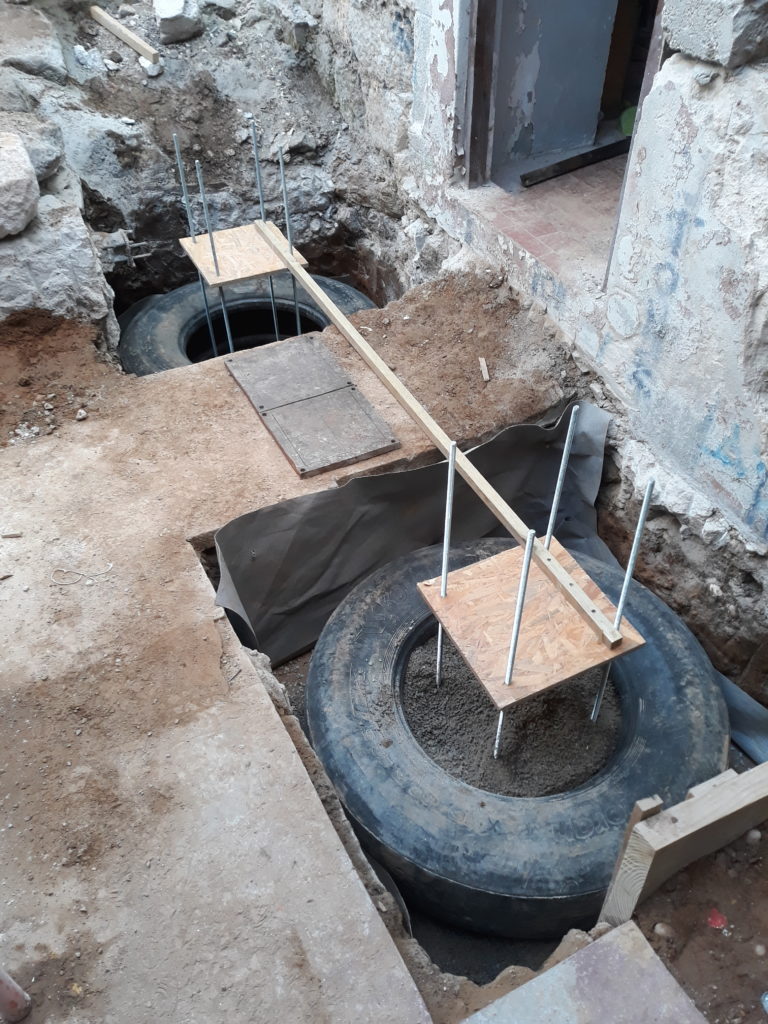
This connection is especially important while setting up the tyre and aligning the structure. Once the roof is finished, its own weight will hold its place. Below the foundation is a metal plate. On one hand, it distributes the forces on the soil and on the other hand it connects the foundation to the holding socket of the column. On top of the metal plate lay the tyres. We chose two tyres to make the foundation strong enough for the load. One truck tyre (95cm ø) and a smaller car tyre (65cm ø). The holding socket for the column is layed on the upper tyre and connected to the foundation through threaded rods which are welded to the base plate. The socket itself also holds the column in the right position.

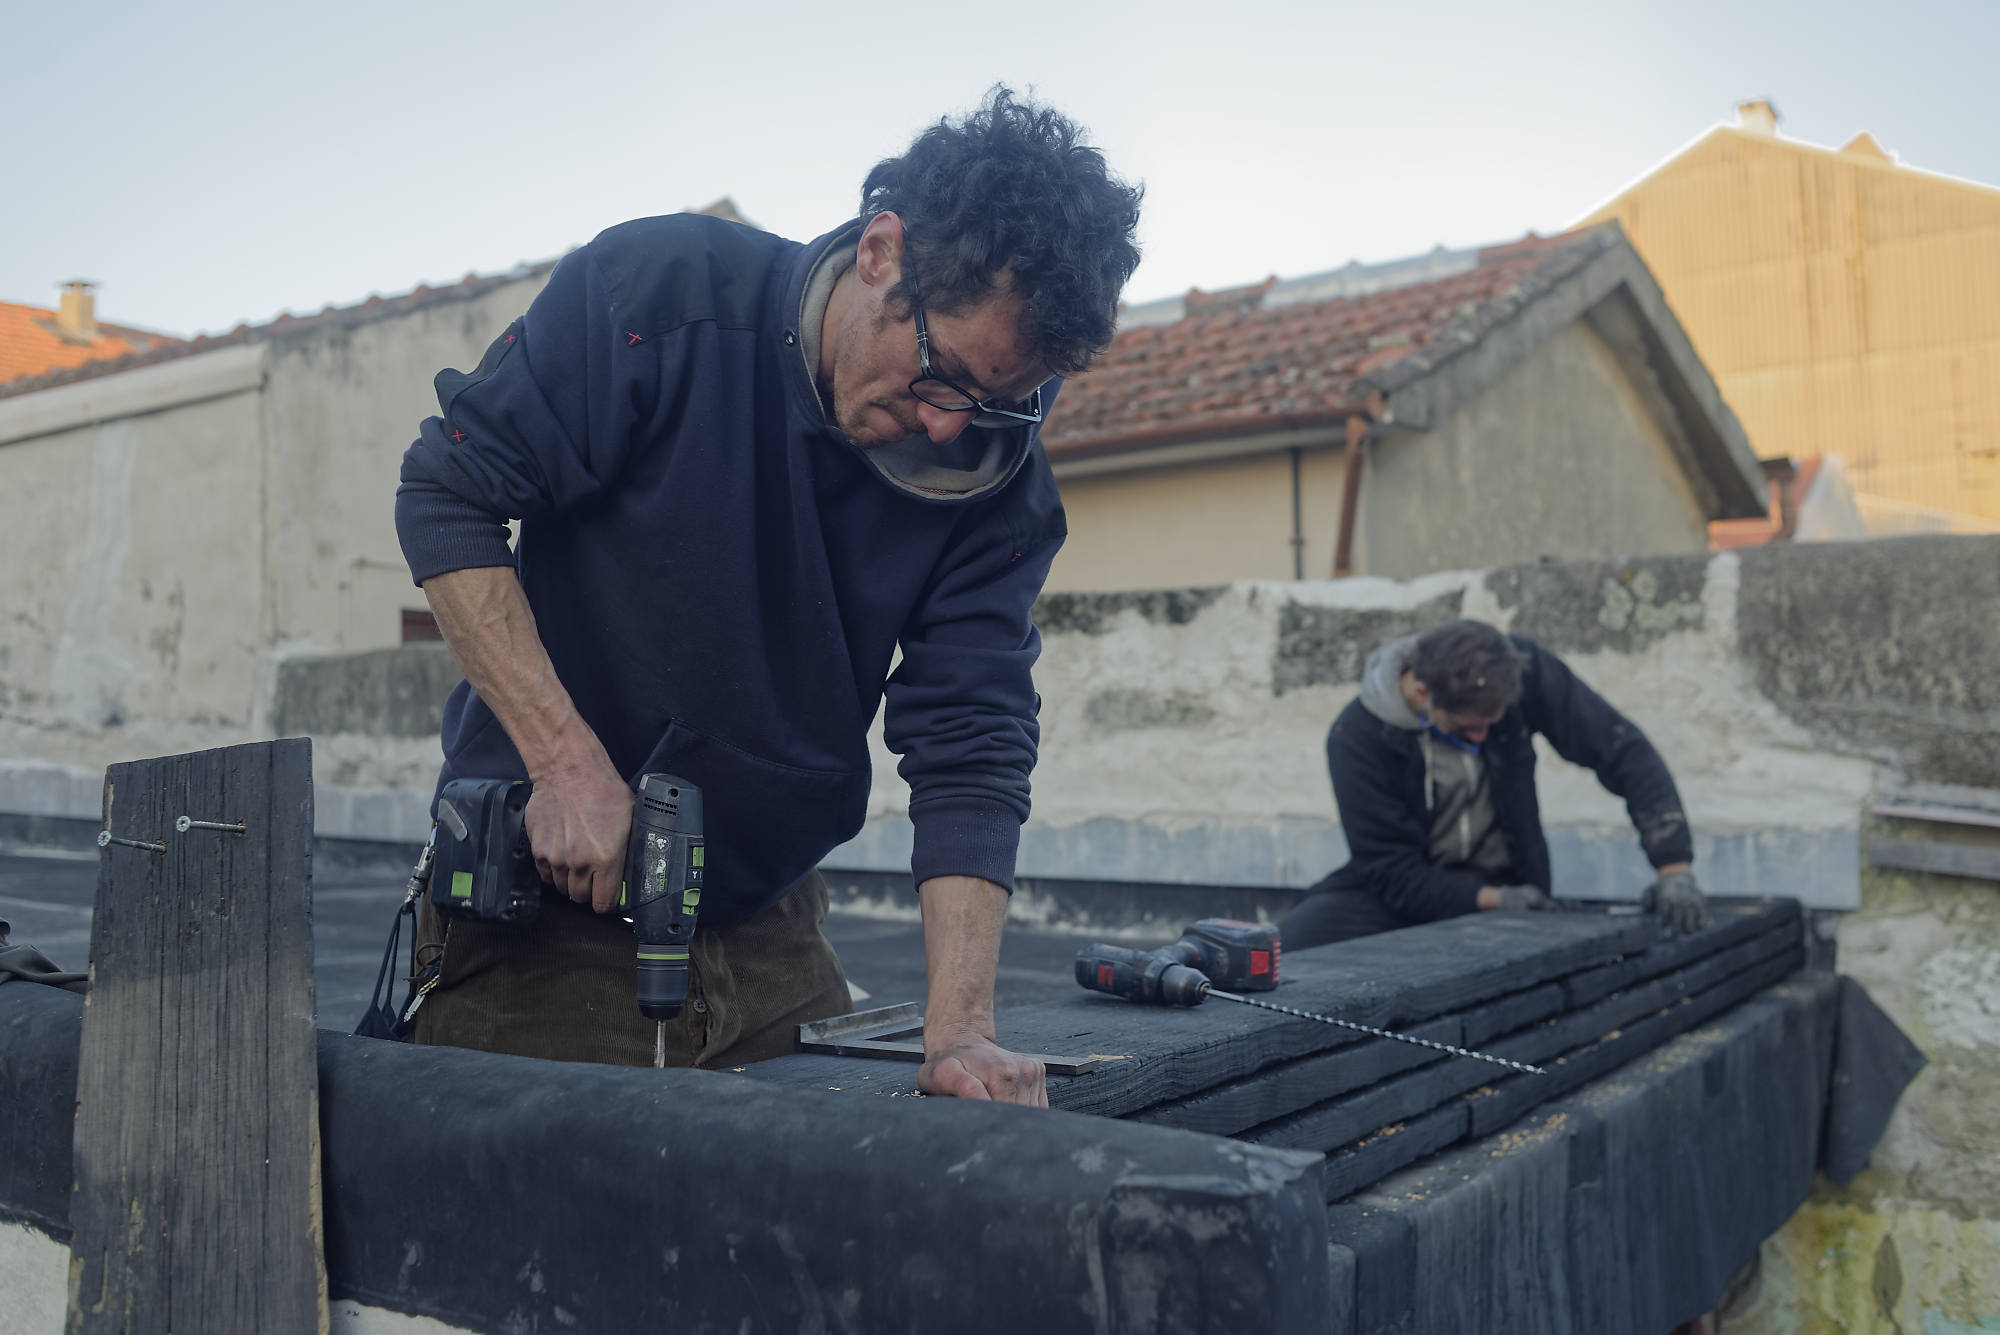
Our workexplained step-by-step

This guide is an overview of every step we took in building our prototype of the tyre foundation. Since it was our first attempt, not all of our processes are optimized and need further development. However, this should serve as an inspiration for anyone with a similar situation and is open for discussion and improvement.

Beforehand a list of tools we used
in the progress:

welding machine,crowbar,grinder,hammer,wheelbarrow,bench drill,shovel,cutter.

Throughout each phase, we remind you that it’s important to protect yourself using appropriate safety equipment.

For this, you will need:

helmets,protective goggles,appropriate protective gloves,security shoes,reusable dust masks.

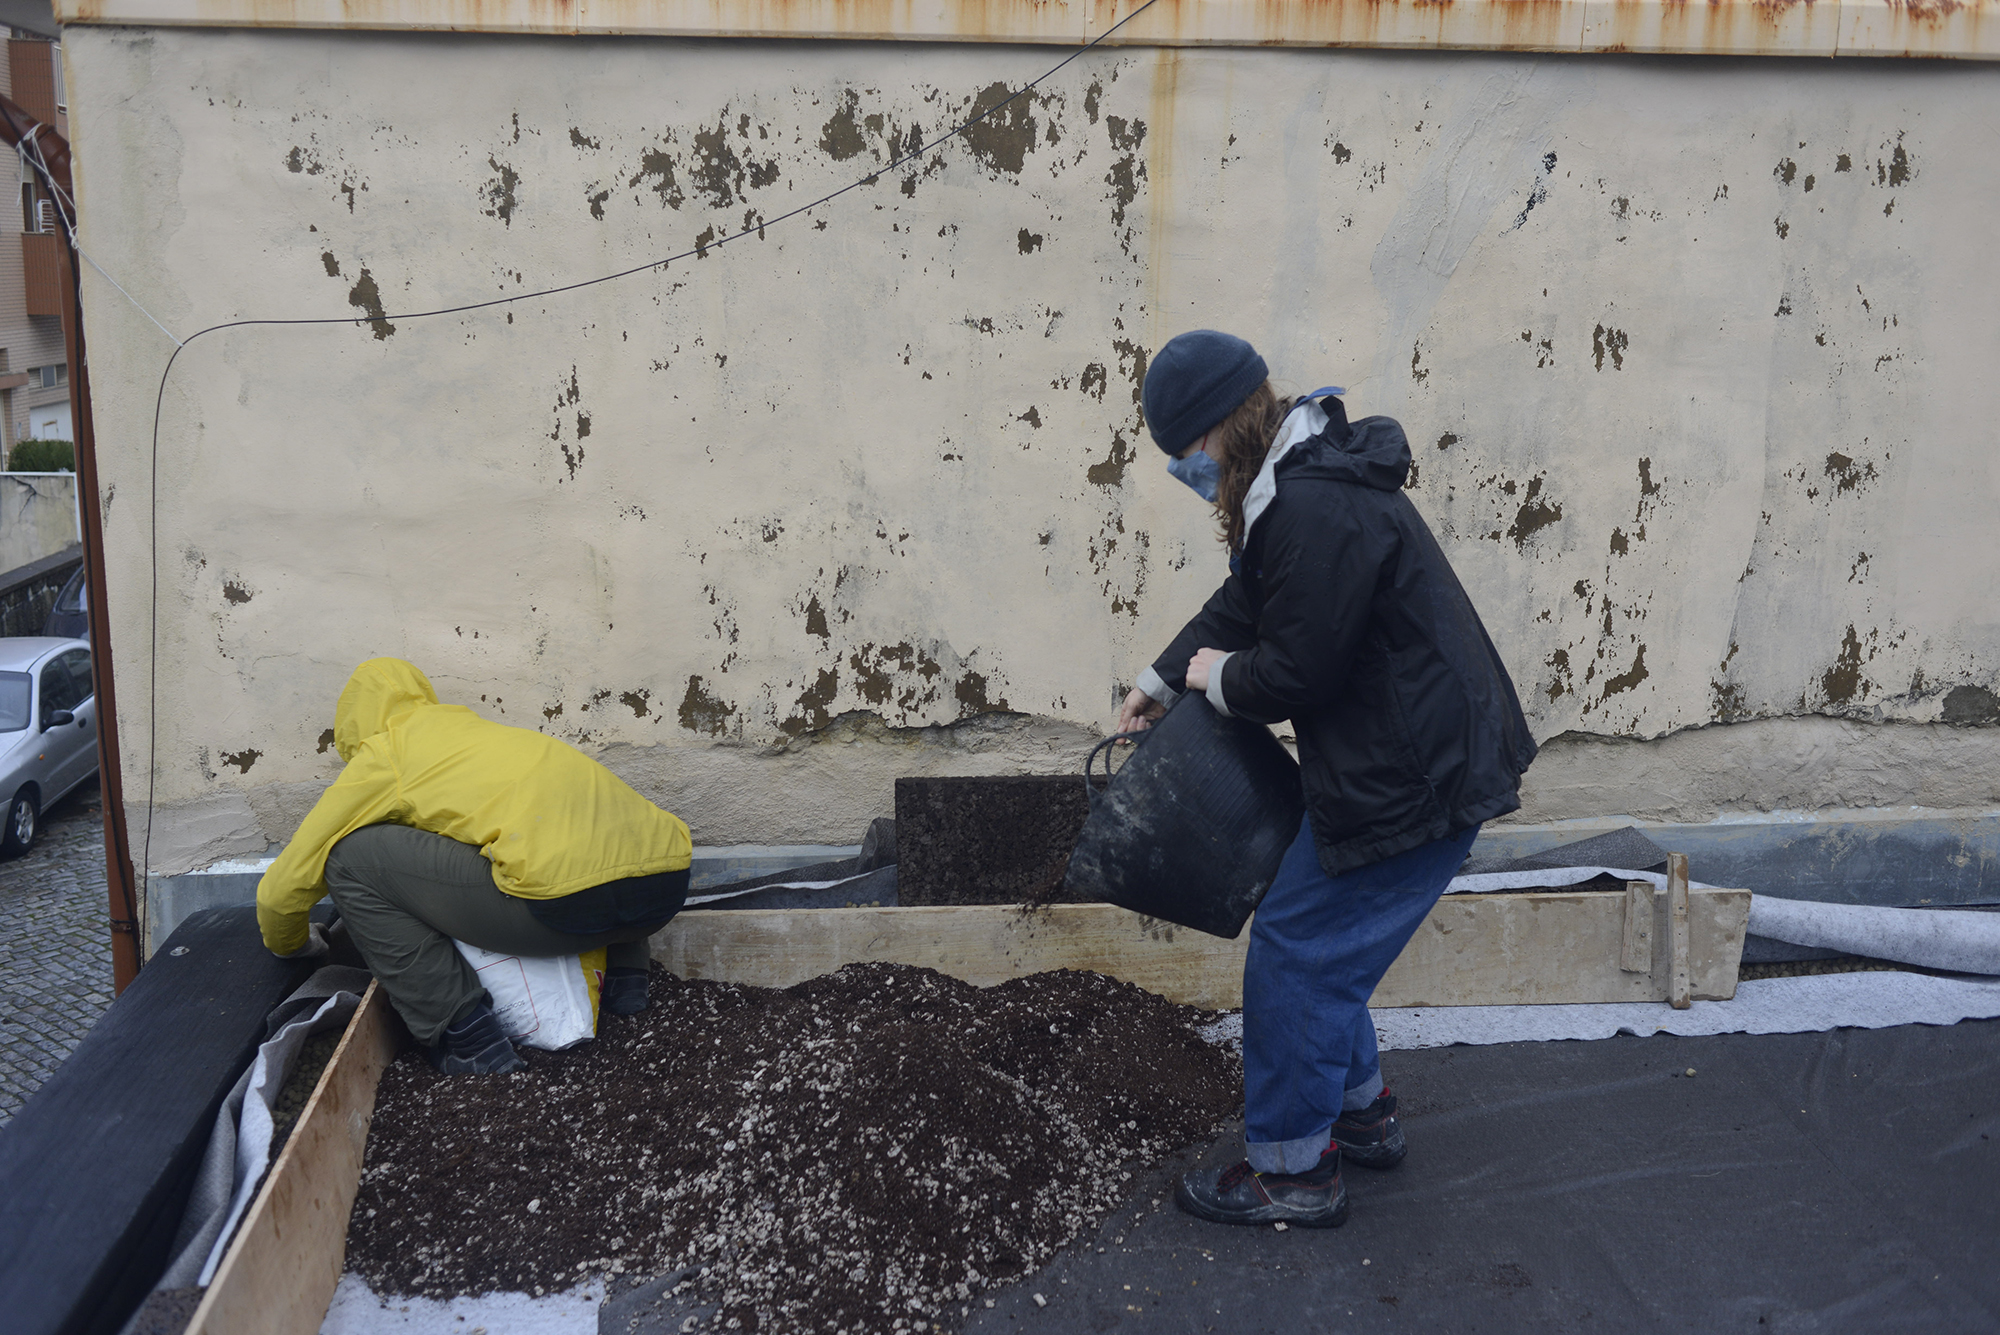
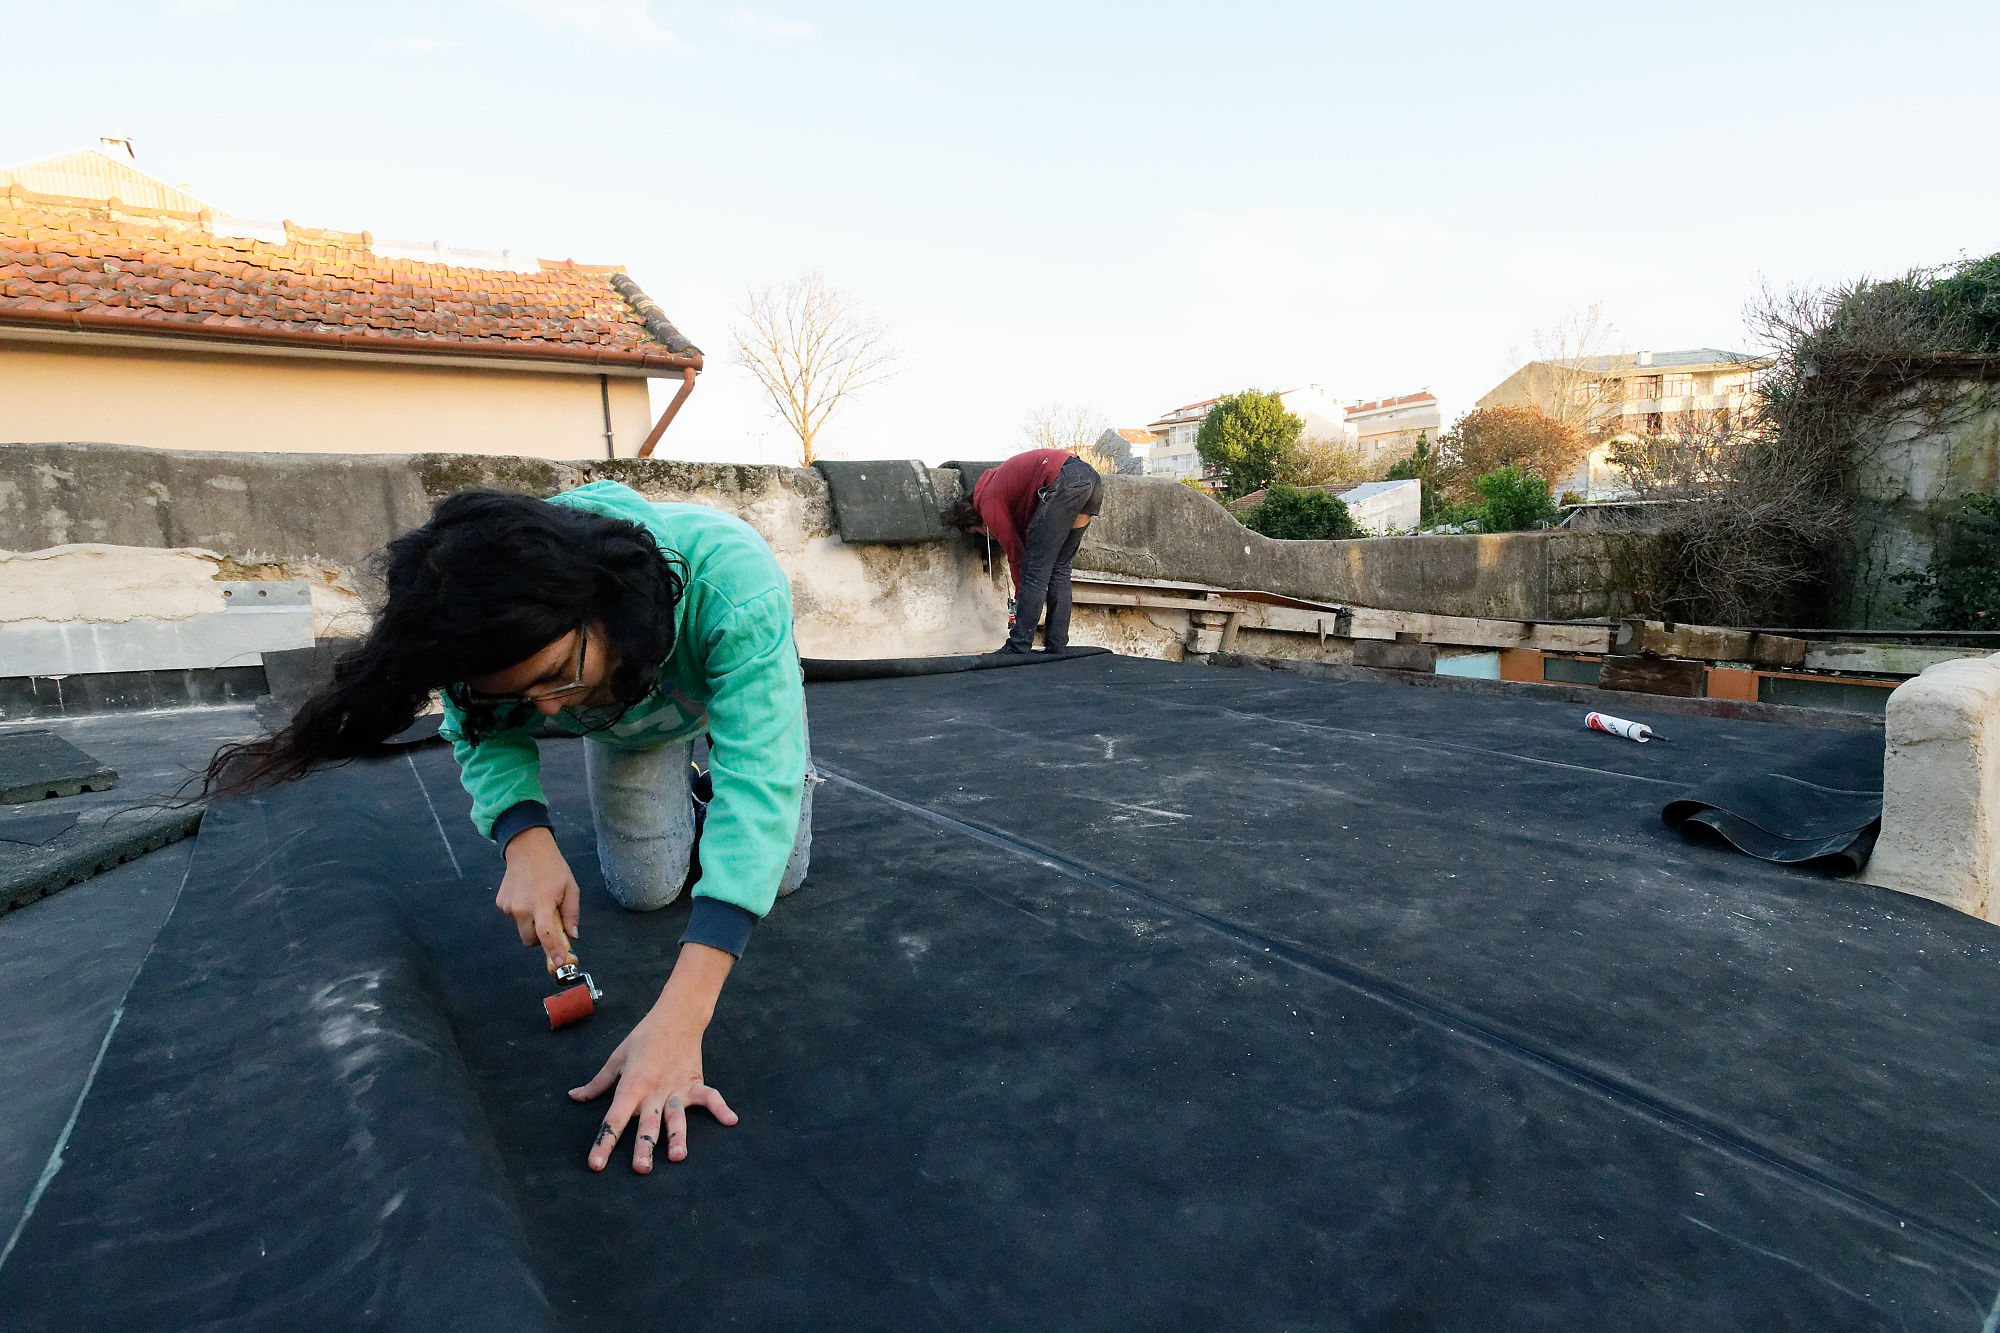
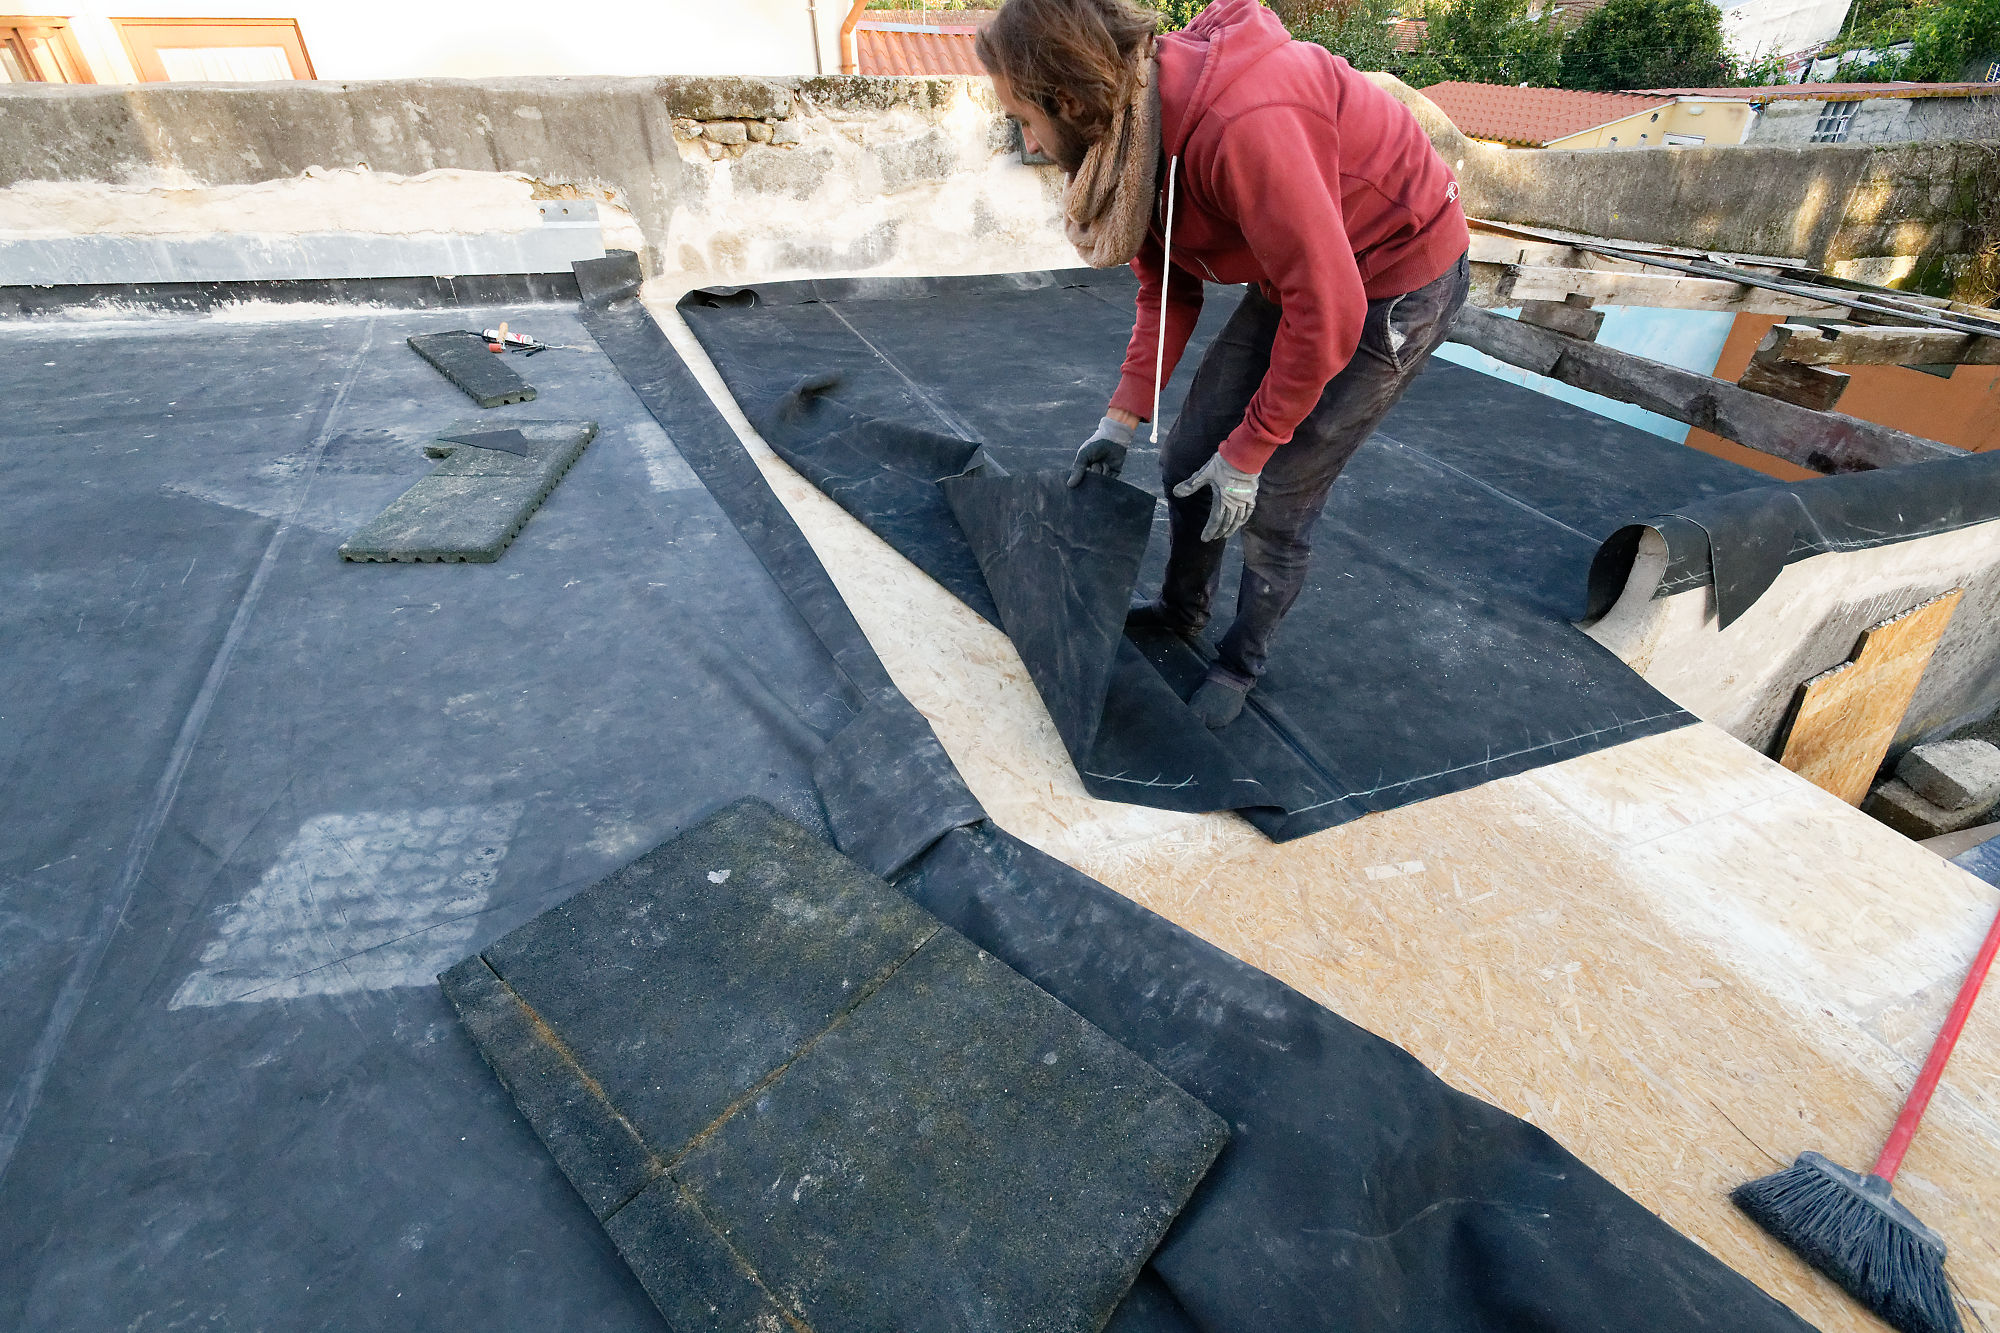
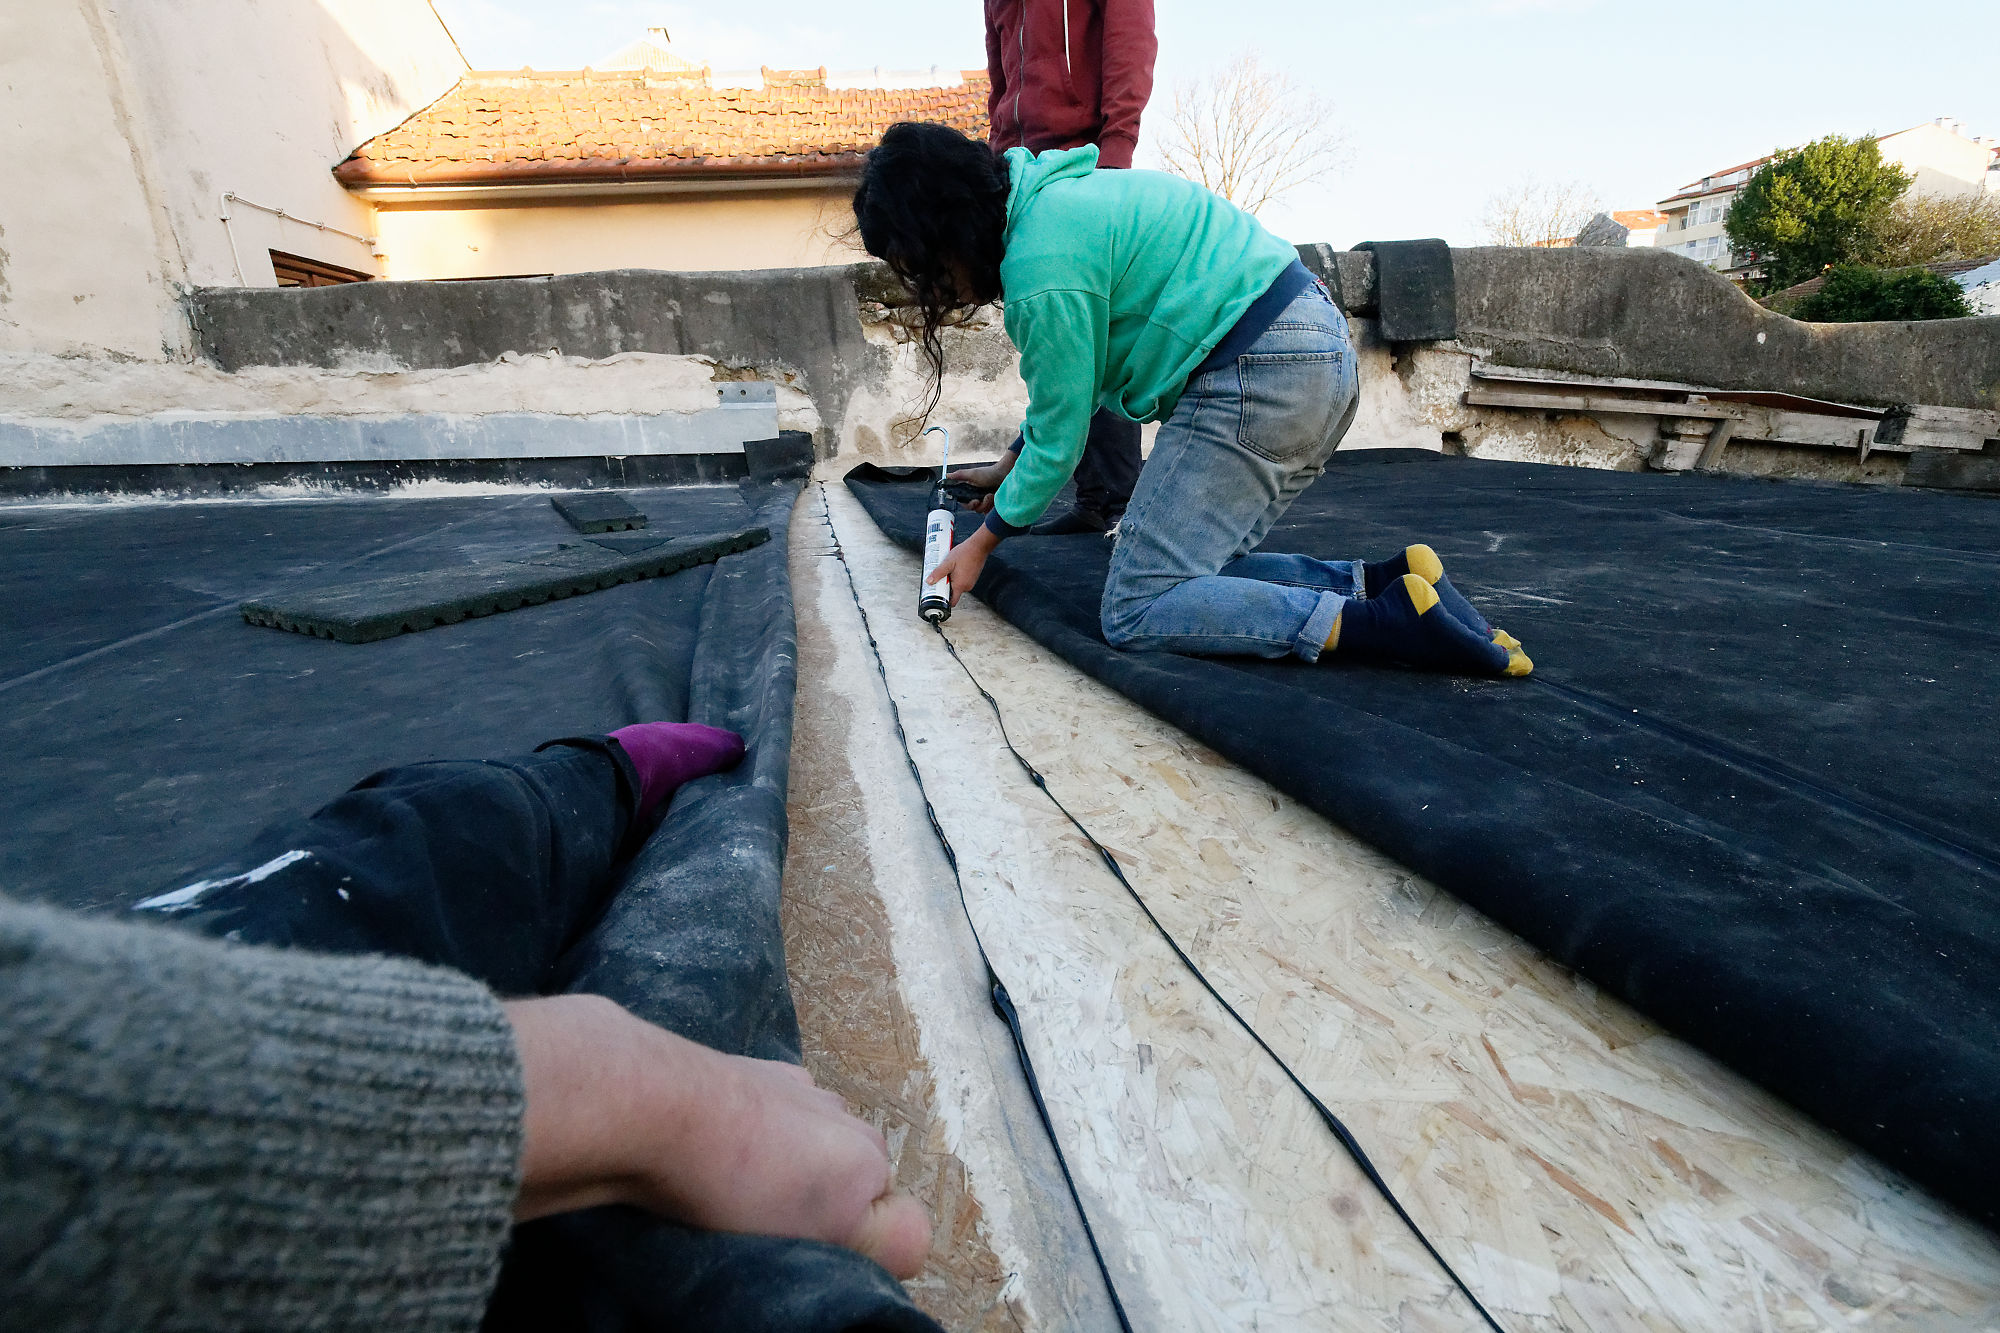
Preparation of the ground

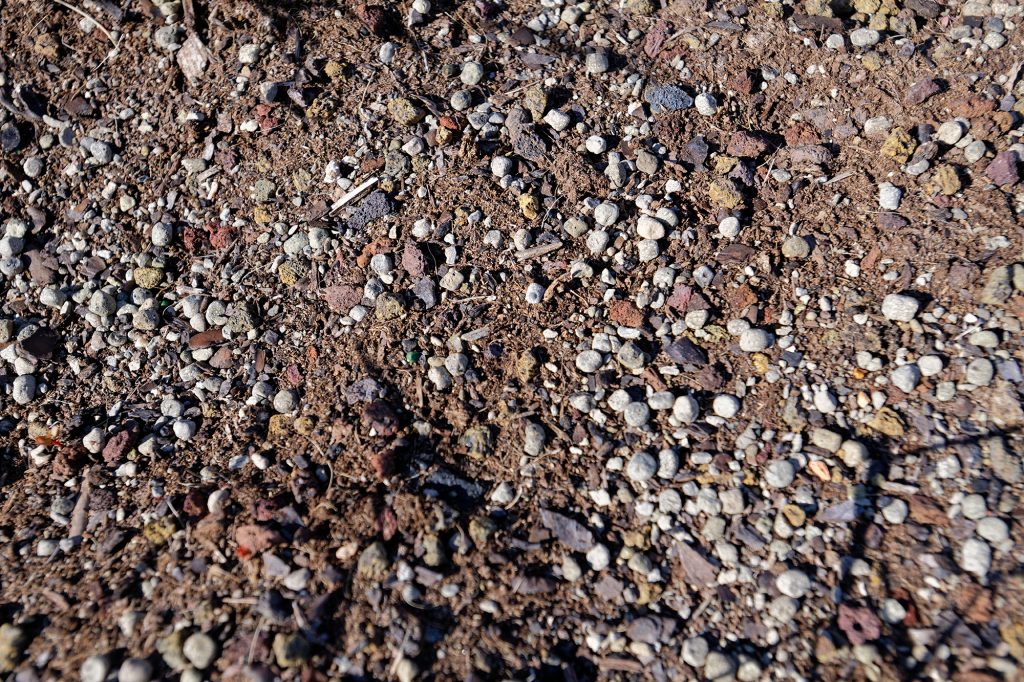
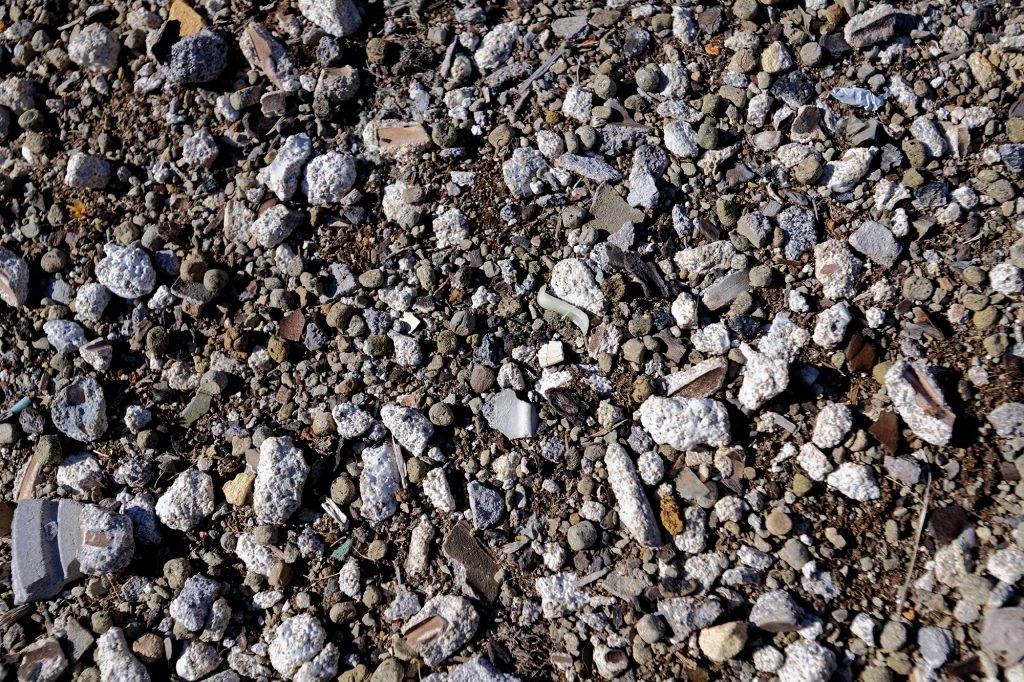
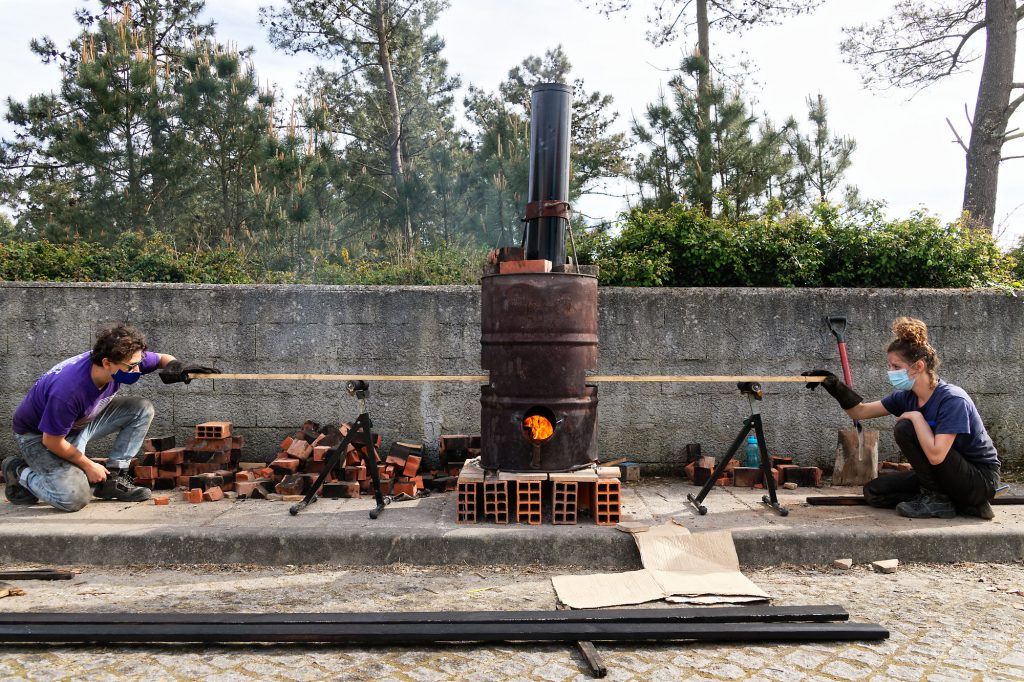
The first and most important step before starting any foundation is the analysis of the ground. The soil has to have a sufficient bearing capacity. If the soil is not suitable there are different possibilities like reinforcing the soil, digging deeper, or adapting the foundation type to a wider tyre for example. In our case, we needed to dig until +/- 70 cm under the floor level to find a proper soil. We decided to put a layer of 5 cm of compressed gravel, frequently used under footings to have a correct level.

Estimated time: 6 to 8 hours per pit,
depending on the toughness of the ground

Woman levelling ground
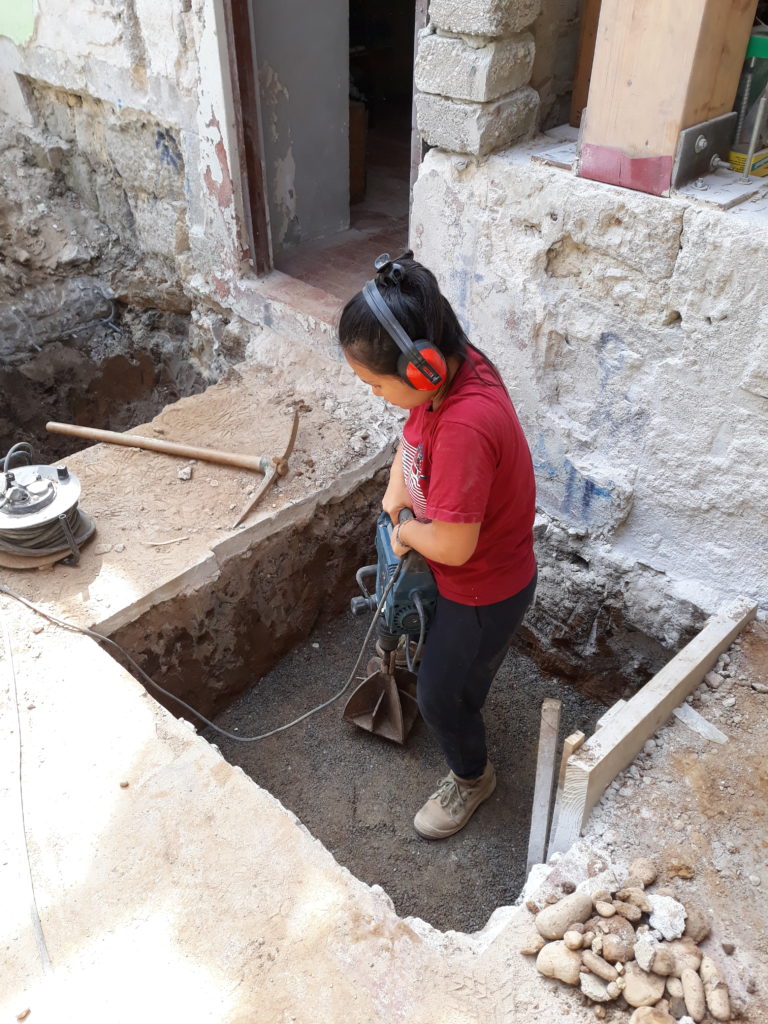
Leveling the ground of the pit

The base metal plate

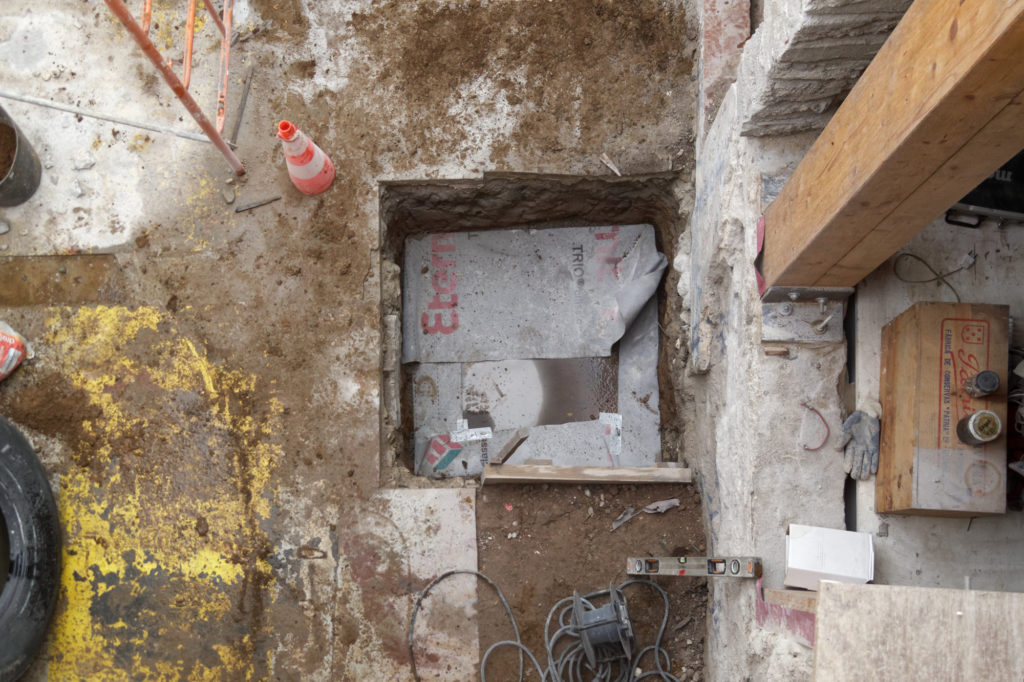
The metal plate is the base of the foundation and serves as a solid surface for the tyres. We chose a thickness of 2 cm. To have the plate and also the column connected to the foundation we welded 4 threaded rods to the plate. The socket will be attached to these rods later on. Before putting the plate in the pit we put a breathable and waterproof membrane supposed to protect the plate from humidity in the ground. An EPDM membrane might have been a more suitable choice to increase the durability of the protection. We tried to wrap the plate as well as possible. Additionally, we painted the base plate and especially the weld joints with anti-corrosive paint. We still don’t know how this will react with the time, neither if it is going to be efficient enough to protect the welds. Our main objective is to take all the necessary precautions to avoid that water eventually permeates and settles at the bottom of the foundation. In our next tyre foundation build, we would consider drilling some holes in the metal plate to allow for the draining of water infiltration. The use of this metal plate was advised by our engineer to level the ground on which the foundation itself would set, but we didn’t find any other project using a similar precaution. It was also helpful for us to link the column to the foundation on a robust way.

Metal plate wrapped with membrane

Estimated time: 2 to 6 hours,
depending on accessible tools to cut the plate on the good dimensions

Metal plate on the ground of the pit

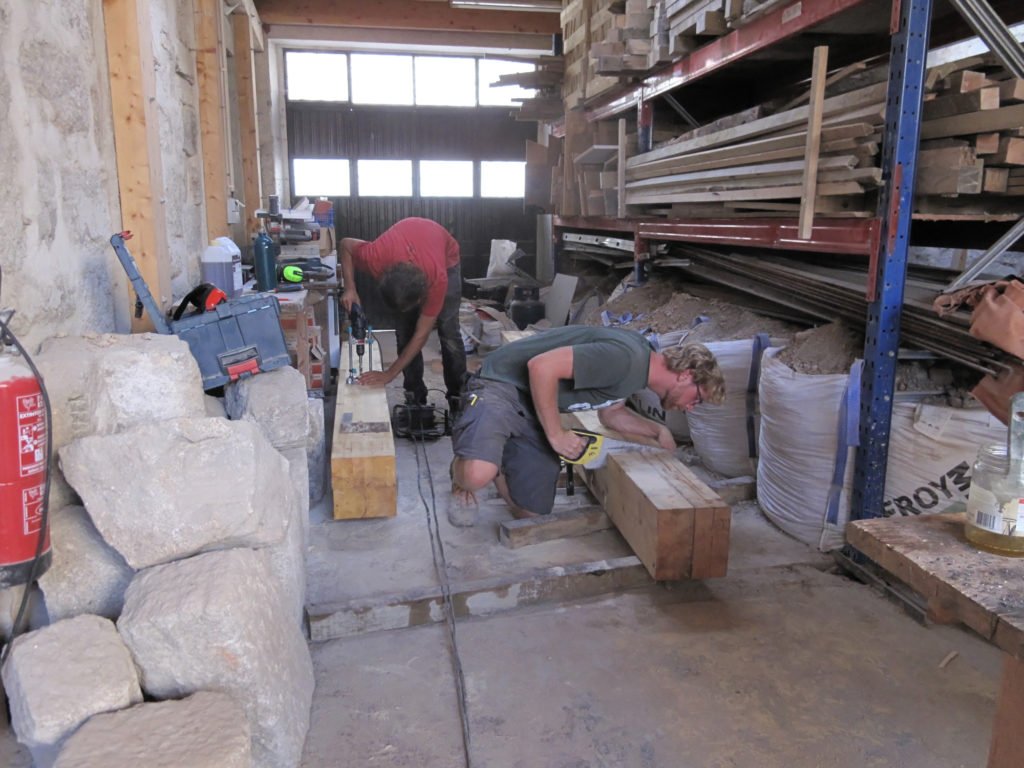
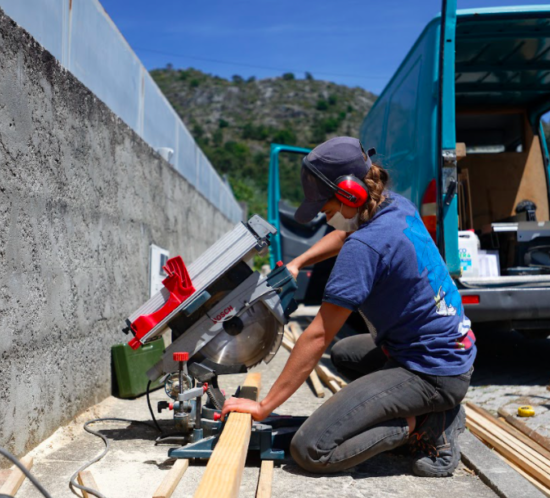
Preparation of the columns

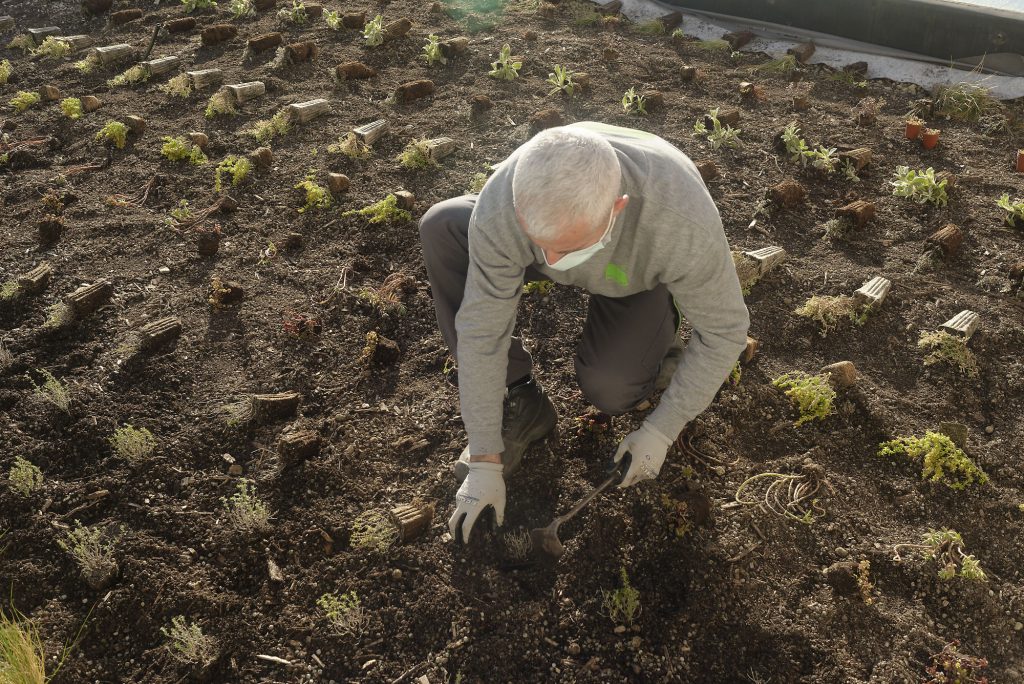
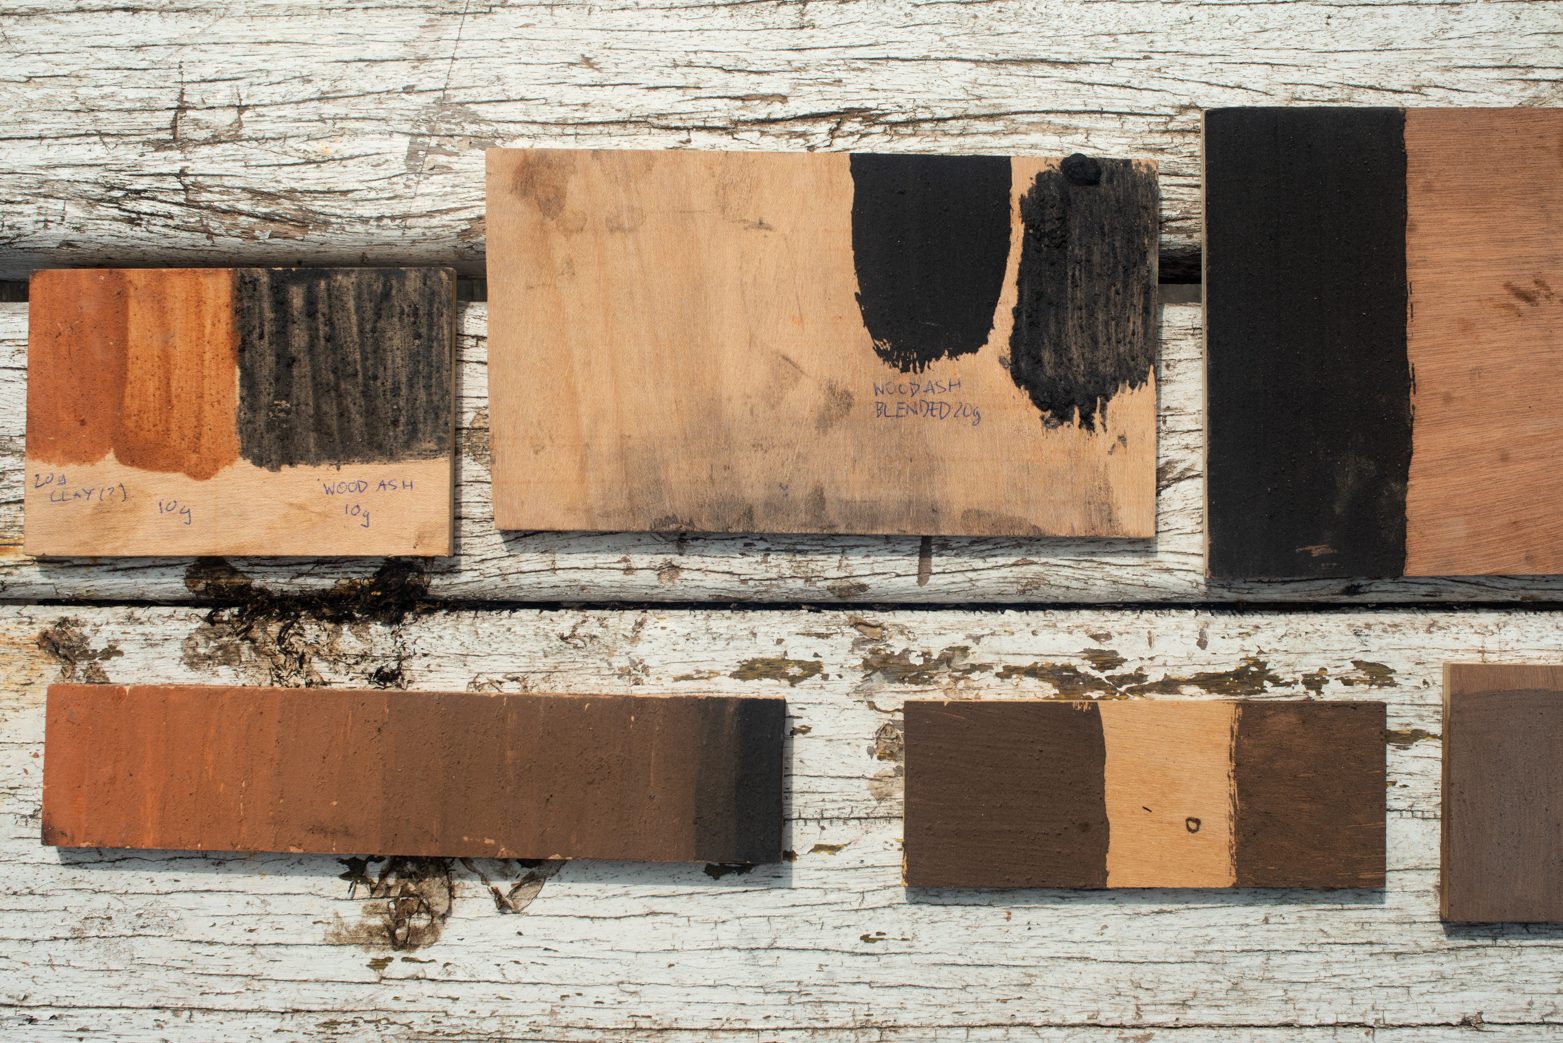
The columns we used are made out of two 12×24 cm construction plywood beams. To join the two pieces we glued and screwed them together. The section is therefore 24×24 cm. To protect the wood from fire, water and pests we applied a layer of wood ash on the tyre, as well as protected the wooden column with a layer of borax, known as a protection against mold and repellent against insects. For a specific protection to prevent a specific termite attack, we paint the column with a mix of essential orange oil (5%) and linseed oil (95%). We will soon dedicate a detailed article to wood protection from fire, water and pests.

Estimated time: 2 hours.

Preparation of the socket

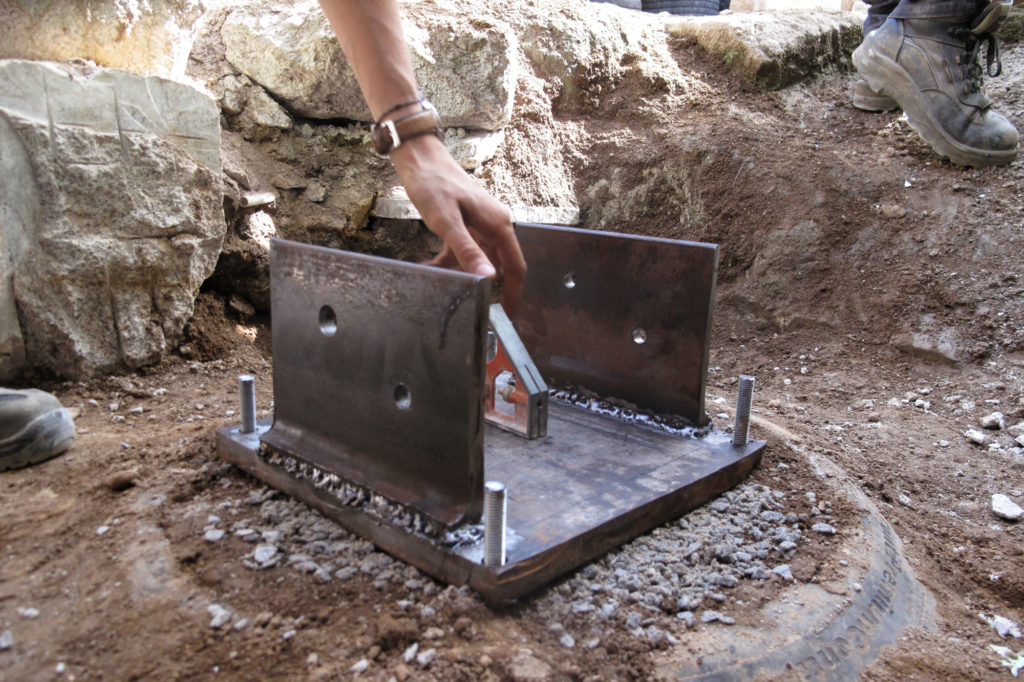
We used a steel socket to fix the column with the foundation. The socket is connected to the foundation with four threaded rods. It is fundamental to align properly the rods after putting the base plate, so that the columns would be aligned to each other. We used a wooden guide to secure the rods’ position while filling the tires. This guide is composed of two pieces that represent the two plates, with the holes for the threaded rods, and a long bar that helps to maintain them aligned and in place.

Metal plate on the ground of the pit

Estimated time: 4 to 6 hours,
depending on accessible tools to cut the steel and drill the holes.

Tyre foundation alignment
Checking the alignment

Filling of the tyres

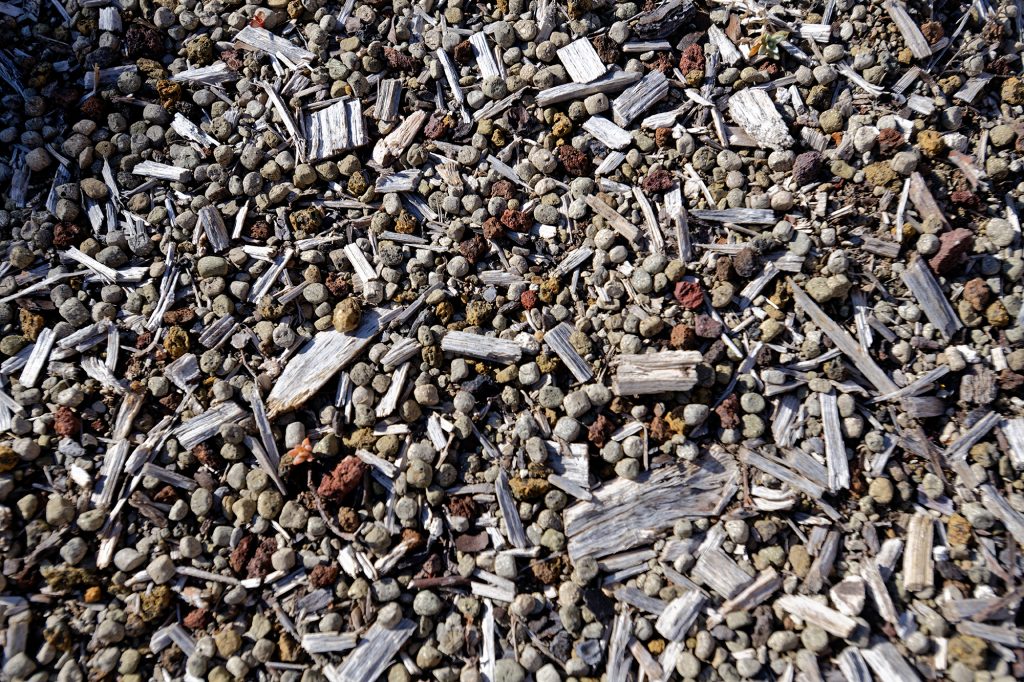
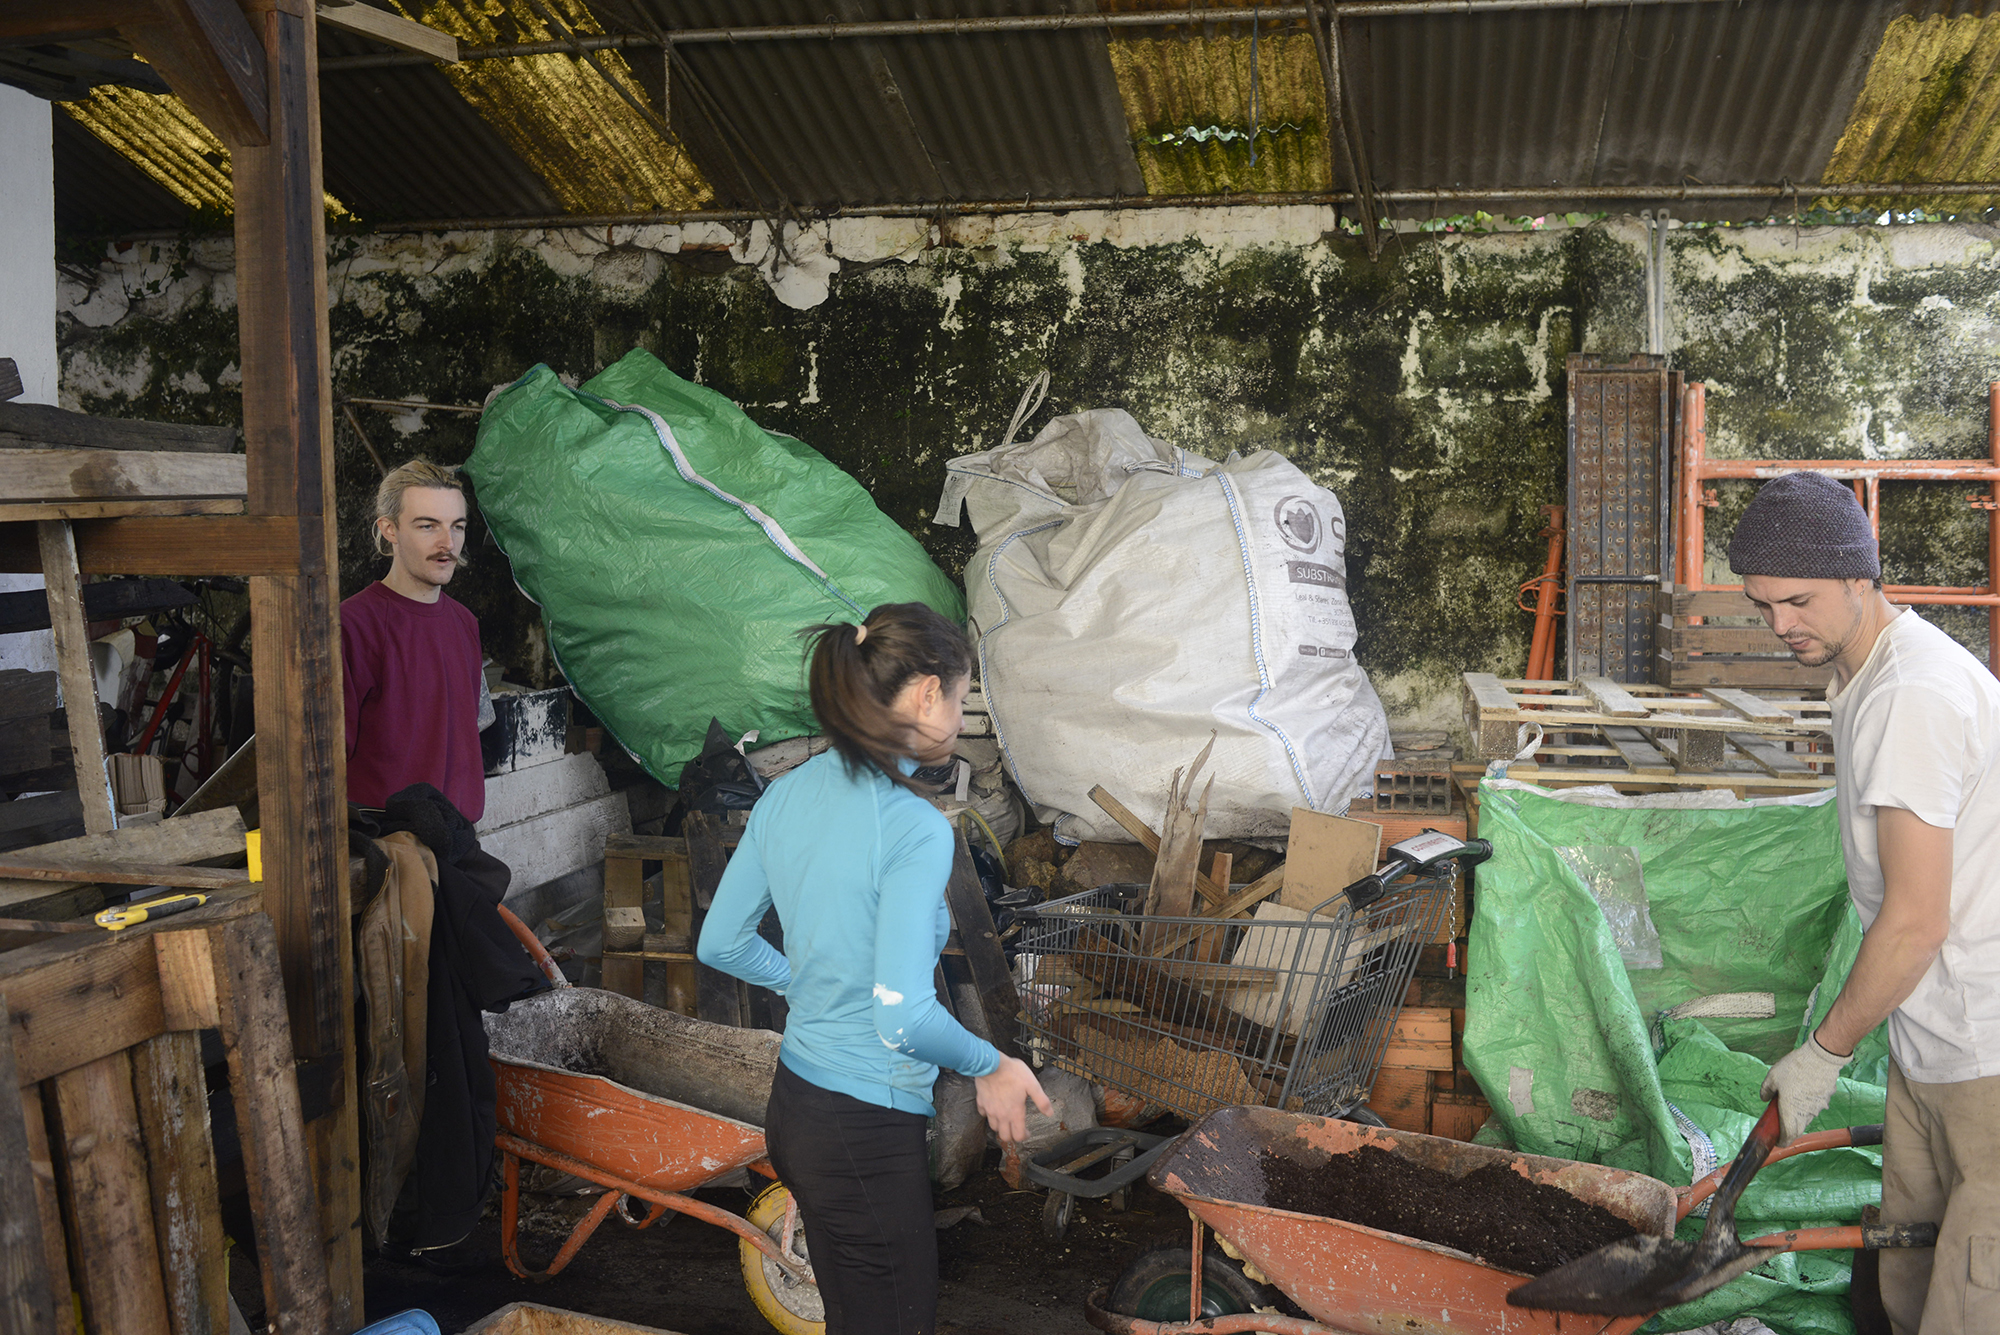
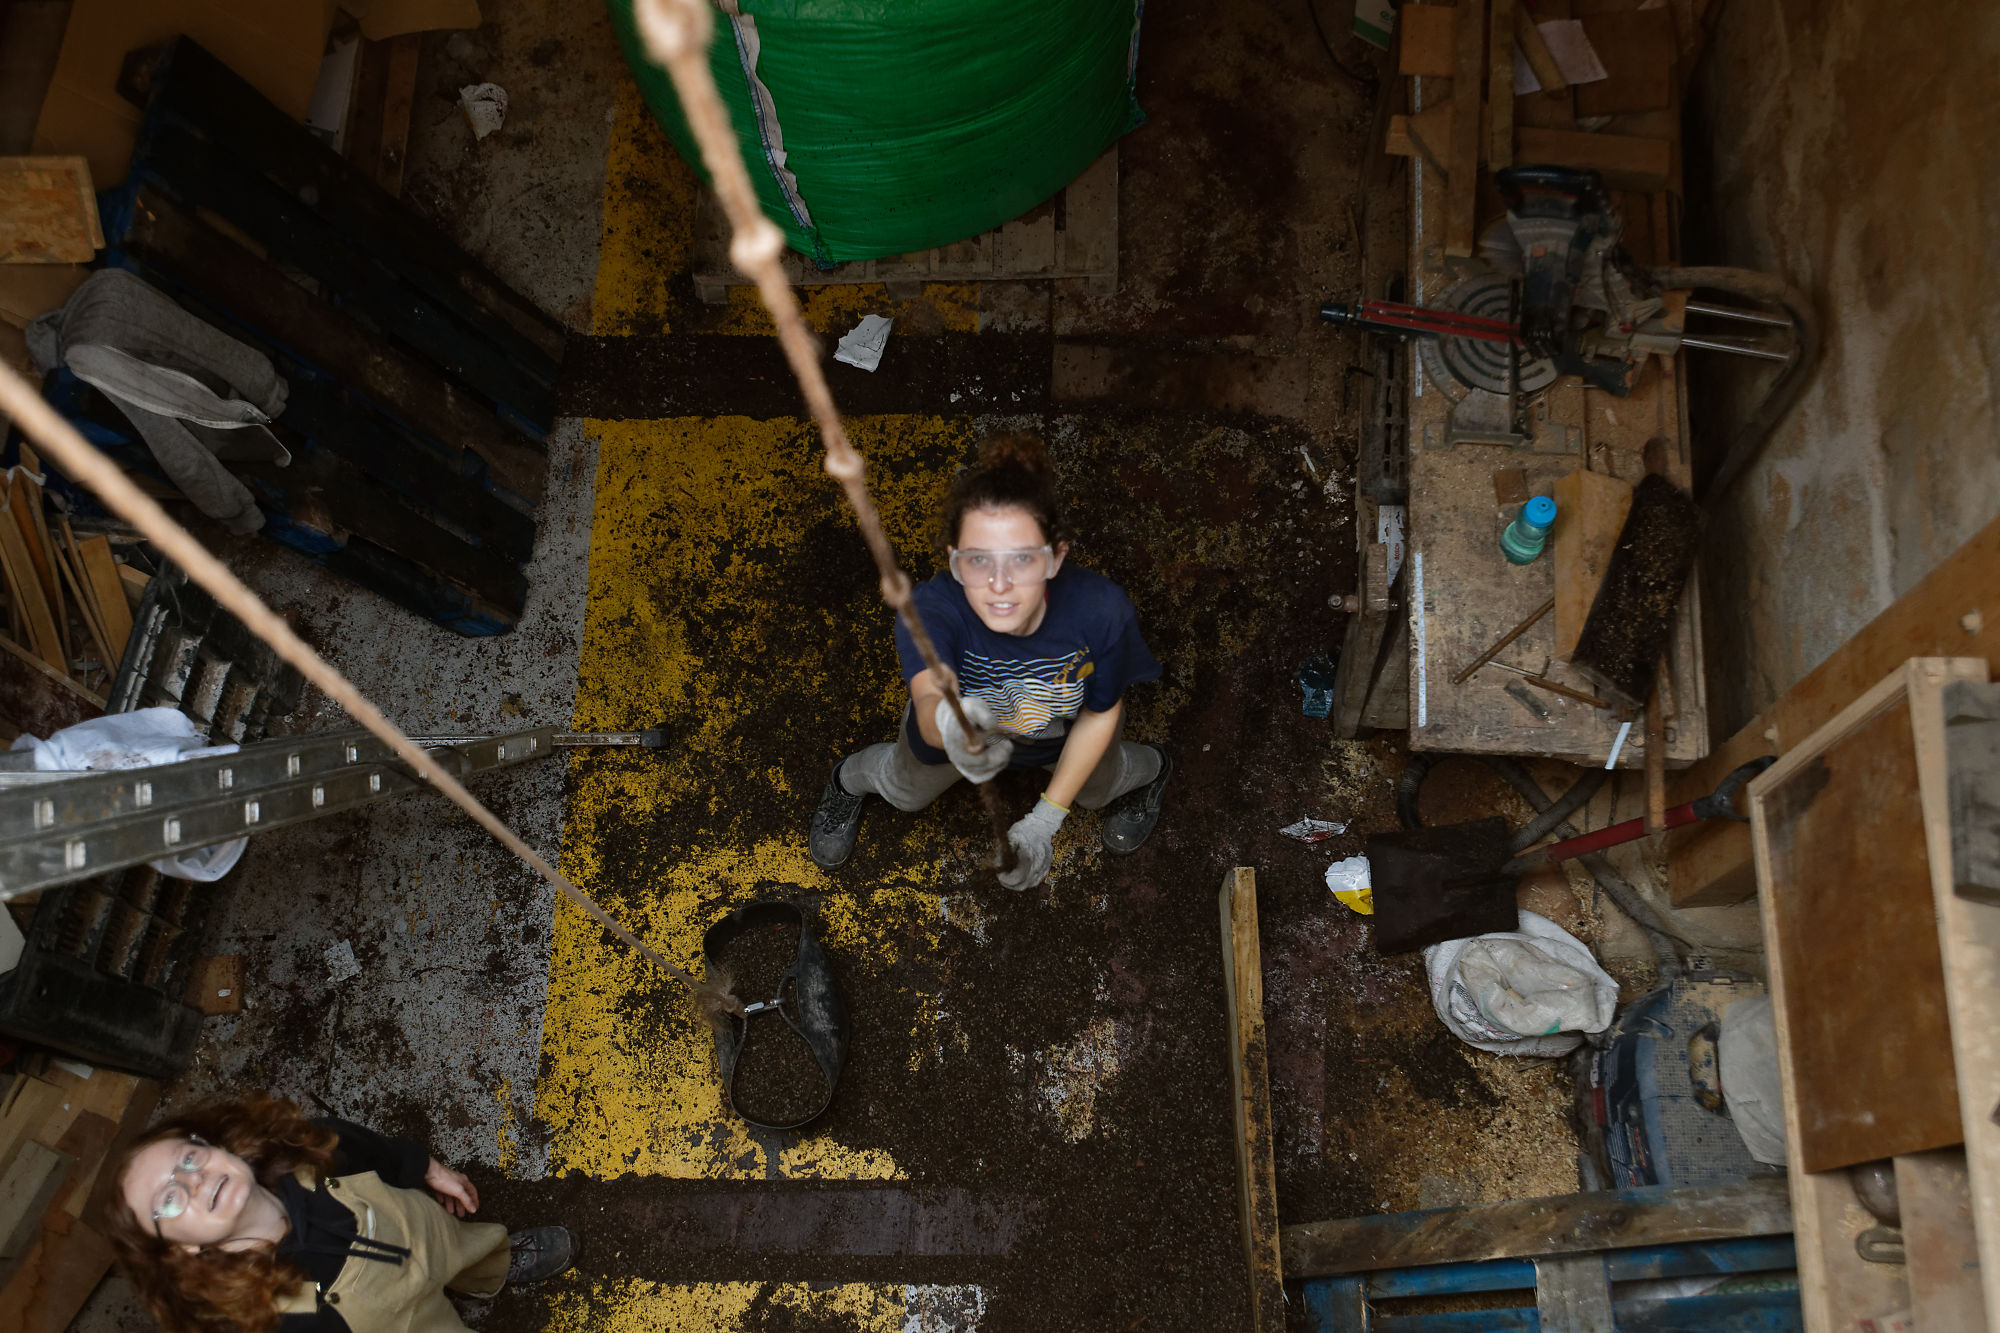
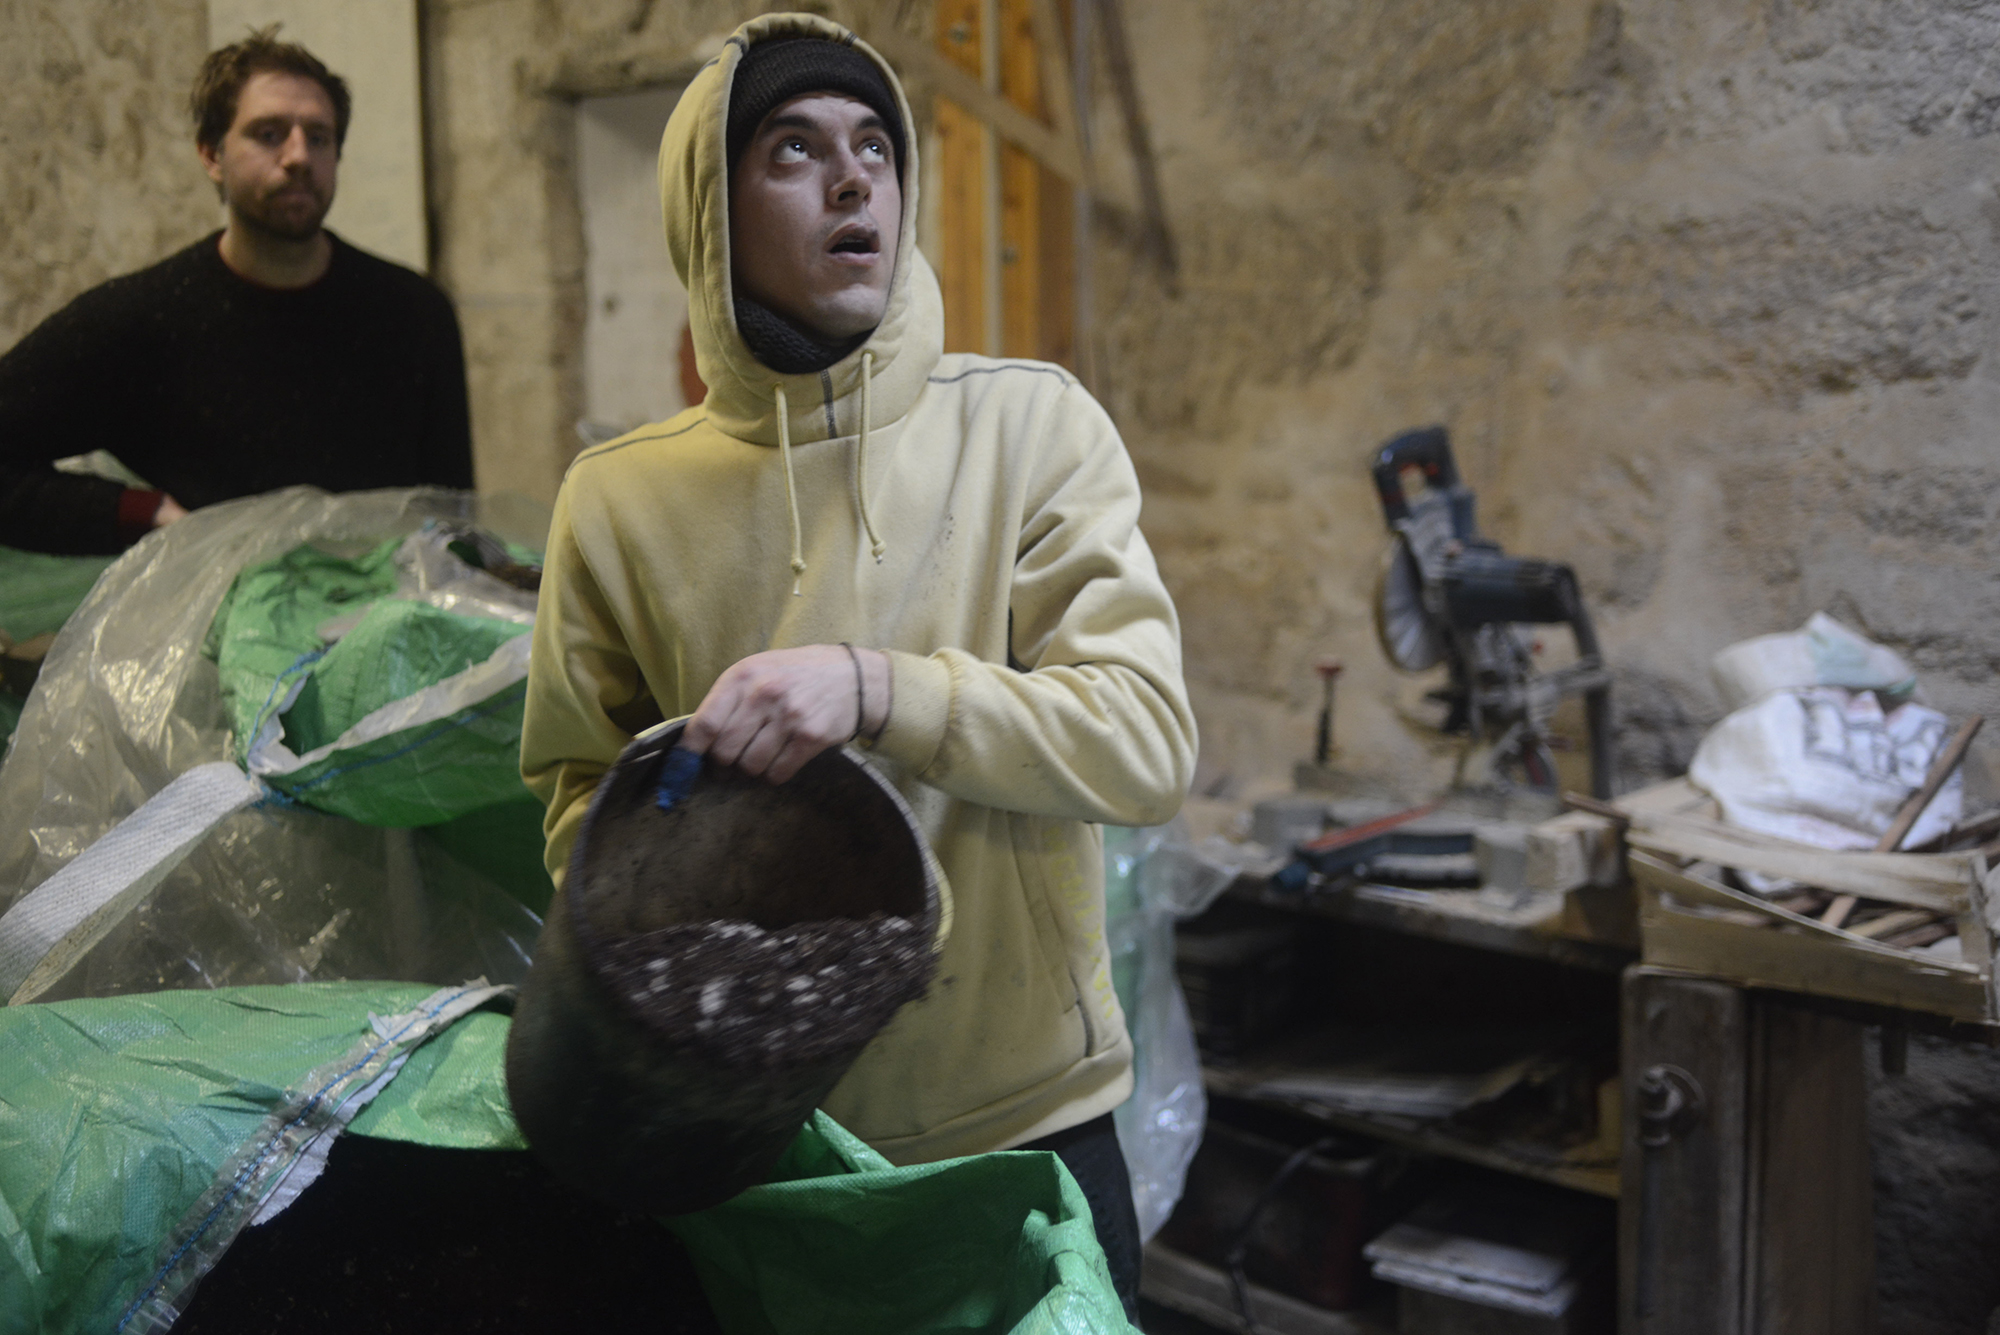
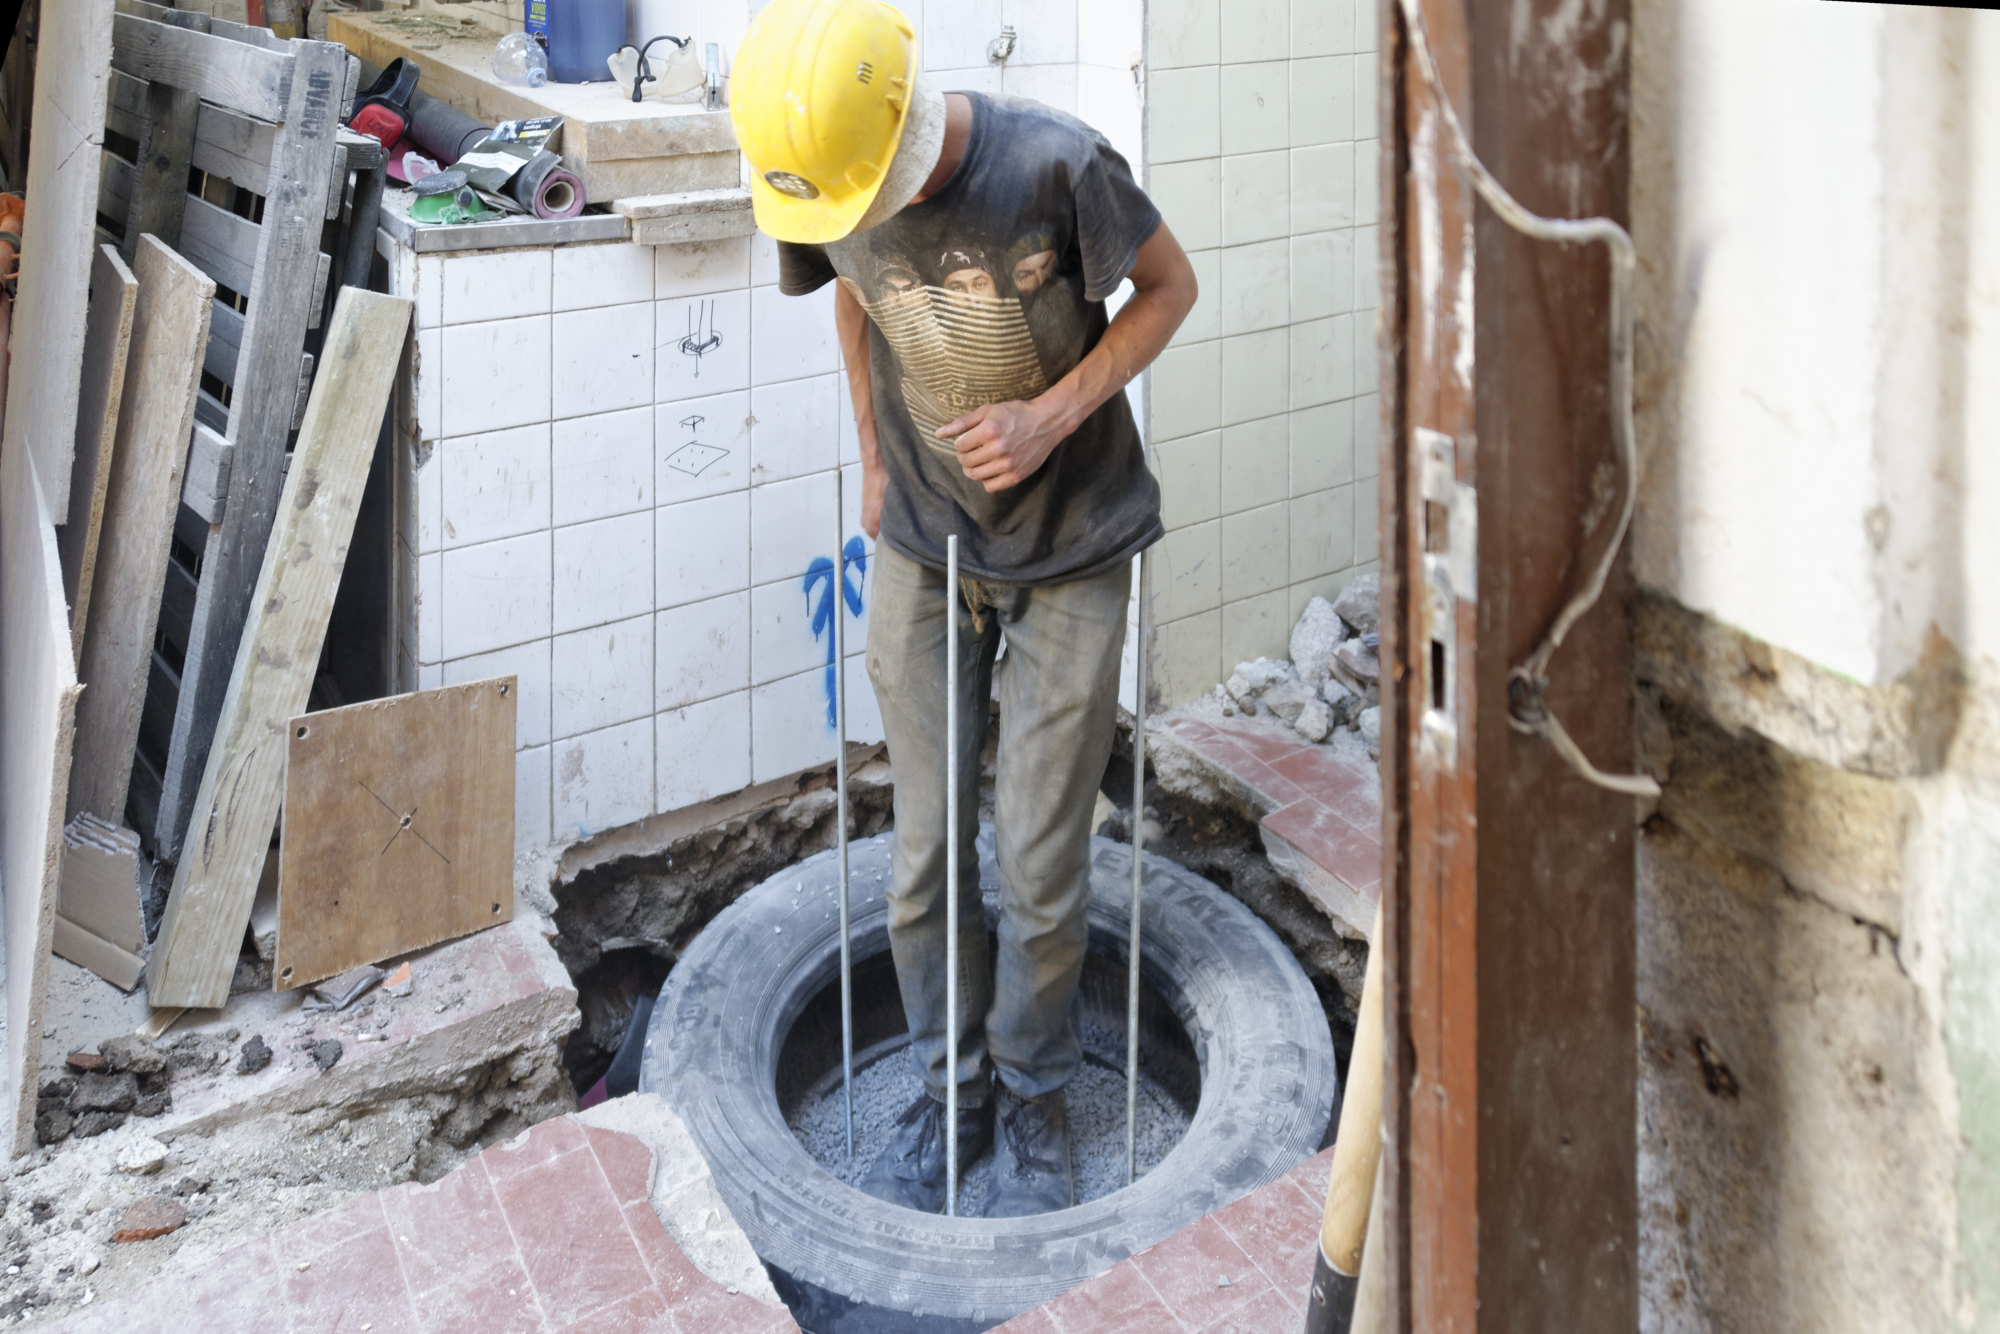
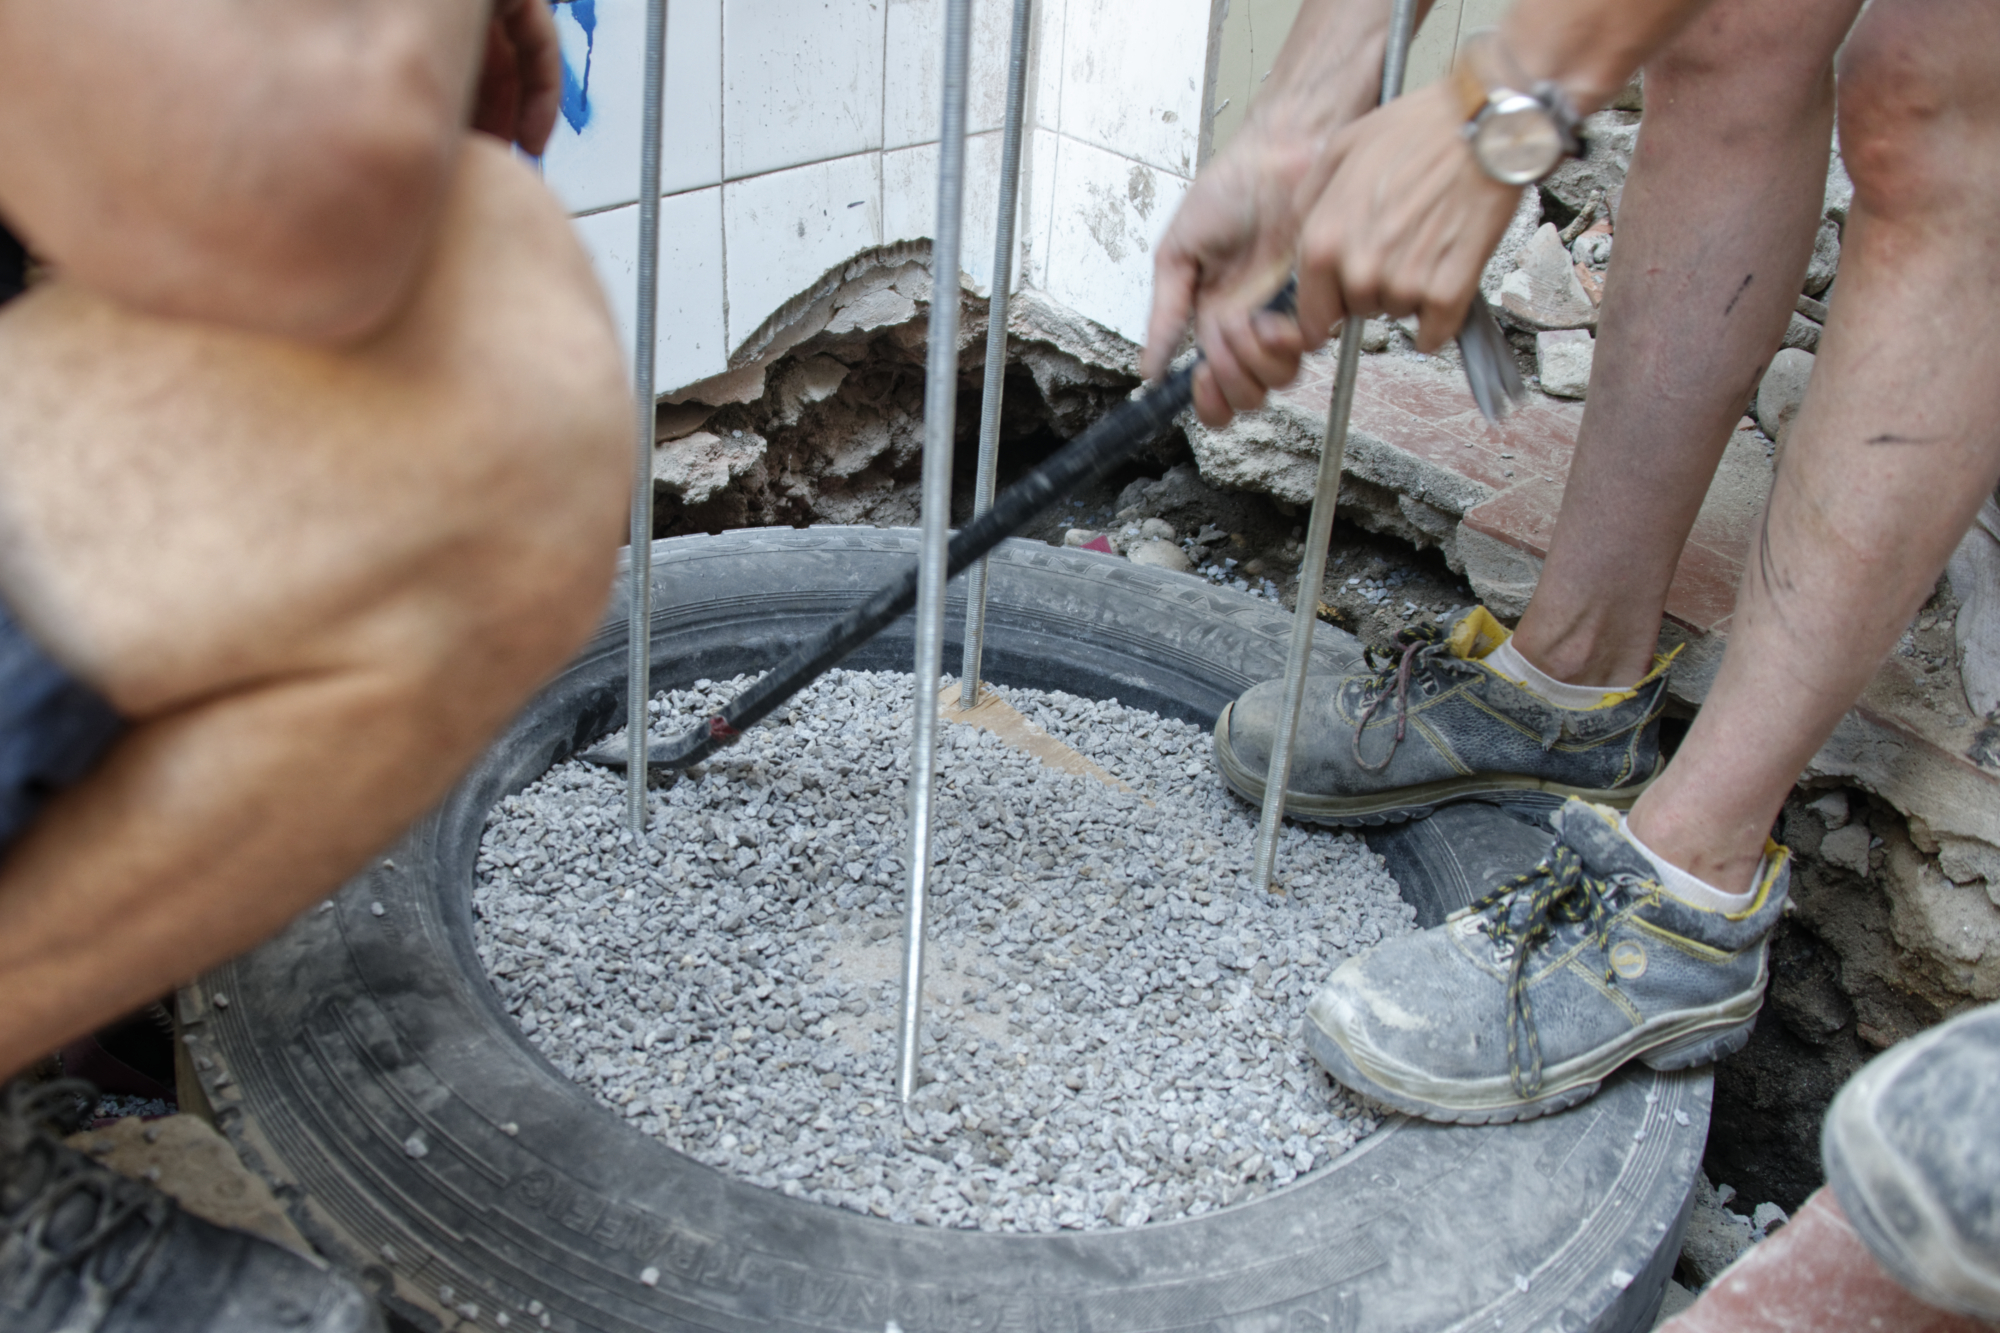
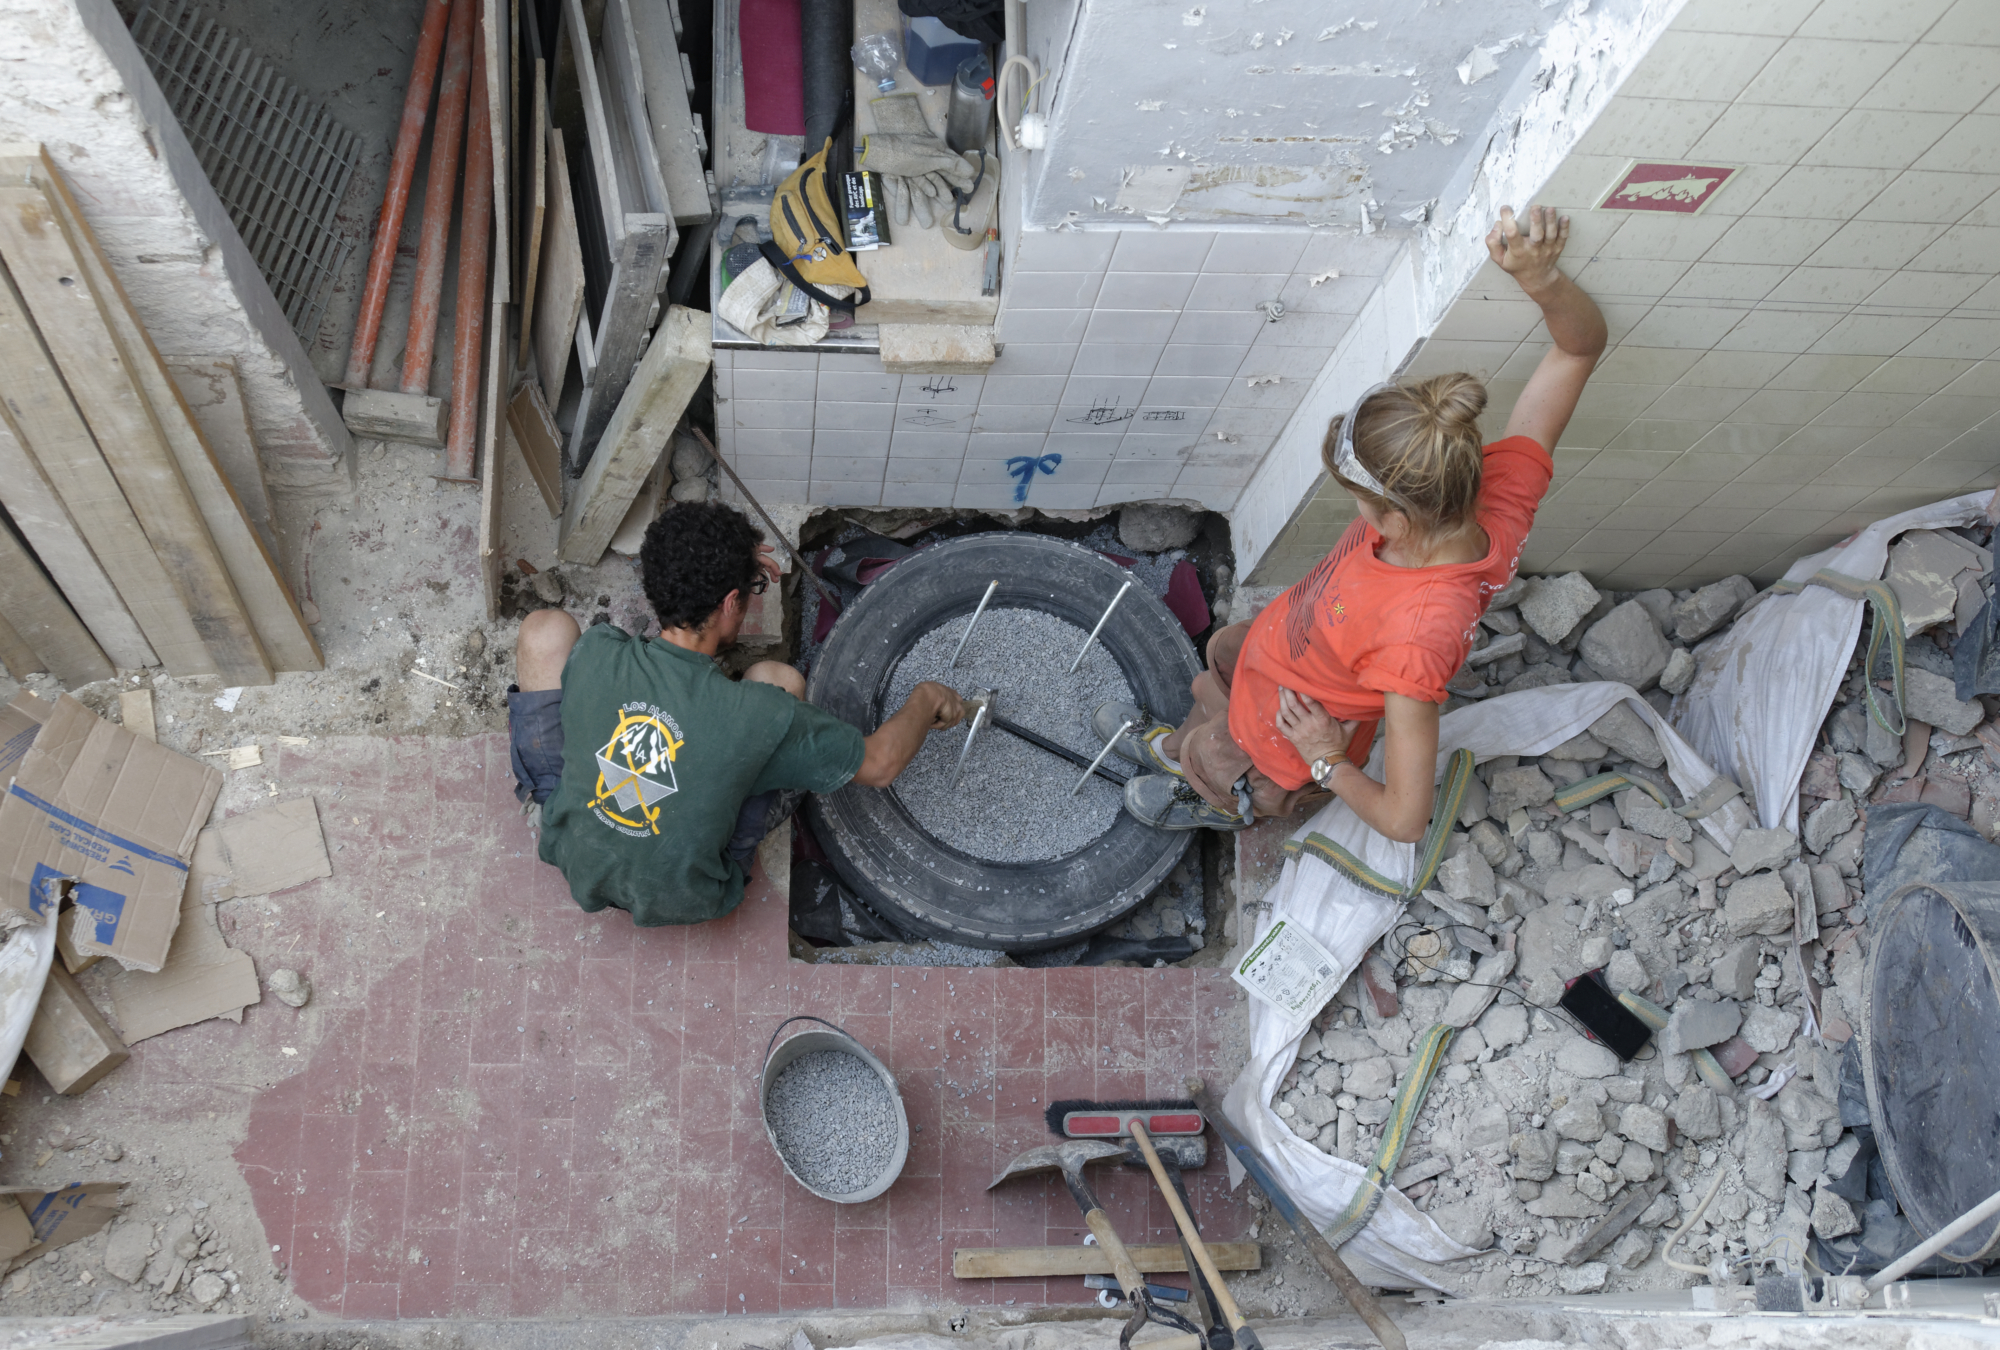
In its rawest form, the tyres can only be filled with earth. Lots of case studies for earth filled tyre foundations are in relatively dry climates where the temperature doesn’t go below 0°C. It is preferable to use an other sub-grade as gravel or other material to encourage drainage and allow for water expansion, and then avoiding some major instability in the ground caused by frost. We decided to choose gravel made of local accessible granite, from the North of Portugal. We had the choice of three sizes of gravel. After some discussions with our engineer, we decided to order the smallest to have better cohesion. We also added some sand to create a mix with better bonding and leave no empty space between the gravel. We used the ratio of two parts gravel to one part of sand (2:1). The mix in the tyres has to be then as compressed as possible. At first, the tyre can be filled with a shovel and by hands. When it is not possible to get any more of the mix in, a crowbar and a piece of wood can be used to open the tyre (see how they did at the Holy Trinity Church Tulse Hill). Once held open, a second person can continue to fill up the space with the mix. A piece of wood can be used to shove the mix in as deep as possible and a hammer to compress it. This needs to be done until the tyre is inflated and no more mix can be added. The foundation is now ready for the socket.

One member of the CC Team inside a tyre.

Filling a tyre with gravel.

Filling a tyre with gravel and compressing

Estimated time: 6 hours for two people to fill the 2 tyres for one foundation
(a truck and a car tyre).

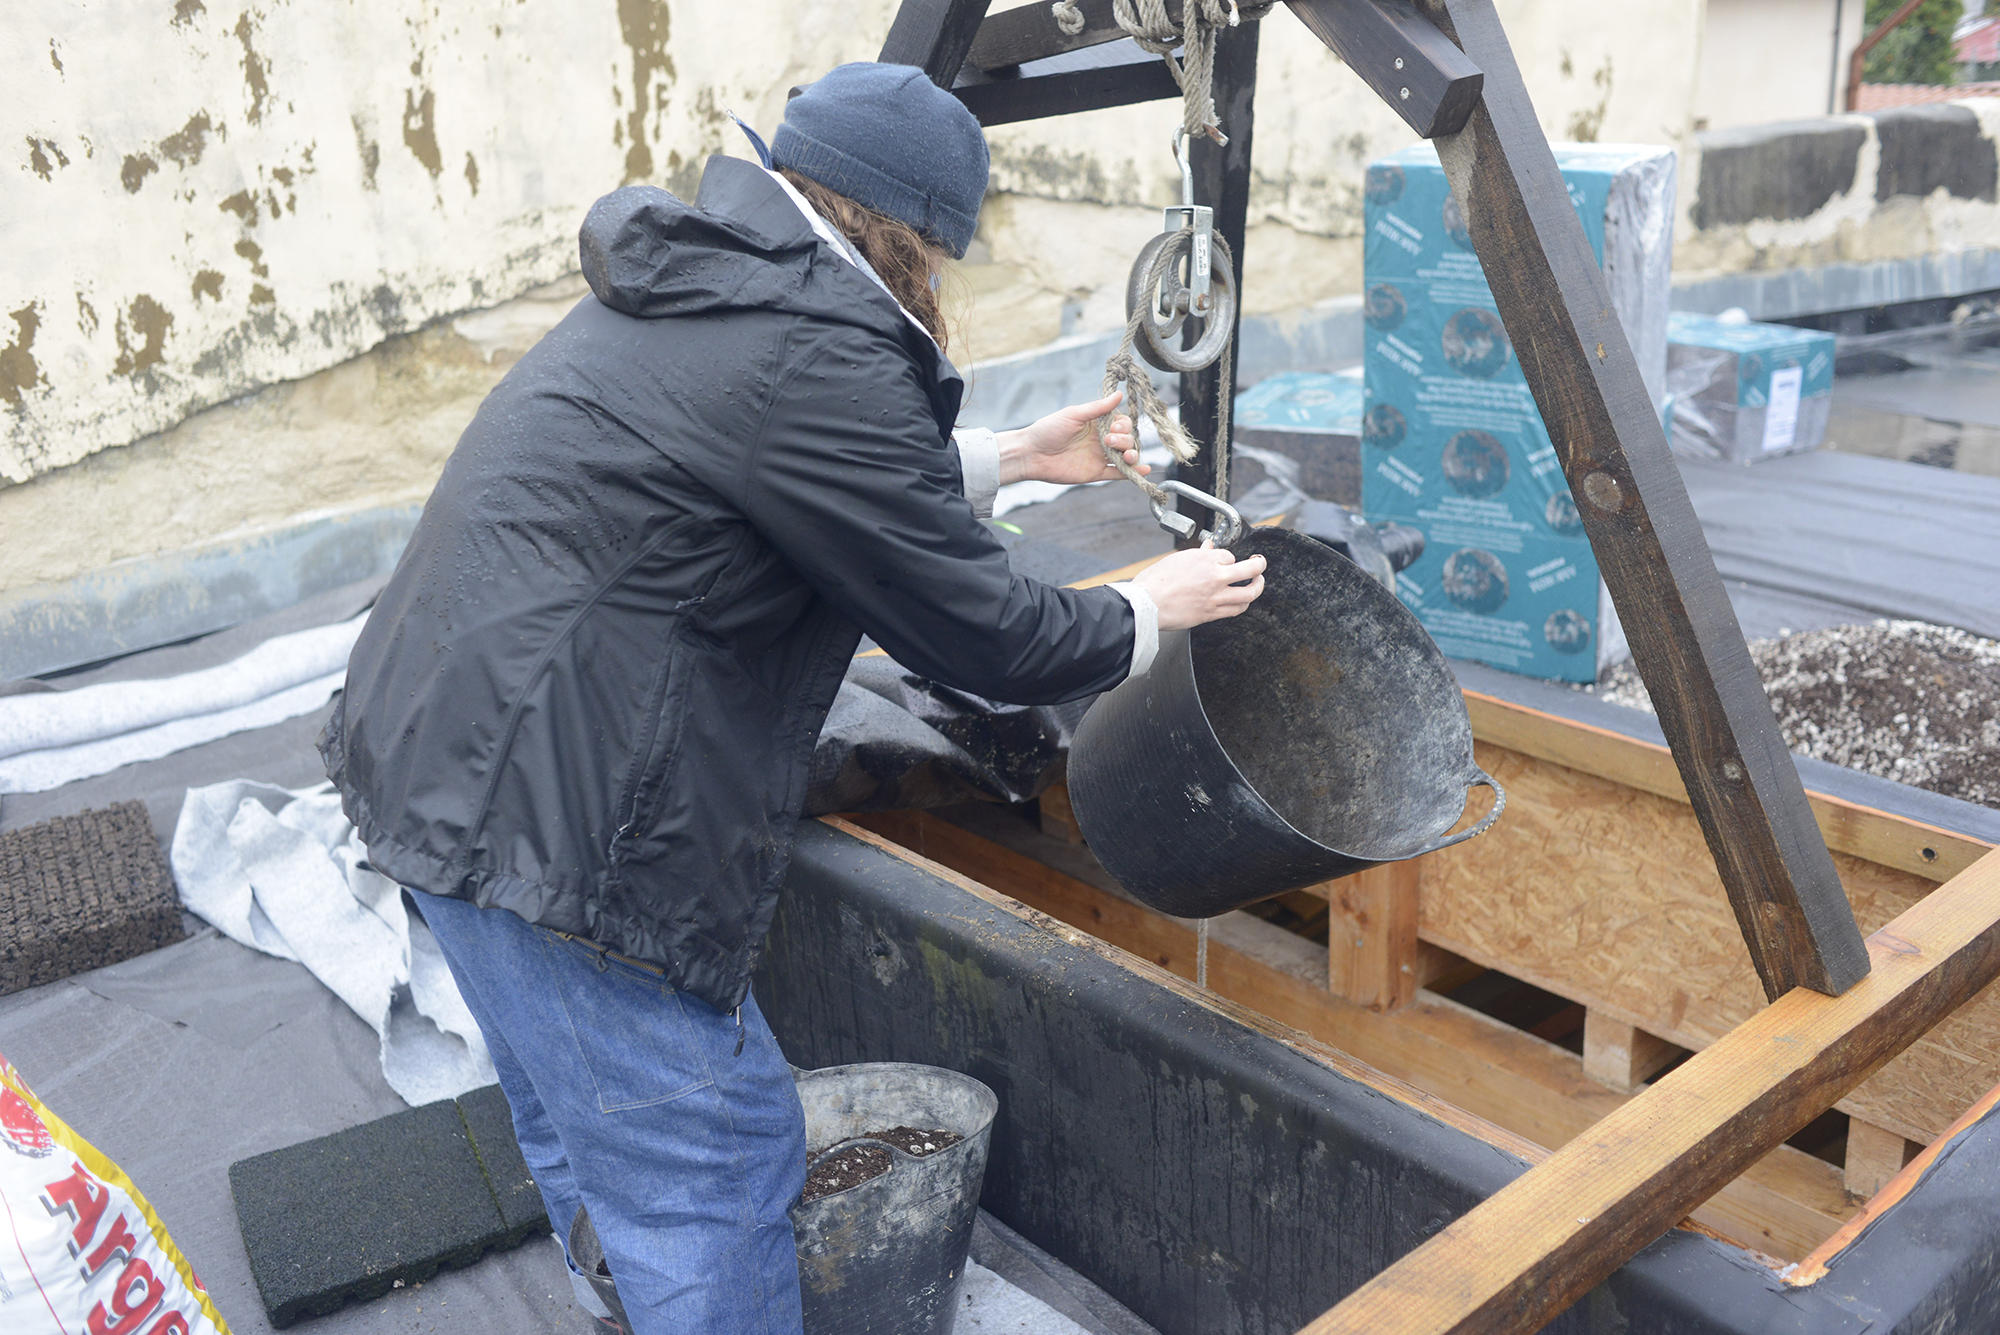
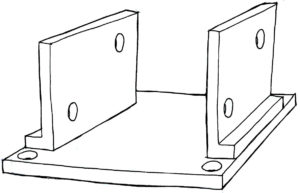
Installation of the socket

The steel socket which is holding the column is made out of three pieces of steel. The objective is to obtain a socket that correctly holds the column. We thought about different forms and finally settled with a “U”-form, that could maintain the feet of the columns and be correctly fixed to the lower part of the foundation.

Metal flanges on base plate
Base plate

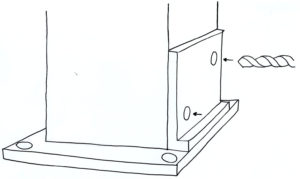
The first part being the base plate (30x30cm), which has four holes to be fixed with the threaded rods of the foundation. The holes of the plate have to line up with the position of the threaded rods and should be 1mm bigger than the diameter of the rods to facilitate their insertion. Our rods were 12mm diameter. The second part being the two steel brackets (15x20cm), which are welded to the plate and hold the column with two horizontal threaded rods. The individual steps of this process are explained below.

Drill metal plate
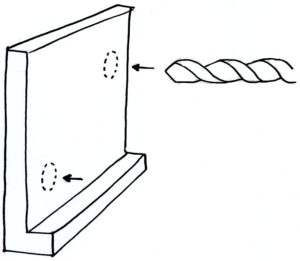
(1) The holes in both of the brackets, which should be shifted, can be drilled and should be at least 2-3mm bigger than the rods.

Plate and flange
(2) Afterward, the first bracket can be welded on the base plate.

Drill flange to timber column

(3) The piece, that results from this step can be used to mark the position of the holes on the wood of the column. For this, half of the steel socket can just be laid on the column.

Column sitting on base
Image

(4) It might be necessary to cut a little edge of the column so there is some space for the weld. After marking the holes, they can be drilled also 2-3mm bigger than the rod. The bigger the holes are, the more room there is to adjust and compensate for potential inaccuracies.

Column on base

(5) The next step is to find the right position for the second bracket. For this, the socket can be laid on the floor, and the column can be put on it. The rods can be stuck through the holes of the first bracket, the column and the second bracket, which is not fixed yet. Also, the bolts can be put on and tightened.

Sketch of steel base plate
Column steel base plate sketch

(6) The second bracket should now touch the base plate and there should be no gap. If it doesn’t, any holes can be drilled bigger to make it fit properly. If it fits, it can be fixed by welding on 4-5 small points. Afterward, the column can be removed. The second bracket should be in the right position and can now be welded on completely.

Estimated time: 5 hoursto install the socket: drill, weld and adjust.

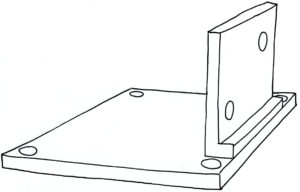
Installation of the columns

Once the socket is welded together in the “U”-form and the holes are drilled, the foundation is ready to receive the columns which have a section of 24×24 cm.Having an even level foundation is crucial and is something to pay extra attention to, during all the process. First, we used the spirit level to check the level of the lower plate, to ensure that the tyre will be placed on level ground. Indeed, it is important to keep in mind that the column will apply a heavy load that needs to be properly transferred to the foundation. For the next steps, the laying of the tyres and the fixation of the socket, make sure to always keep checking the level and the alignment of each foundation.

Metal base plate
Checking the level of the metal plate

Estimated time: 2 hours.

2 men working in workshop
Preparing the columns

The retaining wall

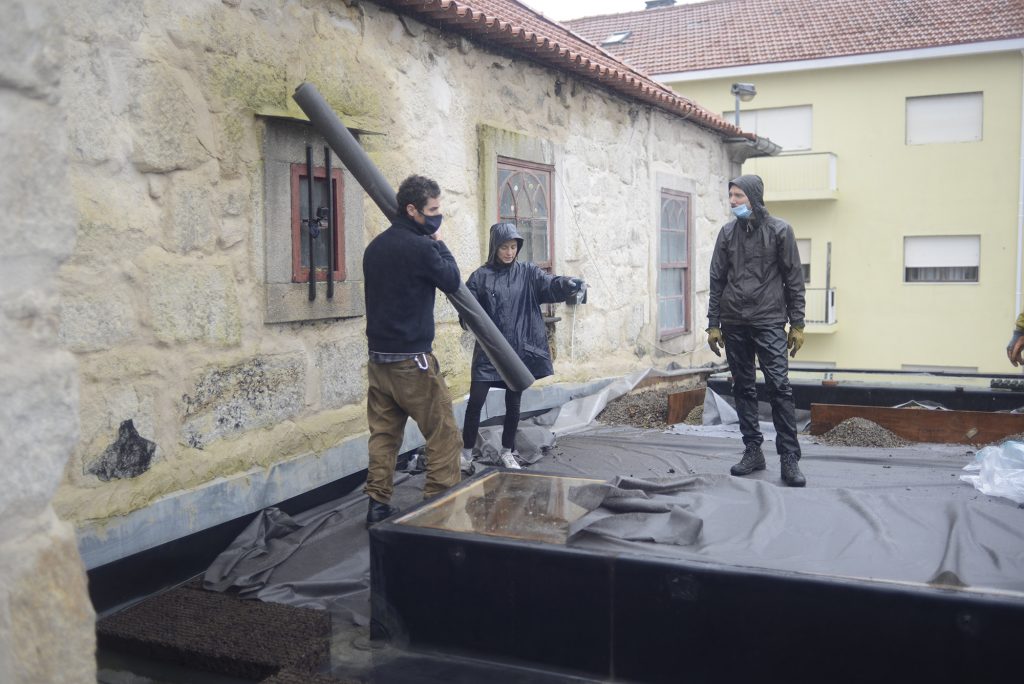
In our case, one of the foundations is positioned under the level of the earth, in an outside environment, that forced us to find a solution for the rainwater not entering inside the workshop space. A retaining wall has been constructed to withstand lateral pressure of soil, due to earth and rainwater. There are a lot of different retaining walls, used for different situations for example the gabion retaining wall or the cantilever retaining wall.

Building retaining wall
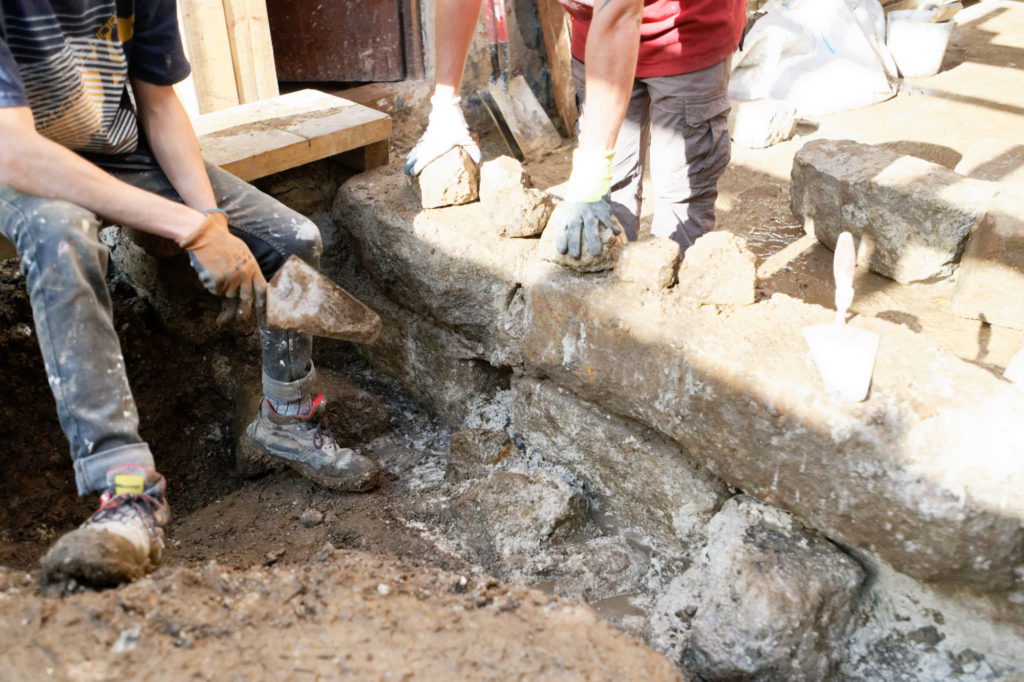
Building the retaining wall

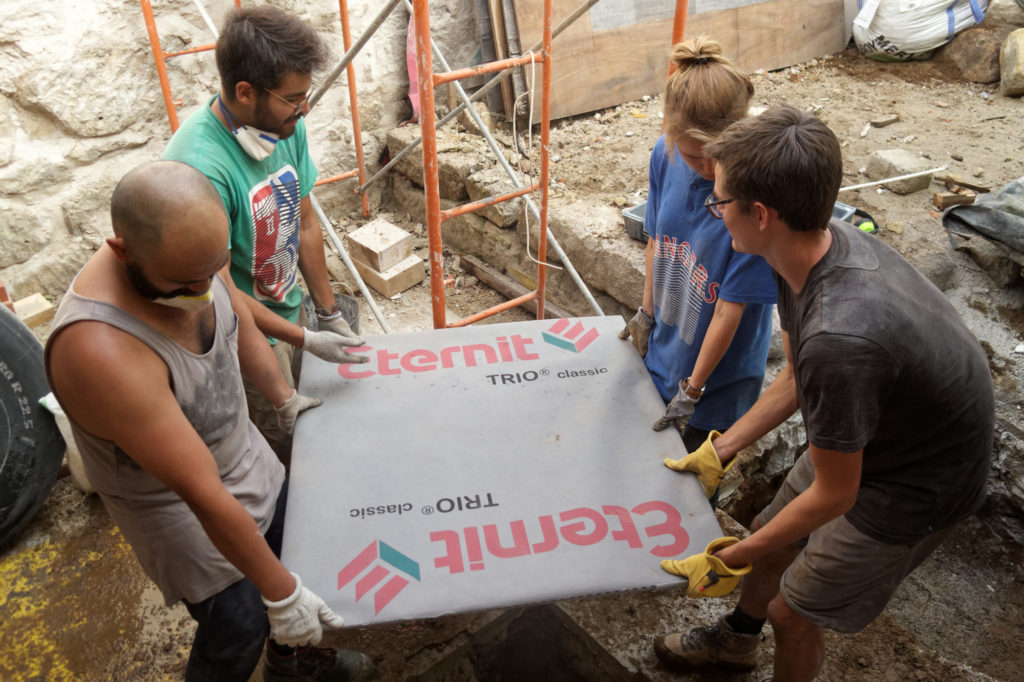
In our case, we built a gravity retaining wall that depends on its self-weight only to resist lateral earth pressure. Commonly, this needs to be of large proportions because it requires a significant gravity load. We constructed the wall from granite stones that we had acquired from previous deconstruction of old walls. To protect the column from water infiltration, we bonded the stones with a lime mortar mix.

Furthermore, we plan to realize a drain which prevents rainwater from entering the basement. Parallel to the retaining wall, it will collect excess water and runs it through a pipe into a sump away.

Cost and Time Comparison

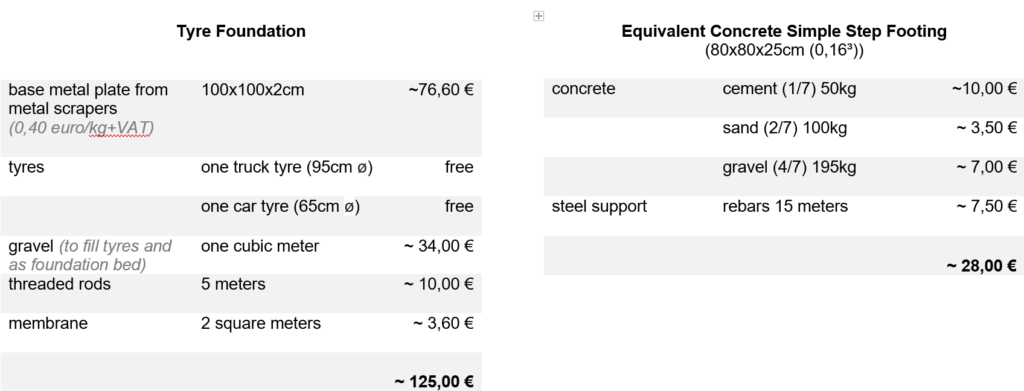
Since we are using the tyre foundation instead of a concrete foundation, the comparison of cost is a crucial point. For this reason we compare only the part of the foundation which is replaceable. The socket and the column are therefore not part of the comparison, since they are the same for both versions. We already pointed out the factor of sustainability, which is our driver in this matter. But what does this mean from an economical point of view? A tyre foundation in its simplest form is only made from dirt and scrap tyres and is therefore basically free. This method is suited for retaining walls and foundations that don’t require anchoring. Our Approach of a highly stressed single step footing which includes anchoring cost approximately 125€ compared to the concrete version of approximately 28€. As the calculation shows, the major cost factor is the metal plate which is also an open question for us. Its necessity is not completely clarified wherefore we are looking for alternatives which even out differences in price and make the single step foundation an economically competitive alternative.

Table showing cost and comparison

It is to be added that the concrete should be mixed homogeneously by a cement mixer rather than by hand, and that welding the steel reinforcement takes some time as well and electricity, and quite a few welding electrodes. In terms of time, the concrete takes at least 7 days to set sufficiently for a foundation in order to set-up the column, but is faster to make, comparatively.

Conclusion

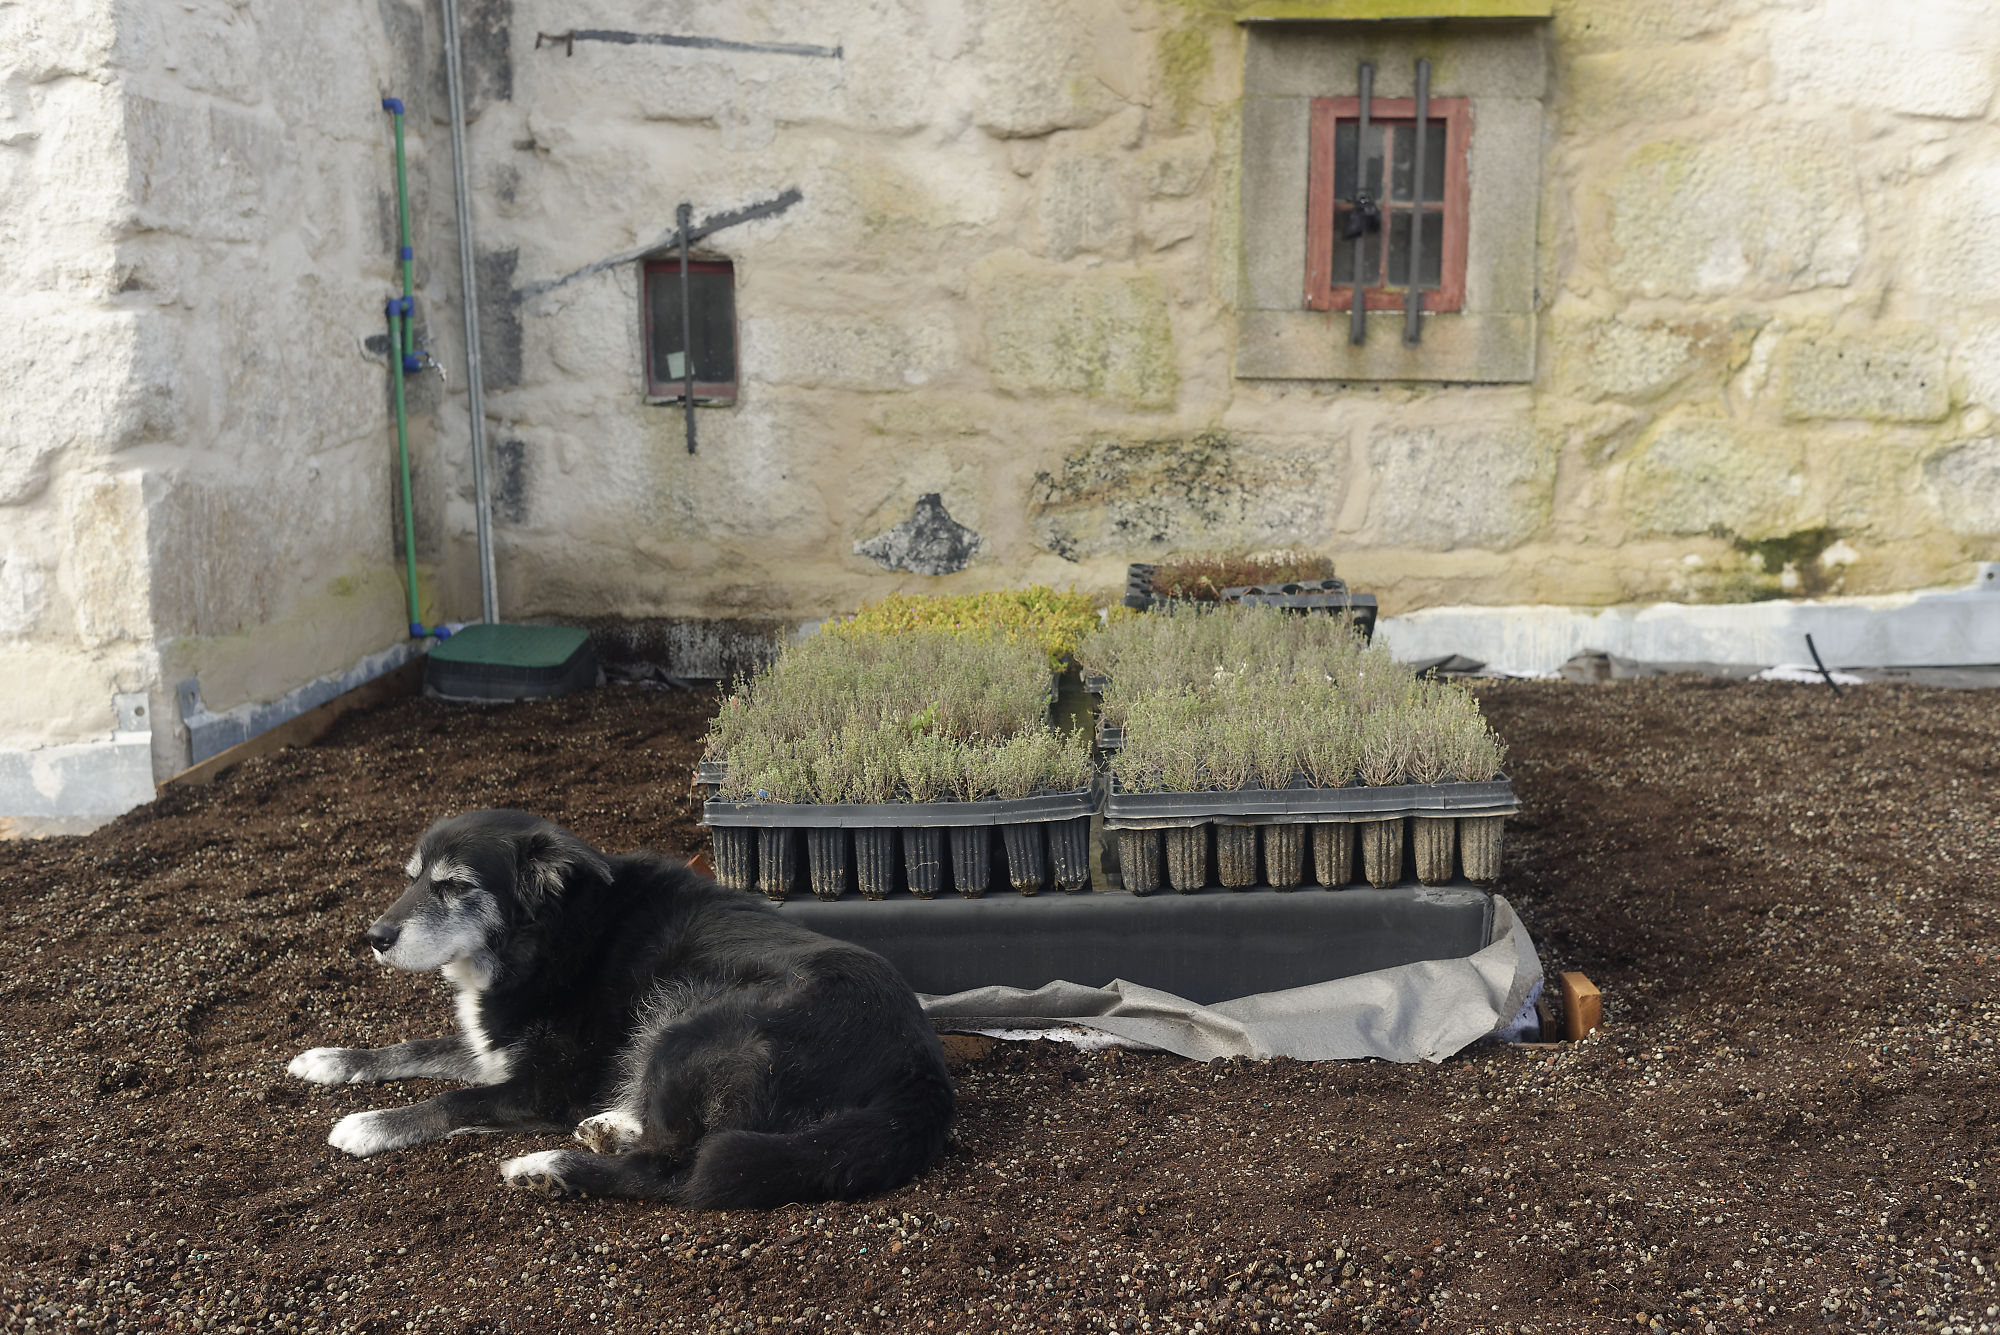
In the process of finishing the green roof, the application of the tyre foundation has been challenging but successful so far. It is carrying the roof structure but needs further observation as to how it will react under the full load of the green roof including soil and vegetation. To be able to observe any kind of movement we installed a measuring unit that we will control regularly.

Measuring settling of tyre foundation
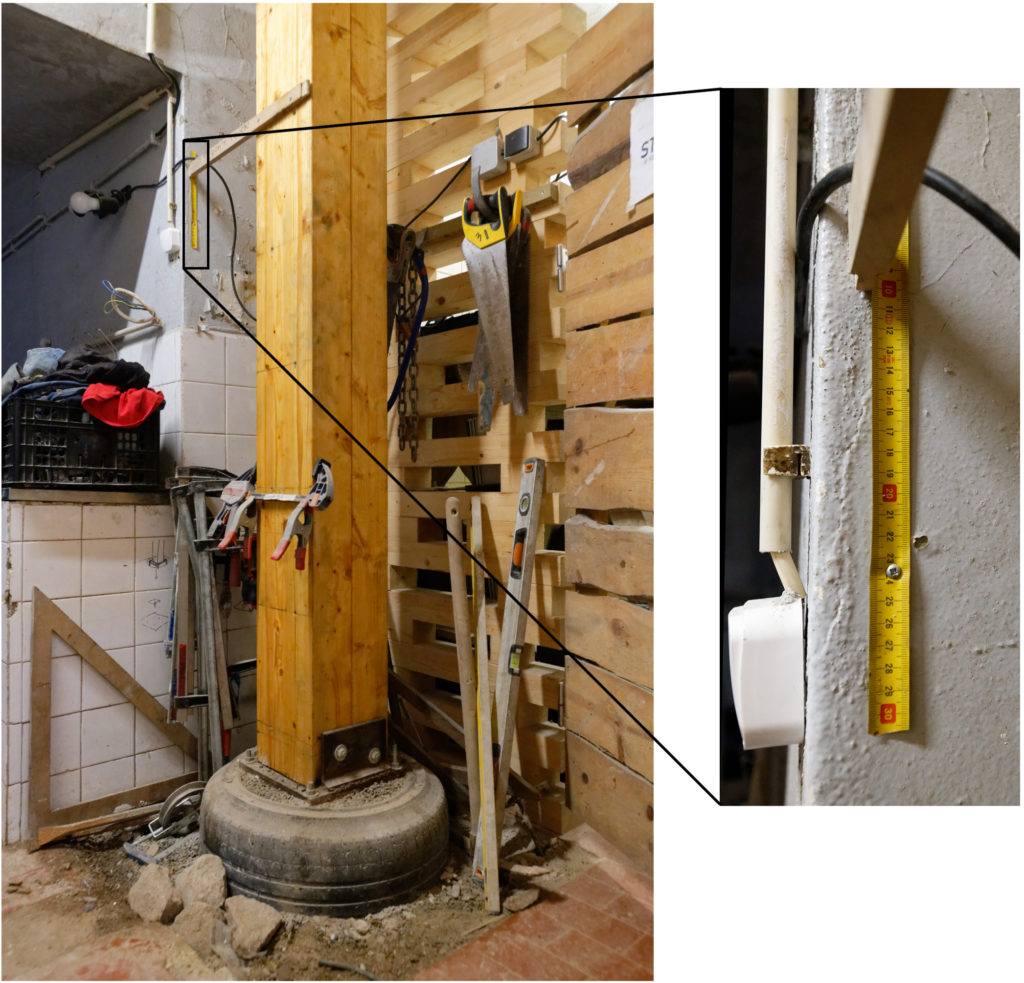
Movement measurement
How to store food outside of the fridge
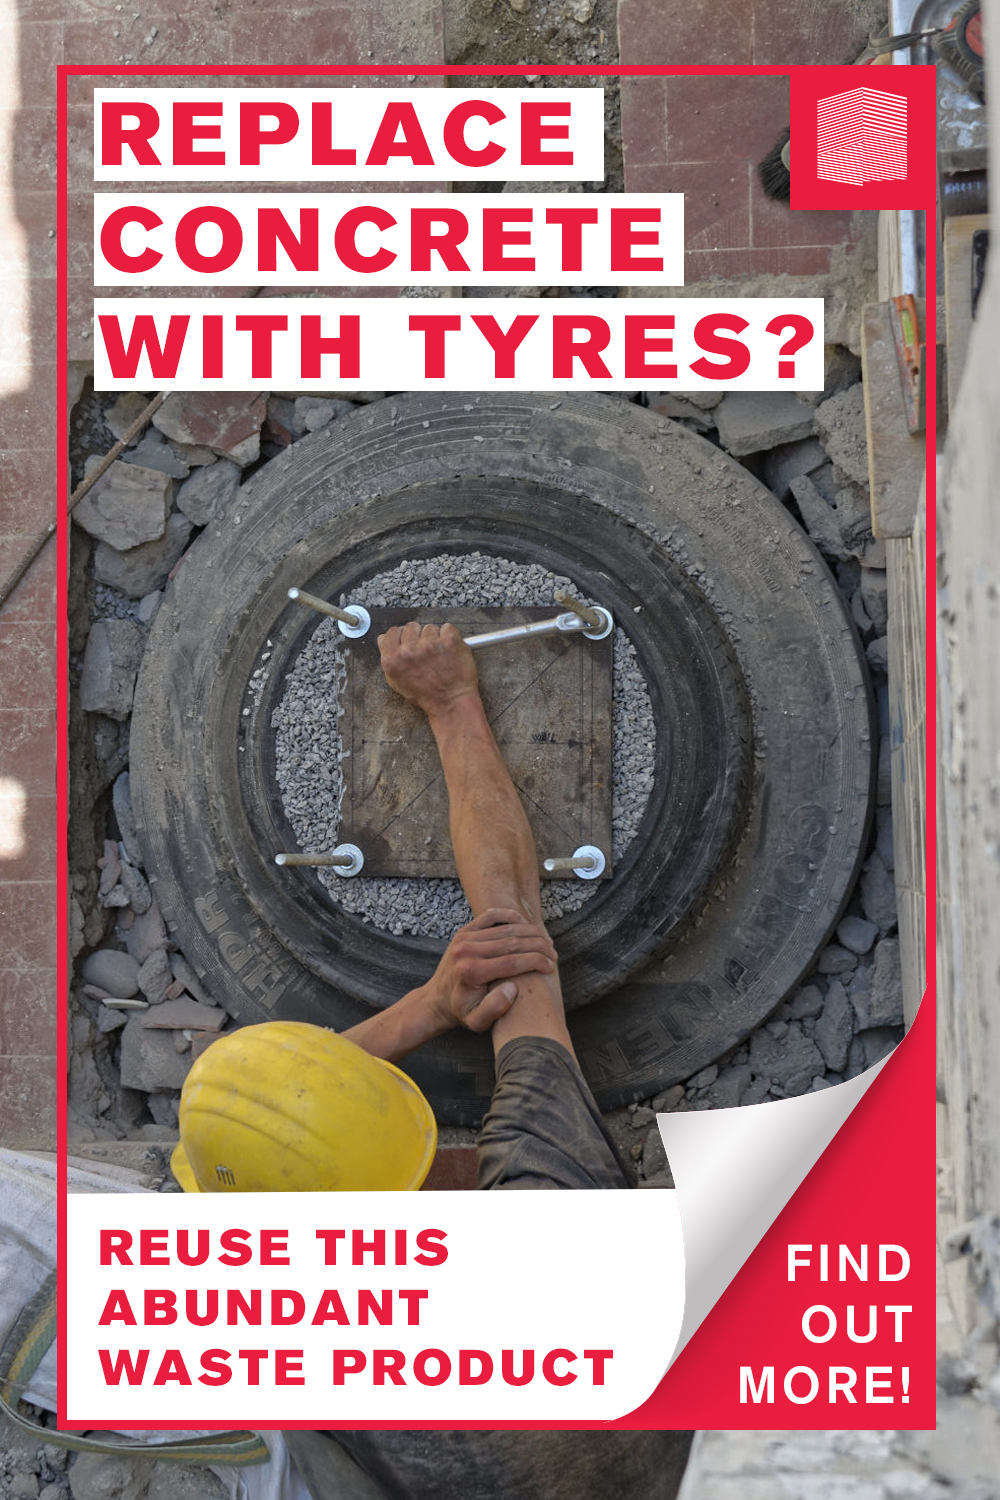
Sustainable Satisfaction? 

Concrete is an extremely popular material for construction and can be found in most parts of the world. Today concrete is the primary material used for foundations because of its many positive attributes: it is strong in compression, it is flexible as it can be poured into adapted forms and sizes, it can be applied in situ, it has good fire resistant qualities. However, the production of Portland cement, an essential constituent of concrete, leads to the release of significant amounts of CO2 and other greenhouse gases. Because of limited natural resources, such as sand, and the output of greenhouse gases, concrete production is not sustainable and therefore requires alternatives in the construction field. A possibility is to use recycled materials which have low energy costs, high durability and low maintenance requirements and therefore a small impact on the environment.

The single step footing foundation represent a viable and affordable alternative method we are looking forward to developing and using in further projects.

You want to see more? Check out the video to see how we experimented with scrap tyres and compressed earth&gravel for a low-impact and concrete free building! 
:ok_hand:

Sources

[Ar. Bindu agarwal, Ar. Aanchal Sharma] “Reuse of Waste Materials: A case study of Earthships”, in: International Journal of Science, Engineering and Technology Research (IJSETR) Volume 6, Issue 10, October 2017, [Online] available at: http://ijsetr.org/wp-content/uploads/2017/10/IJSETR-VOL-6-ISSUE-10-1364-1369.pdf (Last accessed in December 2019).

[Architecture 2030] “Buildings generate nearly 40% of annual global GHG emissions”, [Online] available at architecture2030.org/buildings_problem_why/ (Last accessed in December 2019).

[Andrew, Robbie M.] “Global CO2 emissions from cement production, 1928–2018”, CICERO Center for International Climate Research, [Online] available at: https://www.earth-syst-sci-data-discuss.net/essd-2019-152/essd-2019-152.pdf (Last accessed December 2019).

[Decorex Pro] “Technology for the construction of the foundation of tires”, [Online] available at: /en.decorexpro.com/fundament/iz-pokryshek/ (Last accessed in December 2019).

[Department for Business, Innovation and Skills London] “Estimating the Amount of CO2 Emissions that the construction industry can influence”, [Online] available at: https://assets.publishing.service.gov.uk/government/uploads/system/uploads/attachment_data/file/31737/10-1316-estimating-co2-emissions-supporting-low-carbon-igt-report.pdf (Last accessed in December 2019).

[Deva Racusin, Jacob; McArleton, Ace] “The Natural Building Companion: A Comprehensive Guide to Integrative Design and Construction”, 2012

[Flexagon Office] “Fondations et plots”, in: La Maison Ecologique 67 – fevrier et mars 2012, [Online] available at: http://yourtes.net/fichiers/Fondations%20et%20plots%20-%20La%20Maison%20Ecologique%2067%20-%20fevrier%20et
%20mars%202012.pdf (Last accessed in December 2019)

[Holy Trinity Tulse Hill on YouTube] “Packing Car Tyre Foundations (Car Tyre Foundations #4)”, [Online] available at: https://www.youtube.com/watch?v=0YV2TG5aypw (Last accessed in December 2019)

[Holy Trinity Tulse Hill on YouTube] “Car Tyre Foundations Plate Test”, [Online] available at: https://www.youtube.com/watch?v=K8Vlz6qNCfU (Last accessed in December 2019)

[König, H., Weissenfeld, P.] “Entretien écologique du bois”, ed. La plage, 2008.

[Lowimpact] “Why cement should never be used with natural buildings”, [Online] available at: https://www.lowimpact.org/why-cement-should-never-be-used-on-straw-bale-houses/ (Last accessed in December 2019).

[Mechanical Concrete] “Award Winning, Economical, Green, Industrial Strength, Construction Technology”, [Online] available at: http://www.mechanicalconcrete.com/ (Last accessed in December 2019]

[Miteco] “Descarbonatac fabrical”, [Online] available at: https://www.miteco.gob.es/es/calidad-y-evaluacion-ambiental/temas/sistema-espanol-de-inventario-sei-/040614-descarbonatac-fabric-cal_tcm30-429852.pdf [Last accessed in December 2019)

[Miteco] “Combust fabricamento”, [Online] available at: https://www.miteco.gob.es/es/calidad-y-evaluacion-ambiental/temas/sistema-espanol-de-inventario-sei-/030311-combust-fabric-cemento_tcm30-430164.pdf (Last accessed in December 2019)

[Naik, Tarun R.] “Sustainability of Concrete Construction”, [Online] available at: https://ascelibrary.org/doi/abs/10.1061/%28ASCE%291084-0680%282008%2913%3A2%2898%29 (Last accessed in December 2019).

[Russian Patents] “Module-type anti-seismic protective unit for buildings and structures”, [Online] available at: https://russianpatents.com/patent/225/2250308.html (Last accessed in December 2019]

[World Green Building Council] “New report: the building and construction sector can reach net zero carbon emissions by 2050”, [Online] available at: ww.worldgbc.org/news-media/WorldGBC-embodied-carbon-report-published (Last accessed in December 2019).

The post Tyre Foundations first appeared on Critical Concrete.

Compost Toilet : Our response to water scarcity?

Let us introduce the newest addition to our production center in Porto: the compost toilet! Although human waste is a taboo subject, we will be talking about poop a lot in this article. After all, if you refuse to address a topic, how can you challenge the conventional and unsustainable systems that surround it?

One unsustainable aspect of conventional toilets is water. Most toilets in wealthy countries use potable water to flush toilets, but water is a resource that is becoming scarce amid rising global temperatures. [1] [2] Even if this were not the case, the fact we contaminate drinking water on purpose reflects a dire need to challenge this convention. Human excrement, ironically, is a valuable resource. It can be used as a source of food for bacteria. Sewage, as well as diseases linked with fecal contamination of the environment, can be eliminated when composting is adopted as a sanitation method.[9]

In our phytodepuration article, we explored one alternative method for wastewater treatment. It consists of a marsh-like condition, in which greywater and blackwater are filtered and purified using plants. Compost toilets are the inverse; they require no water and use dead plants rather than living ones. Essentially, microbes break the waste down into humus, a completely decomposed organic material. Besides feces, the other necessary ingredients for composting are straw, sawdust, dead leaves, or wood chips. These carbon-rich materials are known in the composting world as “browns,” while the nitrogen-rich feces make up “The Greens.” The balance of browns and greens is crucial to successful decomposition; a composting toilet without carbon-rich material would not result in compost and would be a health hazard. Additionally, the browns act as a cover material to expunge smells.

Across the world, different prototypes of compost toilets are being tested within diverse capacities and contexts. One such example is the project Mobile Dry Diversion Toilet in Lagos developed by FABULOUS URBAN with several partners since 2017. The project targets families in low-income communities who do not have access to domestic sanitation. This prototype separates the urine and feces into different compartments, which finally facilitates the process of composting. [4] The urea present in urine degrades into ammonia while not only has an off putting smell but also is the reason for the extermination of the bacteria that would otherwise break down the waste.[5] For further explanation, you may follow the link to the original article. Mobile Dry Diversion Toilet


Mock-up prototype being constructed to be tested for the project Mobile Dry Diversion Toilet Photo. © FABULOUS URBAN

Public acceptance, regulations, and a lack of expertise and experience in composting toilet design and operation are all obstacles to the use of composting toilets in urban environments [3].

We have been testing our system here at the Critical Concrete office.

COMPONENTS OF OUR SYSTEM INCLUDE:

a large compost pilea toilet chambera bucket within the chambera seat for the chamber


The assembly of components of the our compost toiletTo use the compost toilet, users cover their poop with a layer of carbon-rich material. In our case, this is mostly sawdust because it is a waste material that we always have on hand. Once the collection bucket in the toilet is full, we empty it into the outdoor compost pile dedicated solely to the compost toilet. The fresh layer of waste is covered with more sawdust, which immediately removes the smell and wards away flies. We then rinse the bucket, pour the rinsing water on the compost pile to help moisten the compost pile, and cover the compost pile again with fresh sawdust.


Our compost pile setup

We use our compost primarily for feces as we are an office which means the usage of this toilet for urine will be more than feces. The imbalance of the proportion of urine and feces could result in a slower composting process. A low level of urine is not an issue for the decomposition, but with our compost pile located near our living space, we want to avoid the smell that it can cause. In the active compost pile, the waste completes its conversion into humus. The temperature at the core of the active compost pile can reach upto approximately 650C. The covering material such as saw dust, hay, weeds, straw is referred as biological sponge in the figure on the right. Once the compost pile is high enough, we leave it to cure for oneyear, after which it is safe to use for gardening. The curing time for compost containing human waste is longer than most compost piles, but it ensures the extermination of pathogens present in the feces before its use.


Section through the compost pile © The Humanure Handbook: shit in a nutshell


Temperature reading from our active compost pile

Making a functional compost toilet can be challenging, so of course, we had to manage some difficulties.  First, the volume of our waste output is disproportionate to our available yard space. After just three months of using the toilet, the compost pile is half-full. Since the active compost pile still needs to be cured once it is ample, we may have to pause our use of the compost toilet at that point. If we had unlimited space in our yard, we would have had the chance to start a new compost pile. But in an urban setting like ours, that is not an option. Our second challenge is that our active compost pile is dry because we use a lot of sawdust. In order to create a hospitable environment for the suitable bacteria to break down our waste, we need to add moisture to the pile. At this point having some levels of urine present in the compost pile would help but, we use some greywater from washing dishes instead in order to avoid washing drinking water and unpleasant smell of urine. It will be also good to mention that according to “the Humanure Handbook: shit in a nutshell” by Joseph Jenkins for a household the separating urine and feces is not necessary.[9]


Rich fertile compost

Even though there are some obstacles to using a compost toilet, especially in an urban environment, the system is quite simple overall. For us, it is a way to transition from relying on a flush toilet and better our water usage while producing garden material. We will update our progress on this blog and our social media as we adapt to this new and improved option for human waste management in our headquarters.


Do’s and Don’ts © The Humanure Handbook: shit in a nutshell


Bibliography

[1] United Nations, “Scarcity | UN-Water,” UN-Water, 2011. https://www.unwater.org/water-facts/scarcity/.

[2] E. Saner, “The no-flush movement: the unexpected rise of the composting toilet,” The Guardian, Dec. 09, 2019.

[3] C. K. Anand and D. S. Apul, “Composting toilets as a sustainable alternative to urban sanitation – A review,” Waste Management, vol. 34, no. 2, pp. 329–343, Feb. 2014, doi: 10.1016/j.wasman.2013.10.006.

[4] “Mobile Dry Diversion Toilet FABULOUS URBAN,” Swiss-Architects. https://www.swiss-architects.com/en/fabulous-urban-zurich/project/mobile-dry-diversion-toilet?nonav=1 (accessed Oct. 06, 2021).

[5] N. Rogers, “Composting toilets could be the way of the future,” ABC News, Jun. 24, 2019.

[6] T. Avellán, “The world needs more toilets – but not ones that flush,” The Conversation, Mar. 21, 2017. https://theconversation.com/the-world-needs-more-toilets-but-not-ones-that-flush-74007 (accessed Oct. 07, 2021).

[7] “Saving water in the home,” nidirect, Oct. 20, 2015. https://www.nidirect.gov.uk/articles/saving-water-home.

[8] N. Hancock, “Safe Drinking Water Foundation,” Safe Drinking Water Foundation, Nov. 30, 2016. https://www.safewater.org/fact-sheets-1/2017/1/23/water-consumption.

[9] J. C. Jenkins, HUMANURE HANDBOOK : shit in a nutshell. S.L.: Chelsea Green, 2019.


The post Compost Toilet : Our response to water scarcity? appeared first on Critical Concrete.

Did you miss our previous article…
https://concretedoctorsolutions.net/?p=104

Pavers Repair – Why Pavers Should Be Sealed

There is an excellent debate about pavers repair as some feel that it is an unnecessary expense while others consider it necessary for any house. While pavers can look good on their own, they need to be properly maintained by employing a company that offers seal pavers services. Seal pavers are specifically used in residential areas and that’s why you need to hire a professional contractor who knows exactly what he is doing.pavers

Sealing pavers help prevent dirt from entering the ground and insulating it so that water cannot be absorbed. It is also used to prevent damage from frost heaves or to make sure that the ground remains safe for walking on. In addition to sealing pavers, there are other sealing options available such as paving walkways. These walkways are an attractive way of beautifying your yard and adding value to your home.

A major problem associated with patios and driveways is that they become slippery especially during the summer months. The main cause for this is the accumulation of ice on the surface. The only way to remove that ice is to dig a deep hole and use heating elements to melt the snow which often results in pooling of water. If the melting of the snow continues then puddles may form and this becomes a danger for people walking along the surface. It is therefore important to hire a qualified paver repair contractor to carry out necessary maintenance and paver repairs.

You will find a number of different methods available for paver sealing. However, one of the best ways of improving your driveways and patios is to hire a contractor who offers services such as brick pavers repair. This kind of service assures you that your patio or driveway is sealed well so that you can enjoy your outdoor space for years to come. Pavers can be repaired easily by removing the damaged part and replacing it with a new piece. In some cases, the pavers may have to be re-sealed in order to fix an damage that has been done.

Some of the common problems that are addressed by seal pavers services include cracks, holes and erosion. Severe weather conditions such as heavy rains can also result in serious damage to driveways and patios. To avoid this, it is important that the driveway is properly sealed. In addition, you can also employ pavers sealing services to improve the condition of your walkways. These services involve the application of special paints on the walkways to make them more durable and waterproof. The coating helps to protect the pavers from eroding.

A majority of homeowners are not aware that there is a difference between brick paver repair and paver sealing. Baking stone sealants are generally used for covering bricks, mortar or stones in order to seal them and provide them with additional protection. Concrete sealants are sometimes used to provide additional layer of protection for concrete walls and driveways. Pavers are used as a part of the paving process. However, there are specific paver repair services which are required when the pavements are in need of urgent repairs or renovation.

There are several advantages associated with hiring a contractor who offers brick pavers sealing services. For one, you will be able to get professional advice on which type of material would be best suited for your needs. Moreover, your contractor will be able to evaluate the extent of damage that has occurred on the pavers and determine the best options to repair them.

There are several contractors who offer paver repair services to homeowners. The key to identifying a competent company is to find one that has a valid license to operate. Furthermore, you should check whether the contractor has the necessary skill, experience and machinery to carry out the repairs properly. If you do all these things, it will be very easy for you to find a competent paver contractor who can fix any major damages on your paver driveway.

Deciding on Your New Patio

concreteFinding concrete patios can be a daunting task. Thousands of companies, websites, and people claim to have a great concrete patio or guarantee a fabulous concrete deck. It is best to do your research before investing in any of these “improvements.” Here are some questions you can ask Concrete Contractors Jacksonville FL about your concrete improvements:

  • Do they have the experience level I need?
  • What material is best suited to my project?
  • How much is a typical concrete patio going to cost?

Find the most beautiful details on stamped concrete patios. There are exquisite hand-carved details on stamped patios, but plenty of factory-produced “flat look” patios are also available. The most appealing flat look patios have the same sloping surface and stamped concrete design elements, but they are stamped with natural stone…and this stone comes in all shapes, sizes, and colors. Choose natural stone over factory-produced flat design variations, because the natural stone will be more detailed, more interesting, and more detailed than the flat slabs.

If you are considering concrete patios for your home, the first thing you need to do is decide on a contractor. This will probably be the most important choice you make, because your patio will represent a huge investment. You don’t want a low-cost contractor that gives you sloppy workmanship or a contractor who doesn’t listen. Do some research and find the perfect contractor for your decorative concrete patios project.

There are several ways to research contractors. Most people start out by asking their friends and family about the concrete contractors they know. Ask them what they like and don’t like about the contractors they have worked with in the past. What were their experiences like? Are they happy now with the work they have done on their new project? Keep in mind that concrete contractors tend to be high-pressure salespeople…so it is important to ask these questions before deciding on any one contractor.

Another way to find a reputable Concrete patio company is to do some online research. There are several blogs and message boards that talk about residential and commercial construction. Look at what people are saying about different projects and concrete contractors. If there are many negative comments left by past customers, you may want to stay away from that company. It can be very difficult to find a new company that has been a part of a bad customer experience.

Once you have found a few potential companies, you will need to decide what type of design options you are interested in. Most patios are made out of concrete, so you will most likely have brick or pavers laid down. Some people prefer the look of brick, while others like the more natural look of the concrete patios. If you are looking for the classic look of a brick patio, then you should look for a company that offers this as an option. If you want to match a stone patio to your home, then you should find a company that offers this as well. It really just depends on what you like the most.

The most common material for concrete patios is concrete. This allows for a lot of design options for homeowners. You can choose from different colors, patterns, and textures for your patio’s floor, roof, and accessories. You can even use paper for your patio if you so desire. With all these options, you are sure to be happy with your new patio.

How to make green roofs really green?

After three years of research, design and construction, our 130 square meter roof is finally finished! 

We are happy to share with you an overview of all the steps we went through, the sustainable technologies we integrated into this project, and the impact we think green roofs can have on our urban landscapes. 

Watch the video below for an explainer of the process of constructing our ecological green roof: 

This journey started three years ago with the demolition of the old roof and replacement with a glulam structure. Along the way we integrated several sustainable technologies that we have documented with articles and videos. For instance, we used recycled tyres for the foundations of our wooden wall structure and protected the exterior timber facade using our charring technique inspired in the traditional japanese process of Yakisugi. 

For more information about these researches, check our previous articles here.

CHARRING STATION

Charring Station

TYRE FOUNDATION

Green roofs are often proposed as a solution to the lack of green space in urban environments or as a way of slowing down the flow of water. But do conventional green roofs actually deliver on these claims? Our research of modern green roofs found that the materials used in construction often do not align with the sustainability ethos that a green roof proclaims. We sought to find alternatives to plastic filters, insulation, and drainage systems: the materials that typically make up the layers of a green roof. In our mission to adopt low-tech, sustainable architecture and construction techniques we wanted to reduce material consumption and also make it as easy to replicate and apply in other situations as possible.

Our green roof layers


Green Roof detail

EPDM


Laying EPDM around rooflights
Silicone fixing
EPDM Silicone

We needed a waterproof layer to cover the OSB roof layer and protect from water ingress. We chose EPDM, a synthetic rubber, due to its availability and long life span. 

Geotextile

To protect the cork from the plant roots and the substrate a geotextile layer is needed. This prevents silt and other fine particles from clogging the grid drainage system within the cork. Geotextiles are semi permeable fabrics that help separate soil layers but permit the passage of fluids. 

Irrigation System

For the climate we enjoy here in Porto an irrigation system is definitely not necessary. However in order to control the parameters of Neoturf’s experiment a system was installed. In the future we will build a rainwater harvesting system that will allow us to store and re-use rainwater for non potable purposes. Watch this space!

Cork Insulation

Cork
Cork grid

Laying the cork panels

The most cutting edge element of this design is the inclusion of cork insulation, thanks to a partnership with Neoturf, who conducted the research about this design. This is the first time this design and technology has been implemented on a green roof of this size so we are very excited and hopeful for the results. The expanded cork is a by-product of the industrial process for manufacturing wine corks and is being increasingly used in construction. We explain more about this carbon negative wonder material in a full article here. 

Cork is a carbon negative material as the trees it is harvested from absorb CO2 from the atmosphere as they grow. These cork boards provide insulation – with the thermal efficiency of Lambda 0.038-0.040 watts per meter kelvin or R3.6/inch.In cold months this is comparable to synthetic materials such as expanded polystyrene during warm weather synthetic insulation performs very poorly due to having low thermal mass [1].  Additionally, in order to allow water to drain a grid was pre-cut into the panels: vital to withstand Porto’s frequent downpours. By using this design and material we negate the need for synthetic insulation, plastic drainage cups, and other plastic liners. 

Substrates

The second experimental aspect of our green roof is being investigated in partnership with Neoturf, who specialise in landscape design and nature based solutions. The soil that is used on green roofs cannot be composed of simply hummus. It requires other gravels or materials that reduce compaction and promote effective drainage. Neoturf are investigating how well 3 different substrates that use recycled construction waste perform in contrast to the commercially available alternative. Should this research prove successful they will promote the widespread use of recycled waste as substrate across the industry. Over the next two years they will monitor the progress of the plants growing on our roof. 

Interview with Paolo Palha from Neoturf

Check out an in-depth interview with Paolo Palha, researcher and engineer from Neoturf, that gives us insights into the significance of his research and what they are expecting to find in the next couple of years, monitoring the plants’ growth:

Conclusion

This green roof represents three years of hard work, prototype development, and teamwork. Countless hands have helped repair walls, build structure, haul earth and the thousands of other tasks needed to realise this ambitious project. We send huge love and thanks to everyone who has helped in any way. This is a major milestone for us and we are excited to see our plants grow healthy and strong. Neoturf will continue with this research over the next two years, after which we can adapt the roof to grow our own food and reach a higher level of self-sustainability.


Are you interested in implementing an ecological green roof in your project? Critical Concrete can provide advice, design and construction services for the whole process: including structure, procurement and material sourcing. Contact our studio today!

Interested in using this technology in your project?

Critical Studio can help!

Learn More!

We need your support to continue researching and developing ecological, low tech solutions. Check out our patreon to see what perks we offer in return for helping us on our sustainable mission.

The post How to make green roofs really green? first appeared on Critical Concrete.
Did you miss our previous article…
https://concretedoctorsolutions.net/?p=60

Co-ops, Cohousing & co.

Cooperative housing is discussed in one module of our Sustainable-Sustainable Architecture postgraduate course; if the topics discussed in this article pique your interest, you may be a wonderful candidate. Learn more here.

Introduction

Living in a single-family unit, either in a house or apartment building has become the living standard, but it isn’t the only possibility. Many houses are equipped with appliances and rooms that are used rarely or on a weekly basis, which suggests that there may be a more functional system out there. On the other hand, many houses in urban settings are cramped and unhealthy due to the rising cost of living in cities and urban migration. This inequity is only growing with urban migration patterns and gentrification. 

The single-family housing model is not a viable paradigm for the future. Not only is it an inefficient use of space, but it is also isolating and fails to nurture community. It tends to be cramped for the poor and leaves vulnerable groups to fend for themselves. On a deeper level, these aspects are the exact opposite of what allowed early humans to create society.

Architects, theorists, and dreamers have all wondered how our dwellings can be reshaped for better quality of life and higher affordability, but to solve these issues, they don’t need to strive for the most complicated answer. Two possibilities already exist to challenge the housing paradigm. Housing cooperatives have existed for over a century and challenge the notion of housing as a commodity. Cohousing is a method of living with others to maximize space, resources, and community. These ideas have potential to not only remedy urban housing challenges, but also to home in on environmental sustainability in domestic spaces.


a basic comparison

Cooperative Housing

Housing cooperatives, or co-ops, have existed throughout history, yet in most places they are not recognized as mainstream housing possibilities. In fact, they’ve gone so far under the radar that you might be wondering what in the world a housing cooperative is. Let’s rewind.

A housing cooperative is a housing business which has shared ownership by its residents.[1] The goal of this collective ownership is affordability rather than profit.[2] Aside from collective ownership, there is one feature that is almost always present in coops: democratic processes.[3] Residents get to vote on the major decisions of the cooperative, such as who can replace a former resident, or whether solar panels should be purchased for the building. Other important elements of cooperative housing are commitment to social goals, security in community, decent housing, personal growth, and transparency in management.[4]

The modern history of housing cooperatives in Europe began in the 1800s in Berlin with Victor Aimé Huber’s cooperative dwellings.[5] The practice evolved and expanded, becoming an opportunity for decent affordable housing and as a possibility for people to have more control over their living conditions. 

Kalkbreite | Genossenschaft Kalkbreite
Kalkbreite Cooperative in Zurich

Differences between Cooperatives

As the practice of founding co-ops spread and grew more prevalent, many differences arose. There are limited-equity coops, often for low and moderate income shareholders, market-value ownership coops, which do not require affordability; rental co-ops which have more secure tenure and have mixed-income tenants; and mutual aid co-ops which are based on solidarity and self help and are usually self-built.[6] Depending on the country and its policies, funding a new housing cooperative could rely on government, banks, or private investors. Cooperatives can be rural or urban, high rise or groups of single family housing.[7] Some co-ops began as ventures to create exclusive and wealthy multi-family housing whereas others were intended to create housing for the poor.

The most pronounced differences between cooperatives comes down to financing and legal constraints, both of which are influenced by the government where a cooperative is located. Cooperatives around the world vary subtly because of governmental constraints in their respective countries, so these are a few examples to show the possibilities.

In Austria, a country with a strong social housing sector, housing cooperatives which are below market-rate are exempt from corporation tax.[8] The government offers subsidies through public housing schemes via low-interest grants or mortgages that cover some of the construction costs.[9] In Egypt, cooperatives are exempt from many taxes, from industry profit taxes to custom taxes and importing fees, some fees including building license fees and publishing fees, and interest of deposits in banks.[10] They receive a 25% discount on state owned land which can be increased to 50%.[11] 


FCH Housing Project in Egypt

Portugal’s government reduces the VAT from 20% to 5% for cooperatives, and they also provide tax exemptions on land acquisitions and subsidize interest rates for cooperatives with low-income target groups.[12] Pakistan has a unique system for cooperative development: the state provides land to cooperatives, but cooperative shareholders are responsible for the construction of their residence on the plot they are assigned.[13] Interestingly enough, in Germany, although housing cooperatives do receive tax relief, they do not receive money from social housing funds; co-ops are not part of social housing there.[14]

The presence of housing cooperatives often hinges on politics. Since cooperatives greatly benefit from the aforementioned subsidies, tax relief, government loans, and other governmental support, proliferation of new co-ops can fluctuate with political changes. Furthermore, governments can incentivise cooperatives through policy, but they can also place limits on the founding of new cooperatives. For instance, Poland banned cooperatives in 1990, a marked difference from the years they had spent becoming mainstream during the socialist regime.[15] On the contrary, Portugal experienced an increase in co-ops after an authoritarian government which opposed the values of cooperatives was replaced.[16] In Pakistan, a corruption scandal from a cooperative paused registration of new housing cooperatives.[17]

Membership practices in cooperatives mean that even in rental cooperatives, residents are less passive inhabitants than in typical multi-family housing. Democratic foundations within cooperatives mean residents vote on management, changes, and governing structures. Each shareholder can have one vote, but in some co-ops the number of votes is equal to the number of shares. Some cooperatives require all decisions to be voted on by everyone, whereas others allow members the option of voting. Whichever way the voting system plays out, members of cooperatives have a stronger sense of ownership and participation, and can motivate one another to create a greener, healthier housing cooperative.


Student Cooperative in California via tsakett on Flickr

Cohousing

Cooperative housing shouldn’t be confused with cohousing, a modern iteration of intentional living developed in Denmark.[18] Cohousing can be implemented within cooperative housing; the two are separate systems which have potential to work together. Cohousing challenges the single family home in favor of sharing space and creating a stronger community.

Although the idea of living with others isn’t new, the term “cohousing” only arose in 1988 after two architects from the United States observed the phenomenon in Denmark, where it had gained traction.[19] Exactly twenty years prior, architect Jan Gudmand-Hoyer had spent several months discussing housing alternatives with a group of friends, developing plans for 12 houses gathered around a common space.[20] Although the project never took form, he published an influential article on the project entitled “The Missing Link between Utopia and the Dated One-Family House” which elicited responses from many families eager to live in such a situation.[21] Another article, “Children Should Have One Hundred Parents” by Bodil Graae, garnered further interest in the concept.[22] After the articles were published, families came together to purchase sites and construct two projects by 1973, which formed the blueprint for cohousing in Denmark.[23]


Rudolph Schindler House in Los Angeles via Lian Chang on Flickr

The ideas are far from new. While Gudmand-Hoyer and Graae were writing these articles, the hippie movement in the sixties was awash with communes and ideas challenging single-family living. But unlike cohousing, many hippie communes were infamous for being financially and socially unsustainable. Additionally, with roots in the early 1900’s, the intentional communities called kibbutz are well known examples shared living from Israel. In California, the Austrian architect Rudolph Schindler built one of the first ever modernist houses, designed for two families to live cooperatively and share one common kitchen.[24] All this is to say that cohousing is not a particularly unique idea, although its less radical stance is possibly what makes it such a viable housing option.

However, what differentiates cohousing from similar ideas like kibbutzim or ecovillages is that cohousing is primarily an architectural design which fosters community alongside a social agreement to live cooperatively. It does not have ideological connotations and can manifest in various ways. Cohousing can be rural or urban, meaning unlike other kinds of intentional communities, it can respond to the global urban influx. Additionally, cohousing may be equipped to handle the challenges of  urban living, such as elder- and childcare along with social isolation. Some cohousing situations share chores in common spaces such as cooking, which tends to free up time for those with busy schedules. 


Spreefeld Berlin Via MitOst on Flickr

Sustainability in Cohousing

Cohousing has some inherent advantages for sustainability. First, dense dwellings groups are more efficient to heat or cool. If the kitchen and living areas are shared, less furniture is needed and kitchen appliances only need to be purchased once for multiple families. By living in close proximity, people can share their skills, which means residents can help each other with tasks like repairing broken items instead of wasting them and buying new things. Additional benefits include purchasing food in bulk, which is better for transportation and uses less packaging. Shared garden spaces mean some food can also be cultivated in a community garden. Having a garden also provides a space to incorporate a compost bin, a challenging feature for typical urban housing.

Cohousing also has the benefit of community learning and social practices, which helps propagate care for the environment and ecological values.[25] By living with many people, there can be less car dependence. Tasks like grocery shopping can be divided and commuting to work can be done with fewer cars.[26] Finally, shared meals can result in lower food waste.[27]


Vauban Cohousing in Freiburg

Housing More Sustainably

There is potential for even more sustainability in cohousing projects. The fact that many cohousing projects are cooperatively owned, purchased before construction is complete, or even designed with input from the future residents is something that allows for even more ecological interventions. If cohousing projects are designed with sustainability in mind, they can be more energy efficient and prioritize passive sustainable strategies. For instance, common areas can incorporate daylighting and efficient ventilation. The design can include a root cellar to store vegetables for long periods in winter without the use of a fridge. Natural materials such as hempcrete, mycelium, cork, rammed earth and many more could all be used as building materials. Since some cohousing projects include aspects of self-building or auto-construction, materials and techniques are employed with easy repairability and designs that factor in longevity. Some features of sustainable design, like solar panels, come at a premium, but if a project is cooperatively owned, these additional costs are spread out among all the owners.

Occupant ownership via the housing cooperative model also means that there can be experimental sustainable practices that wouldn’t usually be possible in conventional multi-family housing. A garden could be designed to have a phytodepuration wastewater treatment system, which would simultaneously provide a beautiful marsh landscape in the common area. There could be compost toilets, green roofs, or food forests, too. With an ecological group of residents, there is also potential for the use and maintenance of a biodigester to produce biogas for cooking. The possibilities are endless, especially with lots of community minded people with various skills willing to contribute to communal projects.

Conclusion

Cohousing and cooperatives are two approaches to financial and ecological housing issues. They provide a peek into what housing would look like if we didn’t approach it from a single-family perspective. When the concepts are combined, they create feasible models for better living conditions, affordable housing, and stronger communities. Moving away from profit and towards collective action gives an added opportunity for a more ecological way of living. Existing cohousing cooperatives are great launch pads for pushing the possibilities of environmentally sustainable multi-family housing, while budding cohousing cooperatives have the opportunity to design healthy living spaces for both people and the planet. 

[1] https://4bfebv17goxj464grl4a02gz-wpengine.netdna-ssl.com/wp-content/uploads/drupal/Profiles%20of%20a%20movement%20final%20web%20ISBN.pdf

[2] Note: There are some cooperatives which are not intended to be affordable housing, but the collective ownership does improve the affordability, even in those cases.

[3] https://www.ica.coop/en/events/cooperative-housing-key-model-sustainable-housing-europe

[4]https://4bfebv17goxj464grl4a02gz-wpengine.netdna-ssl.com/wp-content/uploads/drupal/Profiles%20of%20a%20movement%20final%20web%20ISBN.pdf

[5] https://www.housingeurope.eu/event-183/cooperative-housing

[6] https://www.housinginternational.coop/sdgs-2/cooperative-housing-models/

[7] https://4bfebv17goxj464grl4a02gz-wpengine.netdna-ssl.com/wp-content/uploads/drupal/Profiles%20of%20a%20movement%20final%20web%20ISBN.pdf

[8] https://4bfebv17goxj464grl4a02gz-wpengine.netdna-ssl.com/wp-content/uploads/drupal/Profiles%20of%20a%20movement%20final%20web%20ISBN.pdf

[9] Ibid.

[10] Ibid.

[11] Ibid.

[12] Ibid.

[13] Ibid.

[14] Ibid.

[15] Ibid.

[16] Ibid.

[17] Ibid.

[18]  https://www.cohousing.ca/about-cohousing/history-of-cohousing/

[19] http://www.cohousingco.com/cohousing

[20] https://www.cohousing.ca/about-cohousing/history-of-cohousing/

[21] Ibid.

[22] Ibid.

[23] Ibid.

[24] https://www.archdaily.com/783384/ad-classics-kings-road-house-rudolf-schindler

[25] https://www.iberdrola.com/social-commitment/cohousing

[26]  https://www.moneycrashers.com/communal-living-cohousing-types-benefits-intentional-communities/

[27]  https://www.moneycrashers.com/communal-living-cohousing-types-benefits-intentional-communities/

The post Co-ops, Cohousing & co. first appeared on Critical Concrete.

Natural Wood Protection – Vol. 2

Researching new methods of wood protection are of key importance for the work we do here at Critical Concrete. Wood is the primary material we use to build and renovate houses; from the structure, to the cladding, and the furniture. Priorities of our wood protection solutions include; relatively low-cost, accessible materials, simple recipes. Prioritising these aspects means it is easy to scale up for large projects. 

Tricoil

For our renovation project in Esposende, we rebuilt the roof with a wooden structure, so it was essential to protect the wood for the longevity of the building. With the cladding substructure, window lintel, and furniture we had a lot of wood to treat. Through research of various recipes we came up with a recipe and method which fit the requirements we had. 

TRICOIL (Turpentine/Tung Raw Linseed I Coconut OIL or 3 oil) is a blend of three different oils which gives protection from parasites and environmental conditions. Linseed oil, Tung oil, and Coconut oil are blended together using turpentine as a solvent to combine the oils and allow for deeper penetration of tricoil into the wood. The original recipe and method we based this upon can be found here [1]. 

Tung oil has been used by the Chinese for hundreds of years to protect wooden boats. It is derived from pressing the nuts of the Tung tree. It has anti-termitic properties and offers durable waterproofing. 

Raw Linseed oil, obtained from pressing flax seeds, creates a water repellent barrier on the wood.

Coconut oil, rich in fatty acids, nourishes and protects the wood. 

Turpentine, a solvent derived from tree resin, thins and blends the oils for easy application to the wood. 

Method


Ratio of ingredients for TRICOIL

Heat a large pot of water to 50°C to act as a bain-marie. Place a jar of coconut oil and turpentine into the bain-marie and cook until this mixture has also reached 50°C, stir often. If you have a big enough pot, you can do the same with the linseed oil and tung oil together in one jar, placed in the bain-marie. Once the mixtures have reached the temperature, mix them together.
The Tricoil is now ready to be applied on clean, sanded wood. Apply to the wood once per day for 3-4 days and dry in an open space. 

Burning Station

Since discovering the wonders of Yakisugi, it has become a firm favourite as a method of protecting wood in many of our projects. Our first article in wood protection dives into the science of the method and the properties of charred wood. 

After a fair few projects using our brick burning station at CC HQ, we enlisted it for charring wood for the cladding of the Esposende house. Around a half ton of bricks were put in the van and rebuilt on the street. After so many uses at such high temperatures the normal bricks and even special fire-bricks began to crack and posed a risk of collapse while using the stove. Thus we decided to design a new, super-portable, efficient charring station. 


Blueprint of the new charring station

The body of the charring station consists of an old oil drum, an inlet for passing the wood to be treated through, a feeder for fuel, and a hole to attach a chimney. It mimics the previous charring station with the L shape encouraging an upward draft. The feeder is made of an old fire extinguisher welded on with extra metal for support. 

With the use of two rollers, 1 person can manage the charring station themselves. If the fire is burning well and frequently stocked, it is possible to char a 3m 30x3cm board in 10-15 minutes for both sides. 

The efficiency and speed of this burning station allowed us to burn all the wood for the board and batten cladding of the house in Esposende. Furthermore, this higher degree of flame control allowed us to achieve a uniform result for the boards to not warp and lose their integrity. 

For improvements of the burning station we would advise a metal plate on the lip of the openings for the board to rest on – otherwise it can mark the board. Additionally, a way to adjust the opening for different sizes of boards would increase the efficiency by reducing excess draft. 

Top Tips

Have an ample supply of fuel available to keep the fire well stocked and at a medium-high flame.If the flame is burning too high it is better to do a few quick passes to avoid over-charring the wood which can result in warping.Apply raw linseed oil after charring to compensate for loss of moisture and flexibility.If the wood does warp and you are using it for board and batten cladding, mount the board with the bend curving away from the wall to reduce pressure and prevent cracking. 

There are a few drawbacks of this method and these should be considered before employing this technique in your own projects. One is the time intensive nature of the process. The burning station was fired up most days of the 6 weeks of Esposende workshop. This works if there are many hands available to take on the relatively low-skill task and take turns amongst each other. However it may prove tiresome for a self-build project. The second drawback is the issue of smoke. At Critical Concrete HQ we have neighbours in close proximity, requiring us to build an extra tall chimney to prevent smoking out the neighbours. Having ample space is also a factor to consider. The actual working site of Esposende was relatively small, however, we were lucky to be able to use the quiet street, much to the amusement of the neighbours! Looking to our next renovation project we will need to contain construction activities as much as possible as the street is very narrow with no pavement. For situations when these drawbacks are apparent we endeavour to find more suitable solutions. 


New burning station

Yakisugi cladding on wooden substructure treated with TRICOIL

Swedish Paint / Flour Paint

Filling the requirements of cheap, scalable, non-toxic and accessible ingredients, Swedish Paint is an excellent choice. Swedish paint has long been used as the primary choice for wood protection in many Nordic countries. It can endure the harsh climate while offering an appealing aesthetic. 


Swedish Paint can last for up to a decade before a new application is needed.
Photo by Anders Nord

Method

This is a new method for us and we have tried out one recipe using the materials we had available in the workshop [2].

For 3 litres of paint the following measurements can be used:

300g of flour3l of water600g of pigment300ml of linseed oil

For pigment, we used red clay that we had left over from making a rammed earth floor and wood ash from a local saw mill. There are many options for pigment, do some research and see what is available in your local area. 

This is the very beginning of our research with Swedish paint so there will be more information to come in the future as we experiment with different recipes and ingredients. We will leave these samples outside to see how they withstand the weather.


Paint samples using wood ash and clay

References

[1] ​​https://www.artamin.it/impregnante-ad-olio-fatto-in-casa/

[2] https://engelleben-free-fr.translate.goog/index.php/recette-de-la-peinture-a-la-farine-protection-des-bois-exterieurs?_x_tr_sl=auto&_x_tr_tl=en&_x_tr_hl=en&_x_tr_pto=ajax,elem&_x_tr_sch=http

The post Natural Wood Protection – Vol. 2 first appeared on Critical Concrete.
Always check our latest articles at…
https://concretedoctorsolutions.net//category/concrete-blogs

concrete restoration

How to Fix Cracked Concrete Driveway?

How to fix a cracked concrete driveway? It may sound like a stupid question when your driveway is in tatters, but the truth is that it can be a problem if not taken care of. Cracks usually appear on driveways due to excessive heat and weathering, so you need to remedy this immediately. Most people think that you should rip up the entire section, but this is actually the last thing you should do.

The best option would be to repair the cracks to get back to the surface’s original condition. This would entail getting a penetrating solvent and ensuring that you have no water or other liquid leaks present. Once you are done, you can be sanding the surface until you get the original condition. Then you will seal everything using polyethylene sheeting and repair any hardware. If you had to move the vehicle out of the garage, then all you need is to patch up any damages that you might have overlooked.

How to fix cracked asphalt driveway? This is actually a little more involved than cracking concrete. You first need to make sure that there are no pools of water underneath your driveway; otherwise, you will end up with puddles all around. Once you have cleaned the area, you need to remove the shrink wrap and apply some new asphalt to the bottom of the cracks.

How to fix cracked concrete on a patio? This requires some heavy-duty equipment that you will not be able to get at your local home supply store. Basically, you will need to dig up the crack area and then add new concrete where the old concrete ends. This will have to be done in stages to get the right consistency. The idea is to have the concrete dry quickly to prevent pools of water from forming.

How to fix cracked asphalt on a cement block? This can be done very quickly by adding a second layer of asphalt. To do this properly, however, you will need a truck with a chute. The problem with this, of course, is that you may need to stay home all day to get the job done.

How to fix cracked asphalt on a driveway that you have never laid concrete on before? This requires some heavy equipment and long hours. First, you will need to chip away at the concrete until it becomes thin enough to spread over the entire crack. Then, you will need to use a heavy-duty industrial sprayer to apply the asphalt, making sure to get an even layer on all sides of the crack.

How to fix cracked concrete on a driveway that is already worn? This is one more DIY project that may take a few days or a week to complete. Basically, you will have to scrape off the old asphalt to expose the new concrete. From there, you will have to put up a sealer (for the first time!)

How to fix cracked concrete on a driveway without any mechanization? This is perhaps the most time-consuming and expensive way to get a new driveway. In fact, the only other DIY job that could be as tedious is replacing a single asphalt patch. If you are not willing to spend countless hours on the project, then you should hire someone to do it for you. Make sure you have a contract in place before you begin, though, so that you both know what your obligations are. There’s nothing worse than finding out you can’t have the job done because you can’t afford the materials!