What is a Boom Pump?

Have you ever come across a concrete boom pump before? Unless you work in the construction trade, you may be forgiven for not really knowing what a boom pump actually does. However, for commercial and residential construction projects alike, it’s one of the most useful concrete pumping and layering tools out there.

What Exactly is a Concrete Boom Pump?

A concrete boom pump truck is an item that will help to deliver and pour concrete to projects which might have work being undertaken high off of the ground. For example, you may be working on a high-rise building or a block of flats, and it might otherwise be tricky for you to get concrete or cement up to such a height.

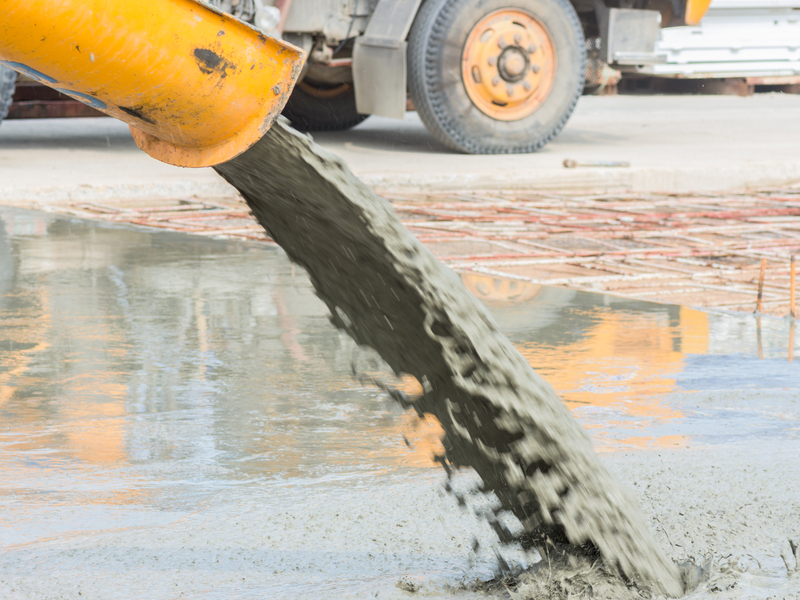
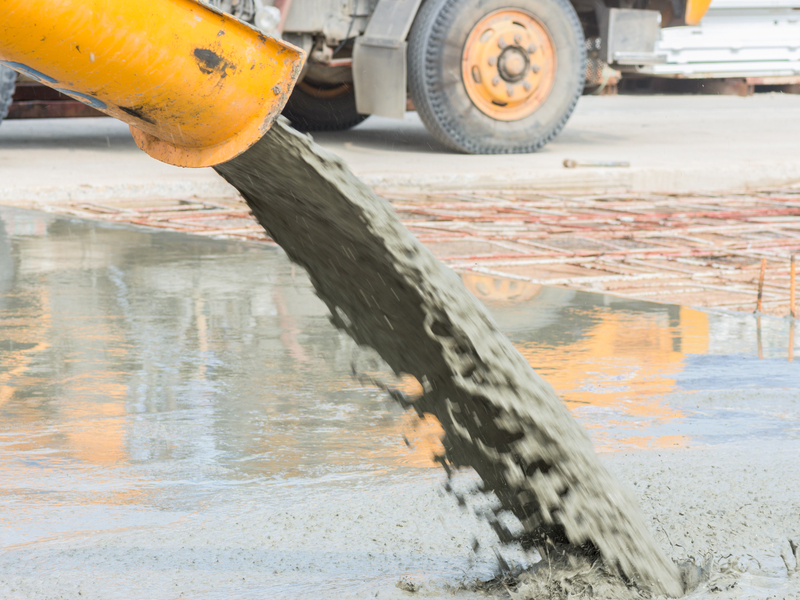
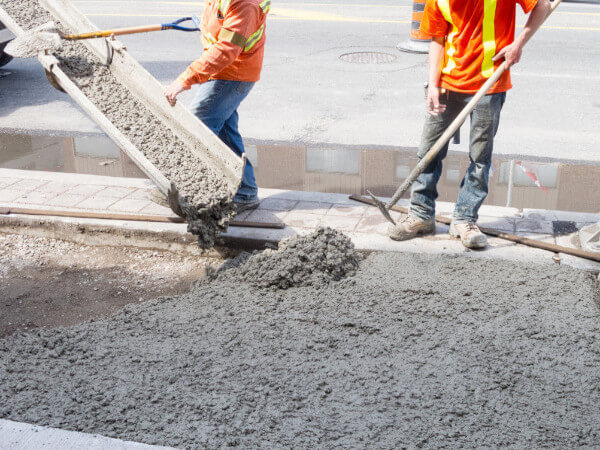
Boom pump on construction site.

A boom pump offers a hydraulic arm, which stretches up from the vehicle’s base level to pump concrete directly to the project area. A boom pump can arrive via truck, so that you have a mobile unit at your disposal, or you can also invest in static systems, too. Of course, there are no right or wrong answers as to which system works best here – it’s all a case of considering your individual needs!

You’ll likely want to invest in a concrete boom pump if you are struggling to get those trickier bits of your construction or building project layered in concrete from a standing level. In many cases, this type of pump will take away plenty of time and effort and will make sure that there is less labour involved with concrete layering.

How Else Might a Boom Pump Device be Helpful?

As mentioned, the boom pump system is great if you have high-level concrete pouring needs. It’s also a fantastic asset if there are obstacles or obstructions in your way, and normal concrete pumping or pouring systems are unable to support you.

You might also find that this type of concrete pump is ideal for pouring mix from above down onto a project. Ultimately, you’ll find that a boom pump is going to give you easier access to some of the trickier points and fixtures which traditional concrete solutions just can’t handle.

The best news is that a boom pumping system is very flexible, meaning that while you can generally expect a stretch of around 72m at basic length, you can also invest in extensions or ask for additional help from concrete suppliers.

Is a Boom Pump Right for my Project?

If you are finding laying foundations difficult due to tricky to reach spaces, then a concrete boom pump vehicle could make all the difference. Why not take a look at the pump options available and take a chance on a more flexible system and operation for your building and construction needs?

There’s no need for you to be doing more work and taking on more hassle than you need to. A fantastic boom pumping system could save you time, money, and energy. Take a look at what’s available and compare! If you would like to find out more about how we can help you, get in touch today on 07812 182778 or head over to our contact page for more details.

The post What is a Boom Pump? first appeared on Base Concrete.

The Different Types of Concrete Pumps

Construction projects require a constant supply of concrete, and without it, the construction project will be impossible to complete. Construction projects are usually faced with the issue of how to efficiently handle a large quantity of concrete manually. To resolve this issue, the use of the different types of concrete pumps at construction sites was invented.

This invention made the handling and placing of large concrete easier. Concrete pumps also made the construction process of tall buildings, skyscrapers and large construction projects more organised and efficient. The market has different types of concrete pumps available according to the size of the construction projects. There are also many concrete services which allow concrete pumps to be hired.

The different types of concrete pumps used for the diverse construction project are cost-effective. During construction projects, it is very crucial to choose the right concrete pumps that are economical, efficient and one that is specifically designed for your particular construction project. Below are the different types of concrete pumps and their benefits.

Concrete Pumps can be categorised into boom pumps, concrete pumps trucks, stationary pumps and concrete line pumps.

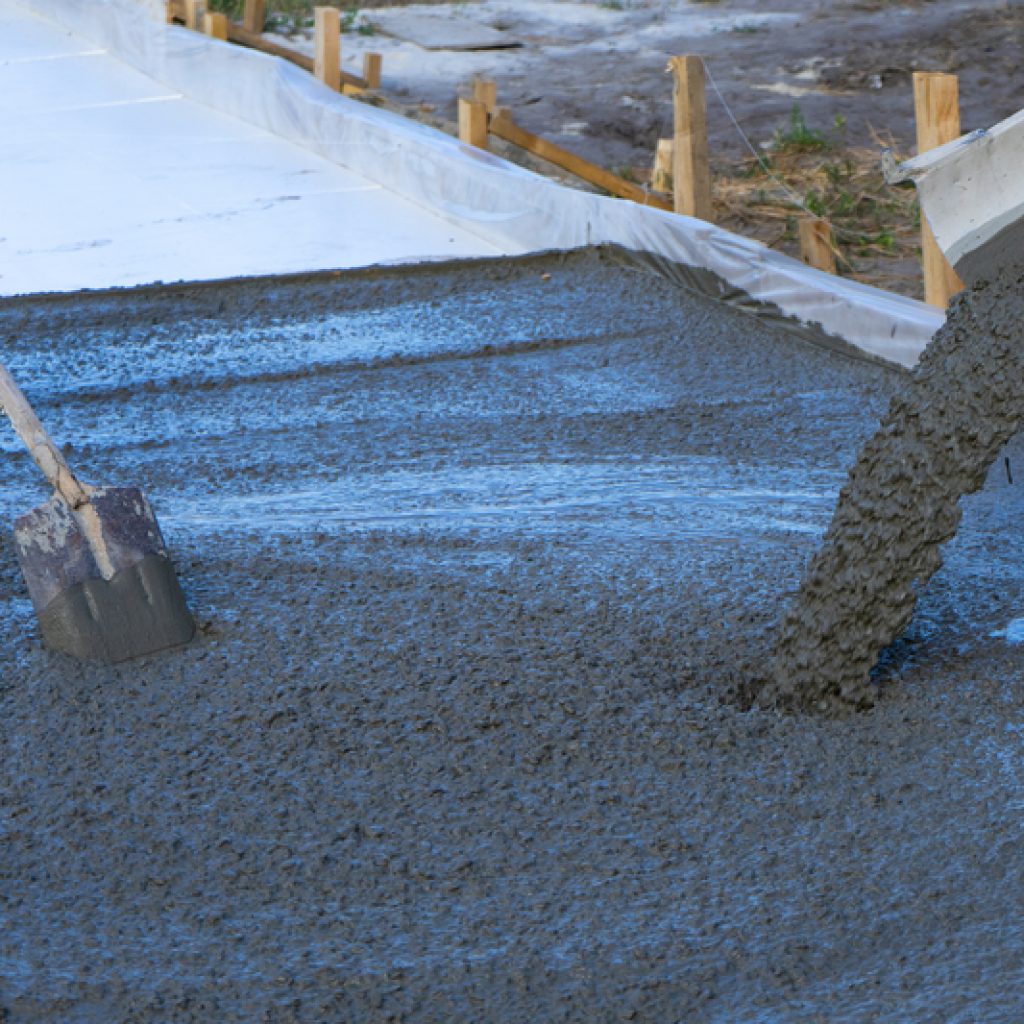
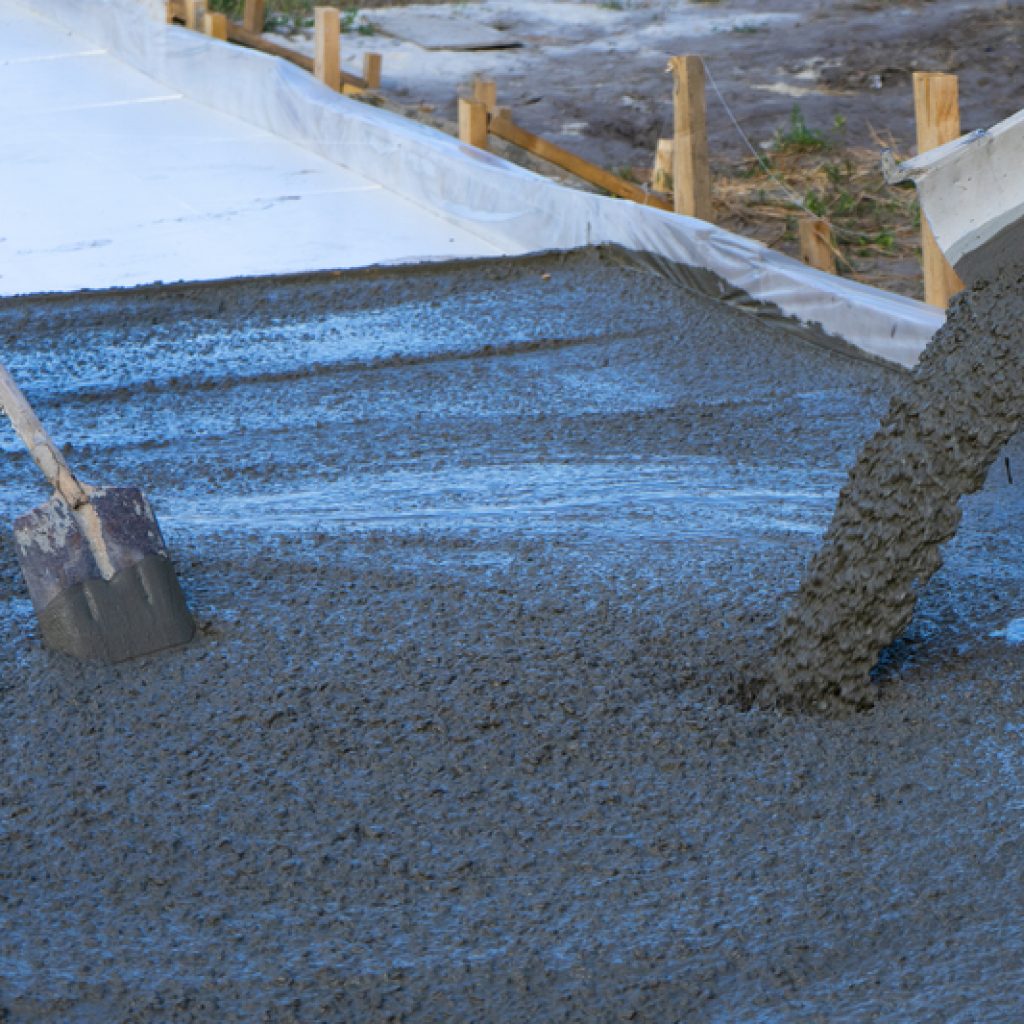
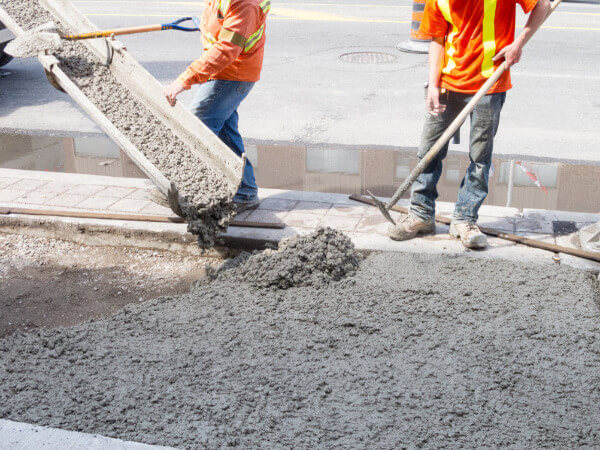
a concrete pump pouring concrete onto construction site

Boom Pump

A boom pump is a type of concrete pump which is characterised by a controlled hydraulic arm where concrete is placed and dispersed accurately in the right direction where it’s needed. 

They’re usually attached to a truck. Boom pumps are normally used for huge construction projects. It can easily navigate any barrier on its way and provides the right portions and angles during the construction process.

It’s easy to manoeuvre a boom pump. And it can churn out a large amount of concrete at a fast speed. It’s highly recommended to use the boom pumps for large construction projects.

Stationary pump

The stationary pump, unlike boom pumps, is characterised by less manoeuvrability. It’s usually attached to a truck or mounted on a trailer and the concrete is pumped through rubber hoses or steel pipelines. Working with a stationary pump requires that the direction of the pipeline be directed to the particular portion where the concrete is needed.

Stationary pumps are known for pouring concrete at a slower speed than other types of pump. So it’s recommended where the demand for a smaller volume of concrete is required for a construction project.

Specialised Usage Pump

Specialised usage pumps are one of the different types of concrete pumps that are readily available. Specialised Usage Pumps are a premium option. They can be designed for special type of construction projects, such as construction projects in mines or tunnels.

Concrete Line Pumps

Concrete line pumps are usually referred to as a trailer-mounted concrete pump or truck-mounted concrete pump because of its arrangement. The arrangement features a line pump attached to the trailer or the back of the truck. They are compact and recommended for small construction projects.

When choosing the right type of concrete pumps for a particular construction project, factors like the design of concrete mix, vertical and horizontal distances, size of the aggregate being used, volume or quantity of concrete should be carefully considered. Thank you for reading this month’s blog. Should you have any queries or perhaps are looking for equipment to hire, call us on 01442 389105 or visit our contact page for more details.

The post The Different Types of Concrete Pumps first appeared on Base Concrete.

Benefits of Onsite Mixed Concrete

While you’re in the planning stages of your latest project, have you considered the benefits of onsite mixed concrete? If not, let us explain!

Budget

One of the great benefits is the amount of control that you have if you opt to use on-site mixed concrete. You see with this method you will receive the exact amount and mix of concrete that you require. As a result, you are controlling your budget by only paying for the amount you use. It avoids having loads of unused concrete hanging about!

Consistency of Concrete

Using mixed on-site concrete supply allows you more control over the consistency of the concrete. This is because, with the volumetric mixers that will be used, the materials that go into the concrete are kept separate until the batching process. This will mean you would be able to pick an exact consistency that would suit your needs.


Say, for some reason the consistency required changed halfway through the project, have no fear, as it’s on-site, this can still be altered! The great thing is the logistical advantage-you have when the concrete is delivered directly to your site. You will find that many companies offer next or even same-day delivery.

Fresh Concrete

That points us to another mixed concrete benefit. If you have the supply on-site, you’re providing your team with access to constant fresh concrete. When it comes to the pouring, it is always fresh. There are times when a delay may hit your project but that cannot be helped, and the fact you can keep the concrete fresh is a massive bonus.


Do note that if traditional drum mixers are being used, these can be impacted by delays because of their need to transport pre-mixed concrete in a drum from the yard to a site, meaning there is a chance it could go off. But with a mixed onsite service, there will be the option to change or extend the order on the spot, because the concrete providers will be able to produce the exact type of concrete needed-fresh!

Reduced Waste 

Keeping with the notion of how much more control you have with this concrete set up when it comes to on-site mixed concrete it is easier to scale your needs in relation to project size. Working on a very large site? You would benefit from volumetric mixers as these can hold up to twice the amount of the traditional drum mixers. Or perhaps it’s more of a smaller project? Likewise, on a small site, the mixers can produce smaller volumes with ease. This helps you to have the amounts you need and cut down on waste in the process.

Concrete Waste

Regarding quality, all the best onsite mixed concrete services will make sure to be providing you with concrete that is made from only the finest materials. Also, keep in mind you will be able to have the mix tailored to suit your needs, so if you require a tougher mix that can be made up or something more workable can also easily be fixed up, no issues.


If you agree that onsite mixed concrete is the way to go for your project, Base Concrete can help. Thank you for reading this blog post. If you are looking for anything to do with concrete, Base Concrete has you covered. Call today on 01442 389105 or visit our contact page for more details.

The post Benefits of Onsite Mixed Concrete first appeared on Base Concrete.

How To Lay A Concrete Base

Follow these steps for the best DIY project

If you are going to be laying a concrete floor for a DIY project it is important that careful preparation is made and each recommended step is followed. You may want to consider hiring a professional to do the work for you. Or at least certain parts. Perhaps the messier steps! Let’s take a look at how to lay a concrete base with this handy guide:

Mark Out Required Area

The first step is to mark out the required area for your concrete base, this can be done using pegs and string. And will need to be 100% accurate. So, make sure all sides are straight.

Dig Out The Area

Next, it is time to dig out the area you have just measured. Dig the ground in the marked area to around 175mm deep for a smaller shed or 225mm for a larger one. As you are going to need a level base it is a good idea to keep the depth you are digging as consistent as you can. Afterwards, remove the pegs.

dd Crushed Stone To Dust

For this step, you will need an MOT type 1 stone, this is crushed stone from 40mm to dust or gravel. Shovel into the space a minimum thickness layer of 75mm to form a hard base for the concrete layer. The depth should be about 100mm for a shed and around 150mm for something larger like a summerhouse. 

Measure, Cut And Fit 100m Timber Rails

Now it’s time to measure and cut and fit 100mm timber rails to the base and make sure the framework is level. This step is to create a framework that offers a strong and stable edge to the concrete and to ensure it is level.

Spread Out Layer 

Spread out that layer of MOT stone or gravel. Then use either a manual earth rammer or powered wacker plate to compact it. This will help create a firm base for the concrete and stop it from cracking over time.

Mix The Concrete 

So, now it is time to mix the concrete. Spread it out evenly and level it off. After smoothing over, grab a stiff broom to lightly brush across the base helping to encourage a textured non-slip surface. 

Keep an eye on the weather forecast at all times. At this stage, if wet weather is forecast cover the base with polythene or a tarpaulin for 24 hours. If it’s hot weather instead then use sacking and keep it damp for a day otherwise the concrete could too dry quickly. This will result in shrinkage and even cracking. You then need to leave it for at least three days to cure.

Finishing Touches 

For finishing touches, look to see if your base is flush with the ground. If this is the case, you will have a space running around the edge of the concrete where the rails were. You can fill this with pea gravel, it will help drain away moisture from the concrete base. Now you just need to place on your base whatever your intended item was!

We hope that our blog has helped you understand how to lay a concrete base. If you have any questions please don’t hesitate to give us a call on 01442 389105 or alternatively head over to our contact page to fill in our online enquiry form. 

The post How To Lay A Concrete Base first appeared on Base Concrete.

Charring Station

Interested in learning more about this topic and more social and sustainable ways of doing architecture? Apply now for our Postgraduate!

jQuery(function() { _initLayerSlider( ‘#layerslider_20_1g4p31gwuunwl’, {createdWith: ‘6.11.2’, sliderVersion: ‘6.11.2’, skin: ‘v6’, navPrevNext: false, hoverPrevNext: false, navStartStop: false, navButtons: false, showCircleTimer: false, skinsPath: ‘https://criticalconcrete.com/wp-content/plugins/LayerSlider/assets/static/layerslider/skins/’}); });

In the former articles was explained some of the advantages to be found within these ancient  common methods of charring wood. Historically and within many cultures, there are a myriad of charring modalities. In this article you will find adapted and illustrate one of those methods using a small wood burning flash oven that can effectively provide the charring levels needed without overtly case timber that has been dried too rapidly. This leads to reversed stresses; compression stresses on the shell and tension stresses in the core. This results in unrelieved stress called case hardening.[1]) the wood items placed through it. In this article we explain how our charring station is built and how it works. Charring systems like this one have been commonly found in many cultures and this is an adapted version of several of those [2]. It is adaptable, is easy to operate and runs without the use of gas or special tools. All that is needed are some (fire) bricks and scrap wood for fuel.

Counter-intuitively, charring wood has several astonishing advantages without involving any chemicals or additional energy consumption. The idea is to sear the surface of the wood without combusting the whole piece nor damaging the interstitial aspects of the wood so it will not warp over time. Besides giving the material an interesting and unique look, the process leads to a triple protection, all without the need of repeating the process after some time has past:

fire protection – charring the surface starts a superficial carbonation of the material and thus lowers the thermal conductivity. termite and mold protection – charring wood destroys the wood’s nutritional value to insects and fungi.water protection – the enhanced carbonation gives the charred layer a waterproof resistance, as water slips on burned wood like over an oily surface.

The easiest and most popular way to char wood commonly found today is probably with a blow torch. This can work, but regrettably too often performed without the attention to detail not to stress the wood from within. It’s easy and practical,  especially for small or irregular pieces but has to be performed with caution. But when searing many big wooden pieces it is slow and uses a lot of gas. These searing modalities are not to be confused with traditional Japanese, 焼杉 (Yakisugi) which is often misrepresented as 焼き杉 (aka shou-sugi-ban”) [3] – us included, in our previous articles!.

Yakisugi can only be achieved with a limited range of Cypress species found on the islands of Japan[4] and is a very unique process found within several methods of crafting guilds. The most commonly seen being where three planks of wood get bound together to form a long triangle and a fire is started in the resulting tube. There are several other methods, but they are for very specific formats and within context to only yakisugi and not the charing modalities found within other cultures.This technique works well only when you have similar boards, as it’s complicated to set up when boards have different widths and lengths.


Terunobu Fujimori, Tea House, Barbican. Photo Ben Tynegate

The birth of the charring station

This contemporary oven is based on some of the principles of a rocket stove. The main idea is to create a fire within a brick tube, which will become very concentrated and strong due to the tube-generated draft-effect (for more explanation on this and general information, check our articles on rocket stoves). Just over the burning material, where the fire is very strong, there will be small slots on the opposing sides of the tunnel. The wood, which needs to be seared, can be passed easily through the fire and thus be charred fast and safely.

After this oven was created with commonly available materials which enables us to char planks and boards of different sizes in an effective manner. This oven also allows the operator safety by lowering the risk of burning their hands, while also providing more control of searing the wood and less waste of fuels which is then more environmentally friendly.

How does the charring station work


Author: Melana Jäckels

1 – The main part is a L-shaped tunnel. On the bottom it has an opening on the side, where the air goes in and it flows all the way through the tunnel up to the upper opening. 

2 – Right after the curve, the fireplace is based on a second layer. Its bottom has two small gaps for the air to pass and to allow the finer ash to fall.

3 – It is important to have a tunnel that is at least 5 cm wider than the boards you plan to char. If a board fills the whole wide of the tunnel it stops the draft and decreases the fire.

4 – On the same level as the fire is also the stair-like firewood intake. The fire is started and fed from here. It’s important to have a brick to close the firewood intake so it does not disturb the air draft in the moments no wood is inserted.

5 – In the chimney, right above the fire, there are two vertical slots on opposing sides to insert the wood you want to char.

6 – Above the inserting slots the chimney narrows slowly. This is important to not happen in a sudden step, as it otherwise will decrease the draft and create a lot of smoke coming out of every small gap.

Building your own charring station

For our charring station we used 12 big bricks (ca. 29x18x9), around 70 medium-sized, red bricks (ca. 23x10x7) and 5 fireproof bricks (22x10x2). Depending on what is available, numbers and materials might be adjusted. Before starting the building process, it is important to choose a big outside space, which is not too windy and has a relatively leveled ground, with enough space on each side of the station to pass the board through.

Step by step:

First, we made a fire-resistant base which is leveled and flat. For this we used the big bricks

Afterwards we started to build a tunnel for the air intake with dimensions of 90 to 25cm. It is important that it is stable and possible to close with removable bricks on the sides

We covered the tunnel with the red bricks and left two gaps of about 1,5 cm each as seen in the picture. 

The fireplace gets covered with fireproof bricks and the next line of bricks is put on all sides

To protect the walls, we also placed fireproof bricks around the fireplace


The next step is to build the J-shaped intake with steps made of bricks, towards the fireplace. It is important to make sure its height will match up with the next row of bricks


Now it is time to create the slots where the to be charred boards will be inserted. For that we put two bricks flat across from each other. This  station works  well for boards with a maximum width of 16 cm. If you plan to use a roller stand, make sure the height of your slots measured from the ground is adapted to the height of the roller stand)


Above the slots we continued building the chimney in the original diameter for a few more rows, but then we start to become narrower by changing the order of the bricks

In this timelapse video you can see how we built up the station in 10 seconds!

How to use the Charring Station

Before starting, make sure to have the right equipment (fire resistant gloves, a mask, a bucket of water / sand, and a fire extinguisher) and enough material to burn! If you want to char a big quantity of wood it is also quite handy to have rolling stands.

Starting the fire works best when you build a little teepee out of dry kidlings and put some sawdust on it, light up the tip of a rolled paper (A4 is enough), and move it slowly into the directions of the teepee. Besides you can put another burning paper over the chimney, to facilitate the draft-effect. 

To avoid unnecessary interruptions, it is important to have a constant refilling of firewood. As soon as the fire burns strongly, the opening of the firewood intake can be closed and the boards can be inserted through the slots. Inside, the strong and concentrated fire will char the surface of the wood from below and the sides. The boards should be pushed through the fire in small steps to have a satisfying and regular result. After the first part of a board is charred, it can be taken out and pushed upturned through the fire again until both sides are completely charred. If the results are not satisfying, the pace should be adapted. Depending on the size, form and species of the wood it will take its respective time to finish one piece.

Once the board is charred it should be brushed with a metal brush and oiled. As the charring process dries the wood very rapidly, depending on its nature it might have a tendency to crack. The linseed oil will nurture the wood and compensate for this effect. For more information on this see our article on Natural Wood Protection.

Conclusion

We are using this method for a while now and we are super satisfied with the results. Not only we save time but also we are more independent of gas. The work with the charring station is safe and convenient. The station is easily adaptable and can be modified to different dimensions. We are looking forward to using the station in the future and improving it further. 

Check our YouTube video for a step-by-step tutorial how to build up your own station!

We would like to sincerely thank Jay C. White Cloud for his time, valuable input and collaboration on this research.

How to store food outside of the fridge

Sources

[1] Wikipedia “Wood drying”, [Online] available at https://en.wikipedia.org/wiki/Wood_drying (Last accessed in July 2020) 

[2] Jay C. White Cloud [Tosa Tomo Designs] https://about.me/tosatomo

[3] [4] Nakomoforestry “Yakisugi” Or “Shou Sugi Ban”? Learn What You Should Call It, And Why”, [Online] available at https://nakamotoforestry.com/yakisugi-or-shou-sugi-ban-learn-what-you-should-call-it-and-why (Last accessed in July 2020) 

Picture: Terunobu Fujimori, Tea House, Barbican. Photo Ben Tynegate [Online] available at https://www.ben-tynegate.com/tea-house (Last accessed in July 2020) 

The post Charring Station first appeared on Critical Concrete.
Did you miss our previous article…
https://concretedoctorsolutions.net/?p=160
Compost Toilet : Our response to water scarcity?

Let us introduce the newest addition to our production center in Porto: the compost toilet! Although human waste is a taboo subject, we will be talking about poop a lot in this article. After all, if you refuse to address a topic, how can you challenge the conventional and unsustainable systems that surround it?

One unsustainable aspect of conventional toilets is water. Most toilets in wealthy countries use potable water to flush toilets, but water is a resource that is becoming scarce amid rising global temperatures. [1] [2] Even if this were not the case, the fact we contaminate drinking water on purpose reflects a dire need to challenge this convention. Human excrement, ironically, is a valuable resource. It can be used as a source of food for bacteria. Sewage, as well as diseases linked with fecal contamination of the environment, can be eliminated when composting is adopted as a sanitation method.[9]

In our phytodepuration article, we explored one alternative method for wastewater treatment. It consists of a marsh-like condition, in which greywater and blackwater are filtered and purified using plants. Compost toilets are the inverse; they require no water and use dead plants rather than living ones. Essentially, microbes break the waste down into humus, a completely decomposed organic material. Besides feces, the other necessary ingredients for composting are straw, sawdust, dead leaves, or wood chips. These carbon-rich materials are known in the composting world as “browns,” while the nitrogen-rich feces make up “The Greens.” The balance of browns and greens is crucial to successful decomposition; a composting toilet without carbon-rich material would not result in compost and would be a health hazard. Additionally, the browns act as a cover material to expunge smells.

Across the world, different prototypes of compost toilets are being tested within diverse capacities and contexts. One such example is the project Mobile Dry Diversion Toilet in Lagos developed by FABULOUS URBAN with several partners since 2017. The project targets families in low-income communities who do not have access to domestic sanitation. This prototype separates the urine and feces into different compartments, which finally facilitates the process of composting. [4] The urea present in urine degrades into ammonia while not only has an off putting smell but also is the reason for the extermination of the bacteria that would otherwise break down the waste.[5] For further explanation, you may follow the link to the original article. Mobile Dry Diversion Toilet


Mock-up prototype being constructed to be tested for the project Mobile Dry Diversion Toilet Photo. © FABULOUS URBAN

Public acceptance, regulations, and a lack of expertise and experience in composting toilet design and operation are all obstacles to the use of composting toilets in urban environments [3].

We have been testing our system here at the Critical Concrete office.

COMPONENTS OF OUR SYSTEM INCLUDE:

a large compost pilea toilet chambera bucket within the chambera seat for the chamber


The assembly of components of the our compost toiletTo use the compost toilet, users cover their poop with a layer of carbon-rich material. In our case, this is mostly sawdust because it is a waste material that we always have on hand. Once the collection bucket in the toilet is full, we empty it into the outdoor compost pile dedicated solely to the compost toilet. The fresh layer of waste is covered with more sawdust, which immediately removes the smell and wards away flies. We then rinse the bucket, pour the rinsing water on the compost pile to help moisten the compost pile, and cover the compost pile again with fresh sawdust.


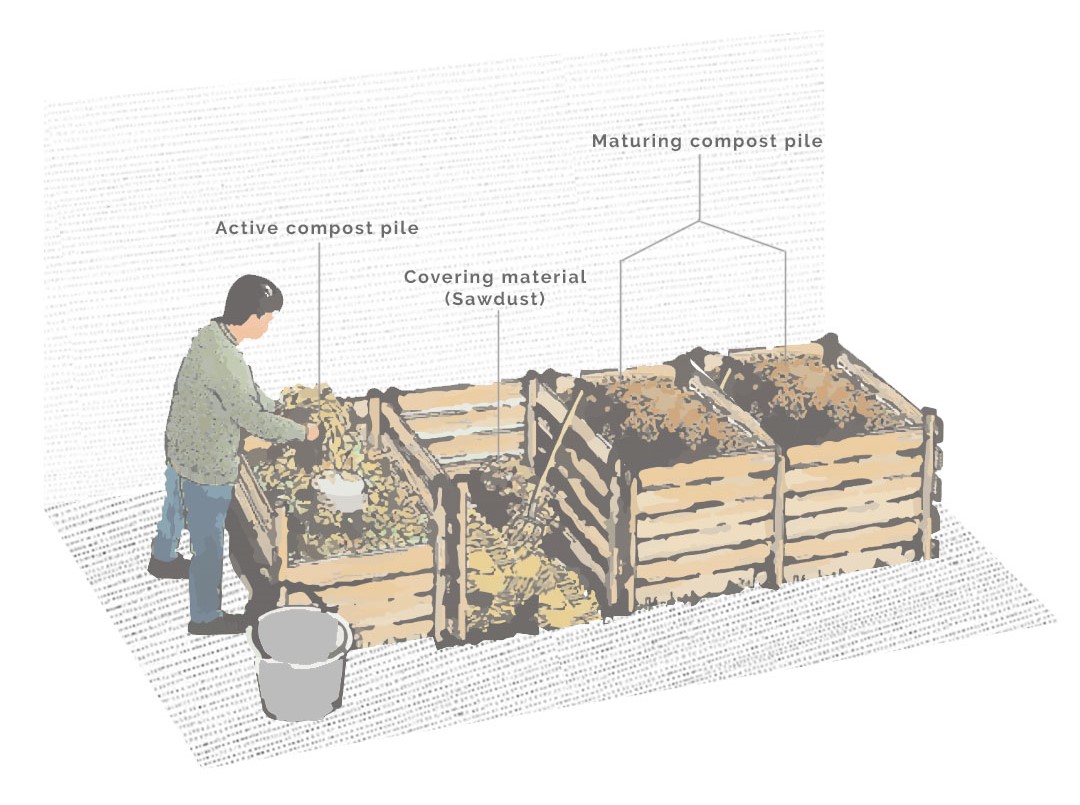
Our compost pile setup

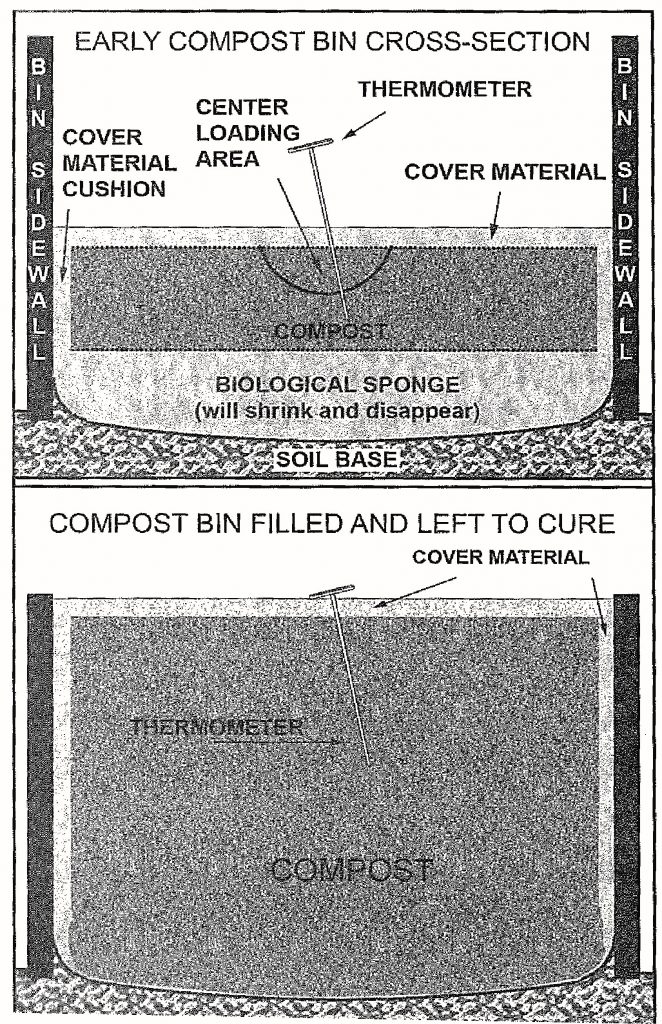
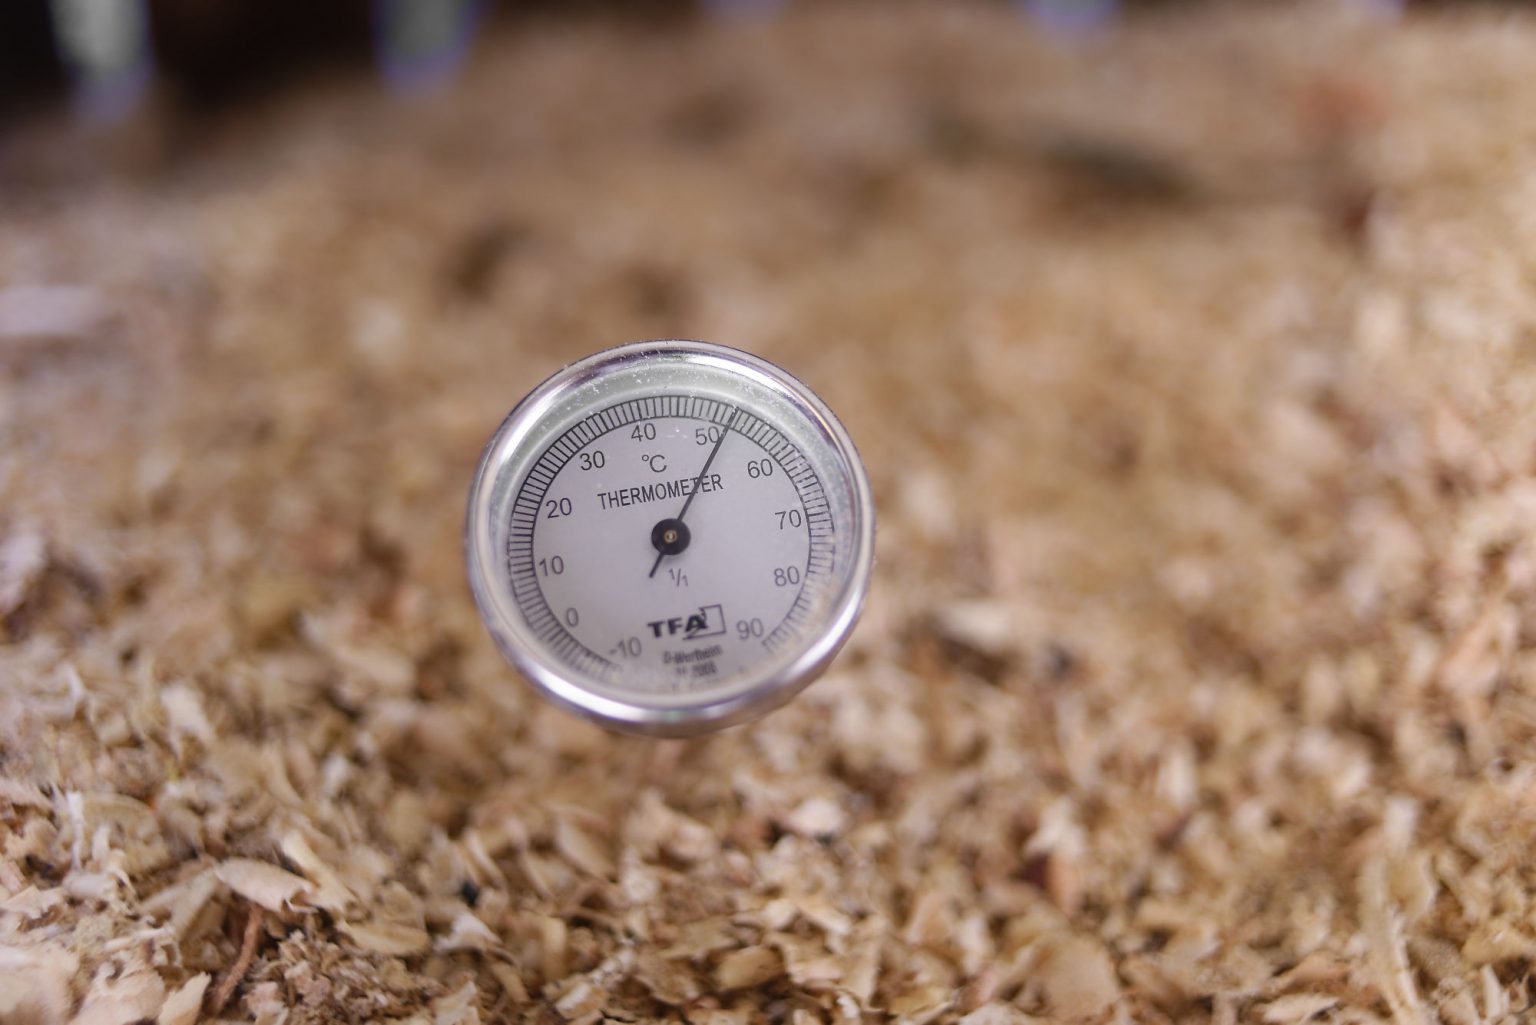
We use our compost primarily for feces as we are an office which means the usage of this toilet for urine will be more than feces. The imbalance of the proportion of urine and feces could result in a slower composting process. A low level of urine is not an issue for the decomposition, but with our compost pile located near our living space, we want to avoid the smell that it can cause. In the active compost pile, the waste completes its conversion into humus. The temperature at the core of the active compost pile can reach upto approximately 650C. The covering material such as saw dust, hay, weeds, straw is referred as biological sponge in the figure on the right. Once the compost pile is high enough, we leave it to cure for oneyear, after which it is safe to use for gardening. The curing time for compost containing human waste is longer than most compost piles, but it ensures the extermination of pathogens present in the feces before its use.


Section through the compost pile © The Humanure Handbook: shit in a nutshell


Temperature reading from our active compost pile

Making a functional compost toilet can be challenging, so of course, we had to manage some difficulties.  First, the volume of our waste output is disproportionate to our available yard space. After just three months of using the toilet, the compost pile is half-full. Since the active compost pile still needs to be cured once it is ample, we may have to pause our use of the compost toilet at that point. If we had unlimited space in our yard, we would have had the chance to start a new compost pile. But in an urban setting like ours, that is not an option. Our second challenge is that our active compost pile is dry because we use a lot of sawdust. In order to create a hospitable environment for the suitable bacteria to break down our waste, we need to add moisture to the pile. At this point having some levels of urine present in the compost pile would help but, we use some greywater from washing dishes instead in order to avoid washing drinking water and unpleasant smell of urine. It will be also good to mention that according to “the Humanure Handbook: shit in a nutshell” by Joseph Jenkins for a household the separating urine and feces is not necessary.[9]


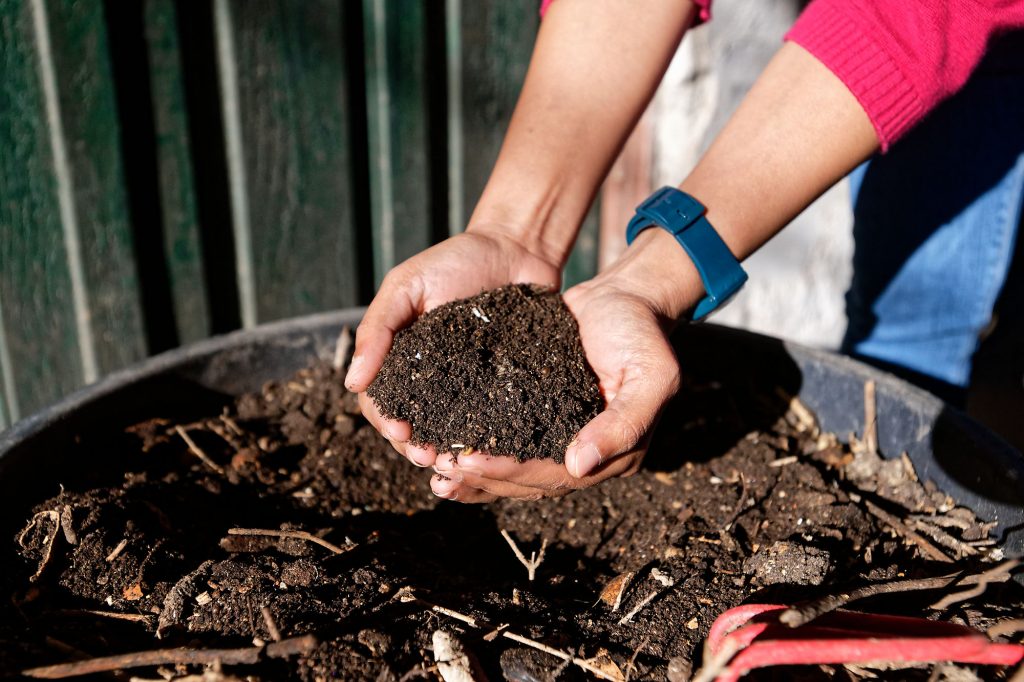
Rich fertile compost

Even though there are some obstacles to using a compost toilet, especially in an urban environment, the system is quite simple overall. For us, it is a way to transition from relying on a flush toilet and better our water usage while producing garden material. We will update our progress on this blog and our social media as we adapt to this new and improved option for human waste management in our headquarters.


Do’s and Don’ts © The Humanure Handbook: shit in a nutshell


Bibliography

[1] United Nations, “Scarcity | UN-Water,” UN-Water, 2011. https://www.unwater.org/water-facts/scarcity/.

[2] E. Saner, “The no-flush movement: the unexpected rise of the composting toilet,” The Guardian, Dec. 09, 2019.

[3] C. K. Anand and D. S. Apul, “Composting toilets as a sustainable alternative to urban sanitation – A review,” Waste Management, vol. 34, no. 2, pp. 329–343, Feb. 2014, doi: 10.1016/j.wasman.2013.10.006.

[4] “Mobile Dry Diversion Toilet FABULOUS URBAN,” Swiss-Architects. https://www.swiss-architects.com/en/fabulous-urban-zurich/project/mobile-dry-diversion-toilet?nonav=1 (accessed Oct. 06, 2021).

[5] N. Rogers, “Composting toilets could be the way of the future,” ABC News, Jun. 24, 2019.

[6] T. Avellán, “The world needs more toilets – but not ones that flush,” The Conversation, Mar. 21, 2017. https://theconversation.com/the-world-needs-more-toilets-but-not-ones-that-flush-74007 (accessed Oct. 07, 2021).

[7] “Saving water in the home,” nidirect, Oct. 20, 2015. https://www.nidirect.gov.uk/articles/saving-water-home.

[8] N. Hancock, “Safe Drinking Water Foundation,” Safe Drinking Water Foundation, Nov. 30, 2016. https://www.safewater.org/fact-sheets-1/2017/1/23/water-consumption.

[9] J. C. Jenkins, HUMANURE HANDBOOK : shit in a nutshell. S.L.: Chelsea Green, 2019.


The post Compost Toilet : Our response to water scarcity? appeared first on Critical Concrete.

Did you miss our previous article…
https://concretedoctorsolutions.net/?p=104

Natural Wood Protection – Vol. 2

Researching new methods of wood protection are of key importance for the work we do here at Critical Concrete. Wood is the primary material we use to build and renovate houses; from the structure, to the cladding, and the furniture. Priorities of our wood protection solutions include; relatively low-cost, accessible materials, simple recipes. Prioritising these aspects means it is easy to scale up for large projects. 

Tricoil

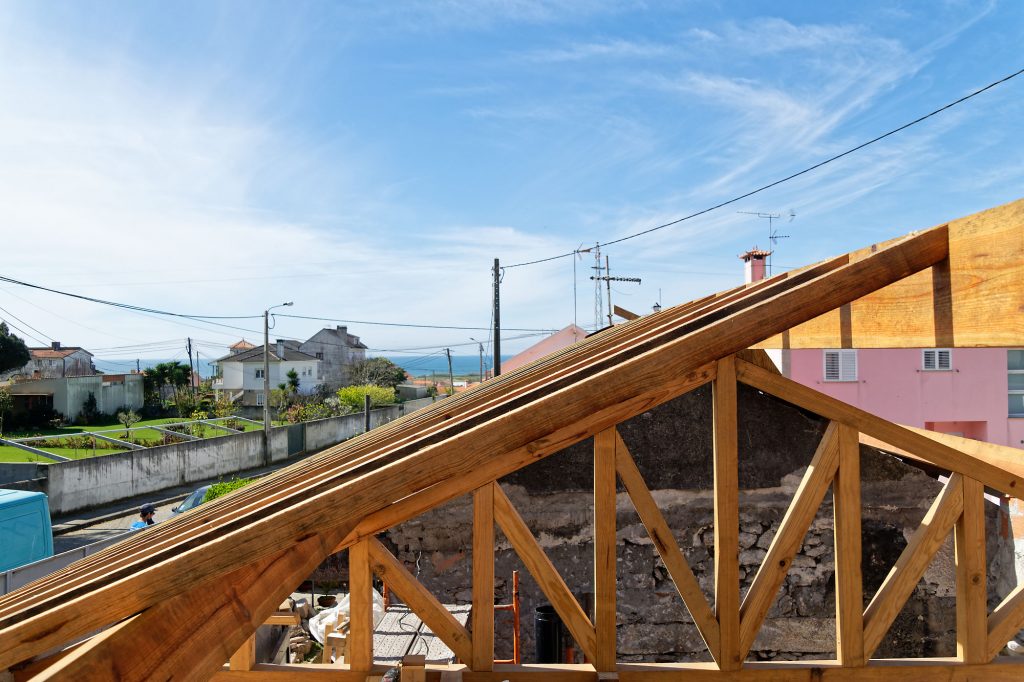
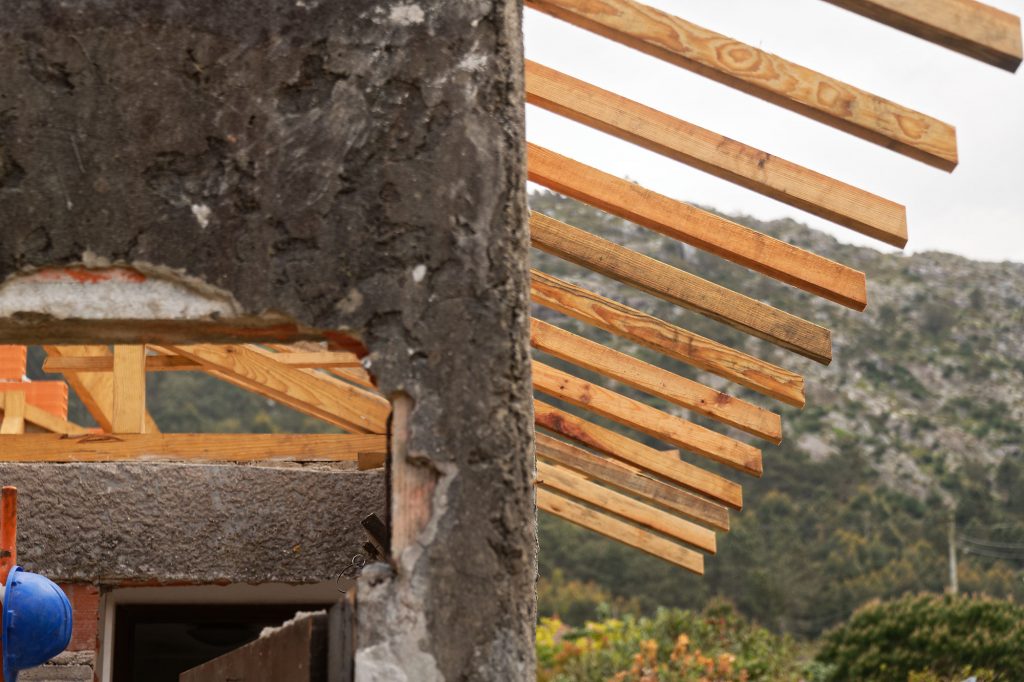
For our renovation project in Esposende, we rebuilt the roof with a wooden structure, so it was essential to protect the wood for the longevity of the building. With the cladding substructure, window lintel, and furniture we had a lot of wood to treat. Through research of various recipes we came up with a recipe and method which fit the requirements we had. 

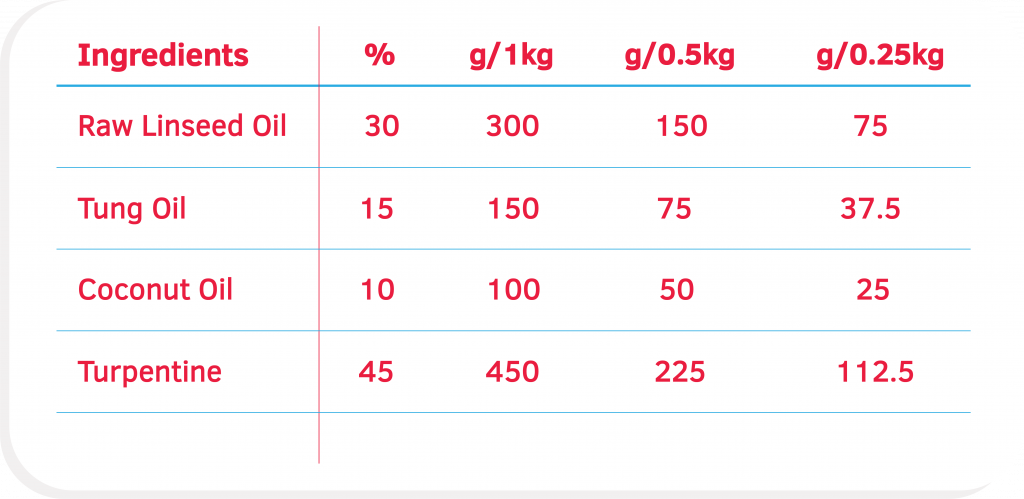
TRICOIL (Turpentine/Tung Raw Linseed I Coconut OIL or 3 oil) is a blend of three different oils which gives protection from parasites and environmental conditions. Linseed oil, Tung oil, and Coconut oil are blended together using turpentine as a solvent to combine the oils and allow for deeper penetration of tricoil into the wood. The original recipe and method we based this upon can be found here [1]. 

Tung oil has been used by the Chinese for hundreds of years to protect wooden boats. It is derived from pressing the nuts of the Tung tree. It has anti-termitic properties and offers durable waterproofing. 

Raw Linseed oil, obtained from pressing flax seeds, creates a water repellent barrier on the wood.

Coconut oil, rich in fatty acids, nourishes and protects the wood. 

Turpentine, a solvent derived from tree resin, thins and blends the oils for easy application to the wood. 

Method


Ratio of ingredients for TRICOIL

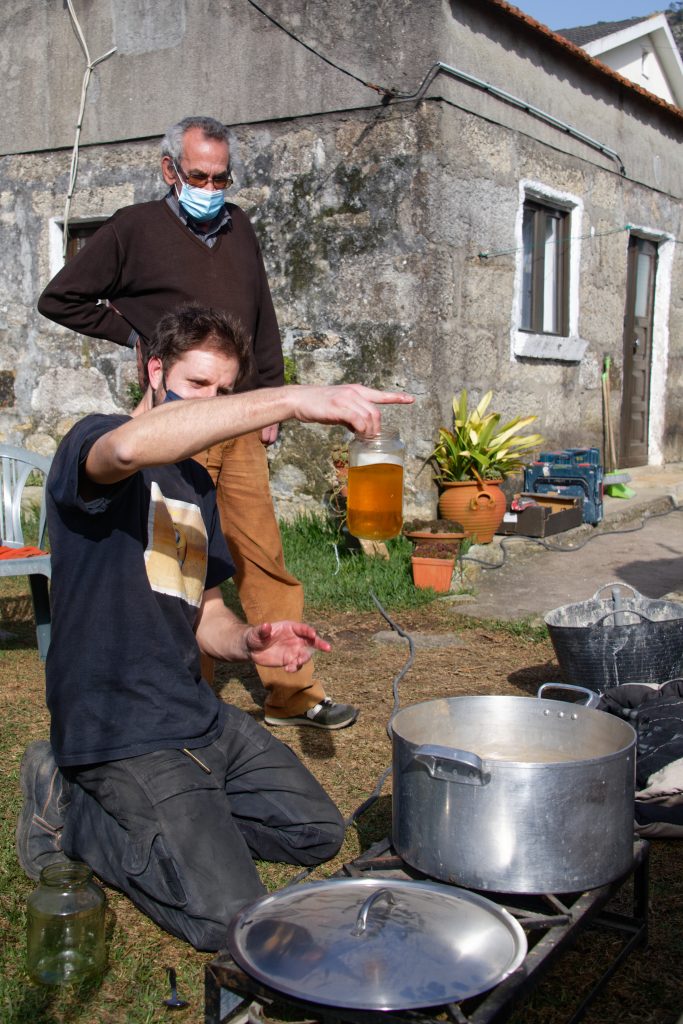
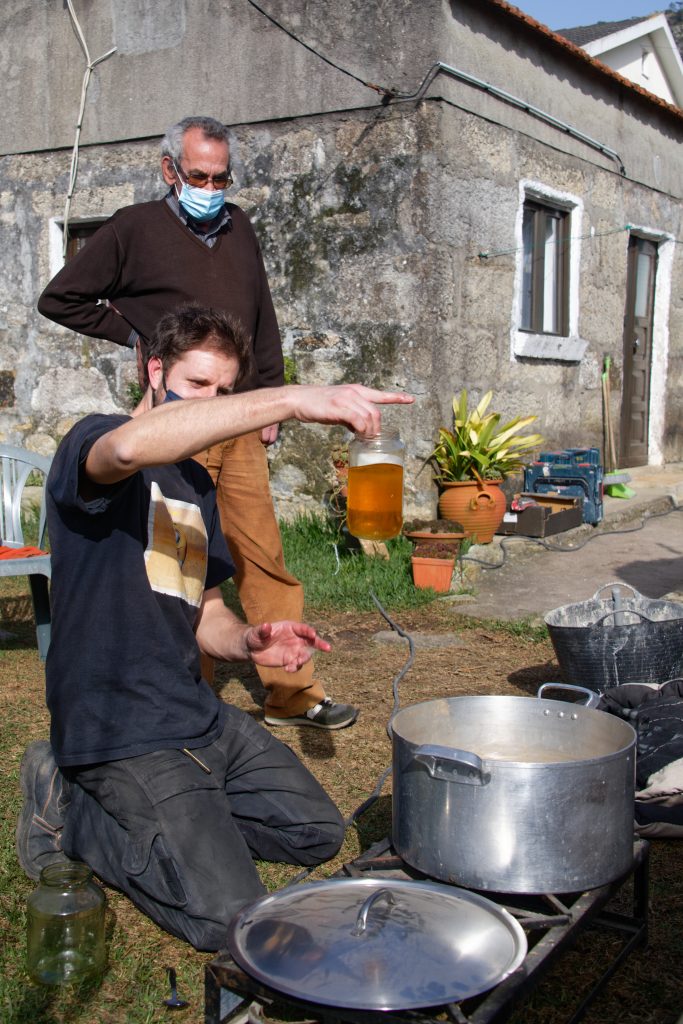
Heat a large pot of water to 50°C to act as a bain-marie. Place a jar of coconut oil and turpentine into the bain-marie and cook until this mixture has also reached 50°C, stir often. If you have a big enough pot, you can do the same with the linseed oil and tung oil together in one jar, placed in the bain-marie. Once the mixtures have reached the temperature, mix them together.
The Tricoil is now ready to be applied on clean, sanded wood. Apply to the wood once per day for 3-4 days and dry in an open space. 

Burning Station

Since discovering the wonders of Yakisugi, it has become a firm favourite as a method of protecting wood in many of our projects. Our first article in wood protection dives into the science of the method and the properties of charred wood. 

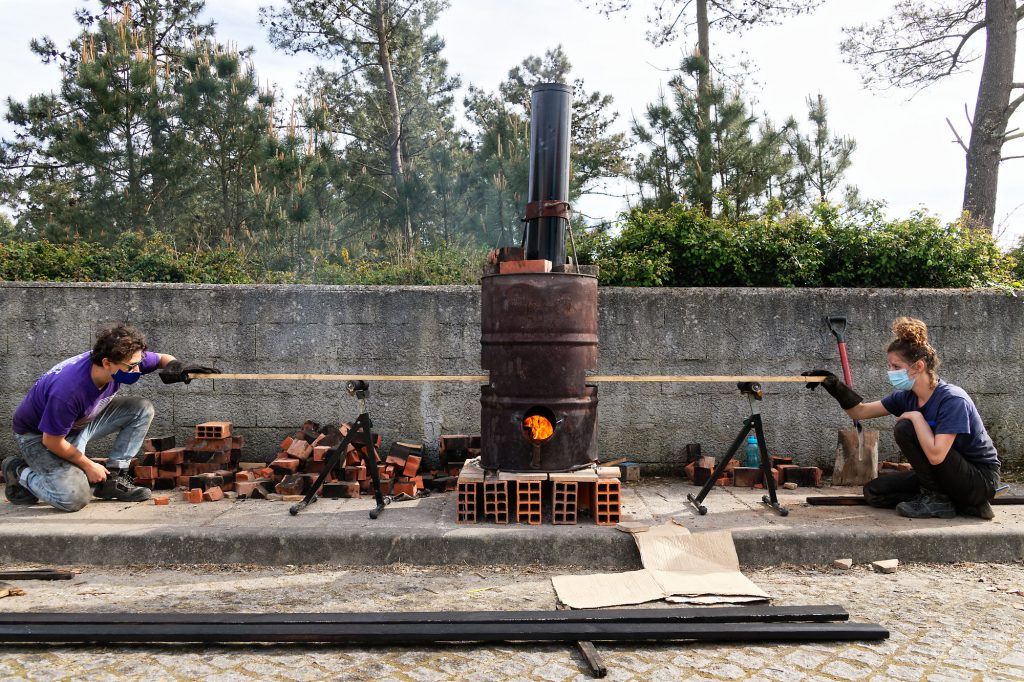
After a fair few projects using our brick burning station at CC HQ, we enlisted it for charring wood for the cladding of the Esposende house. Around a half ton of bricks were put in the van and rebuilt on the street. After so many uses at such high temperatures the normal bricks and even special fire-bricks began to crack and posed a risk of collapse while using the stove. Thus we decided to design a new, super-portable, efficient charring station. 


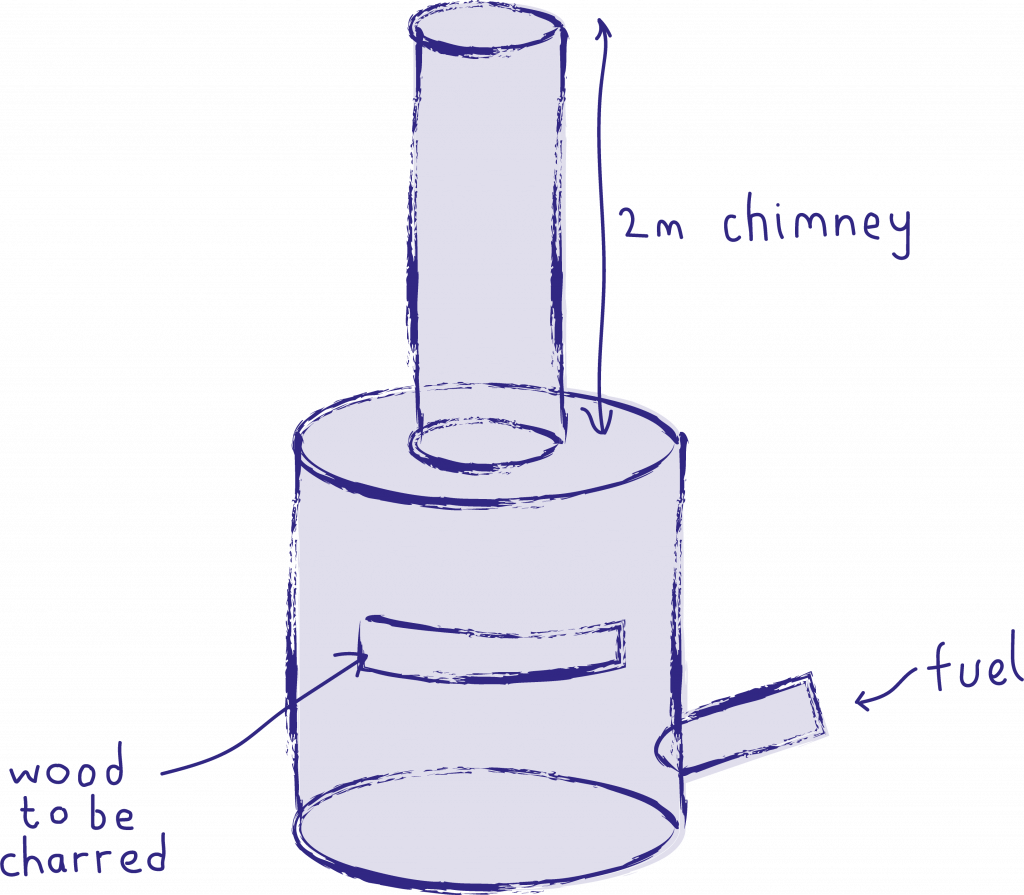
Blueprint of the new charring station

The body of the charring station consists of an old oil drum, an inlet for passing the wood to be treated through, a feeder for fuel, and a hole to attach a chimney. It mimics the previous charring station with the L shape encouraging an upward draft. The feeder is made of an old fire extinguisher welded on with extra metal for support. 

With the use of two rollers, 1 person can manage the charring station themselves. If the fire is burning well and frequently stocked, it is possible to char a 3m 30x3cm board in 10-15 minutes for both sides. 

The efficiency and speed of this burning station allowed us to burn all the wood for the board and batten cladding of the house in Esposende. Furthermore, this higher degree of flame control allowed us to achieve a uniform result for the boards to not warp and lose their integrity. 

For improvements of the burning station we would advise a metal plate on the lip of the openings for the board to rest on – otherwise it can mark the board. Additionally, a way to adjust the opening for different sizes of boards would increase the efficiency by reducing excess draft. 

Top Tips

Have an ample supply of fuel available to keep the fire well stocked and at a medium-high flame.If the flame is burning too high it is better to do a few quick passes to avoid over-charring the wood which can result in warping.Apply raw linseed oil after charring to compensate for loss of moisture and flexibility.If the wood does warp and you are using it for board and batten cladding, mount the board with the bend curving away from the wall to reduce pressure and prevent cracking. 

There are a few drawbacks of this method and these should be considered before employing this technique in your own projects. One is the time intensive nature of the process. The burning station was fired up most days of the 6 weeks of Esposende workshop. This works if there are many hands available to take on the relatively low-skill task and take turns amongst each other. However it may prove tiresome for a self-build project. The second drawback is the issue of smoke. At Critical Concrete HQ we have neighbours in close proximity, requiring us to build an extra tall chimney to prevent smoking out the neighbours. Having ample space is also a factor to consider. The actual working site of Esposende was relatively small, however, we were lucky to be able to use the quiet street, much to the amusement of the neighbours! Looking to our next renovation project we will need to contain construction activities as much as possible as the street is very narrow with no pavement. For situations when these drawbacks are apparent we endeavour to find more suitable solutions. 


New burning station

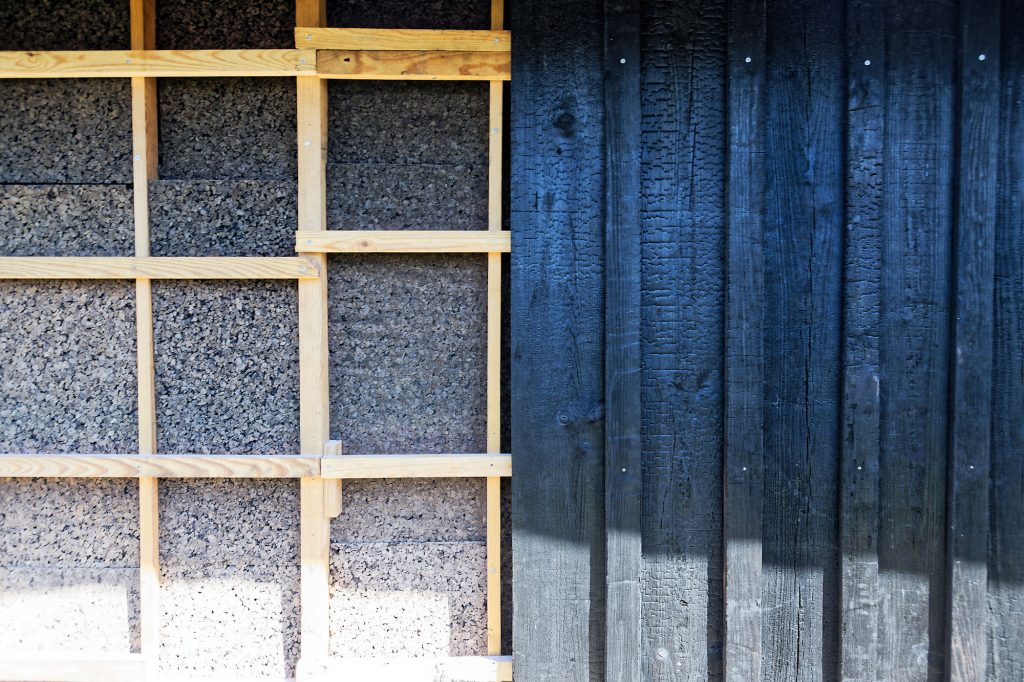
Yakisugi cladding on wooden substructure treated with TRICOIL

Swedish Paint / Flour Paint

Filling the requirements of cheap, scalable, non-toxic and accessible ingredients, Swedish Paint is an excellent choice. Swedish paint has long been used as the primary choice for wood protection in many Nordic countries. It can endure the harsh climate while offering an appealing aesthetic. 


Swedish Paint can last for up to a decade before a new application is needed.
Photo by Anders Nord

Method

This is a new method for us and we have tried out one recipe using the materials we had available in the workshop [2].

For 3 litres of paint the following measurements can be used:

300g of flour3l of water600g of pigment300ml of linseed oil

For pigment, we used red clay that we had left over from making a rammed earth floor and wood ash from a local saw mill. There are many options for pigment, do some research and see what is available in your local area. 

This is the very beginning of our research with Swedish paint so there will be more information to come in the future as we experiment with different recipes and ingredients. We will leave these samples outside to see how they withstand the weather.


Paint samples using wood ash and clay

References

[1] ​​https://www.artamin.it/impregnante-ad-olio-fatto-in-casa/

[2] https://engelleben-free-fr.translate.goog/index.php/recette-de-la-peinture-a-la-farine-protection-des-bois-exterieurs?_x_tr_sl=auto&_x_tr_tl=en&_x_tr_hl=en&_x_tr_pto=ajax,elem&_x_tr_sch=http

The post Natural Wood Protection – Vol. 2 first appeared on Critical Concrete.
Always check our latest articles at…
https://concretedoctorsolutions.net//category/concrete-blogs